Friday 26 April 2013

Baba Ghanoush

Good morning! And thank Faramir it's Friday! Here is a little recipe for the infamous aurbergine dip Baba Ghanoush, perfect with flatbread, vegetable sticks, or on the side with a main meal perhaps?
I found it tastes better overnight when it#s been sitting in the fridge and cooled down properly.

Baba Ghanoush
(Serves 4-6, 100-70 calories each)


1 large aubergine, pricked all over with a fork
3 fat garlic cloves, unpeeled
1 tsp ground coriander
1 tsp ground cumin
1 tbsp light tahini
Juice of 1/2 lemon
2 tbsp extra virgin olive oil
Salt & pepper to taste
Fresh coriander to garnish (optional)

- Pre-heat the oven to 200°C, and bake the aubergine for 25 minutes. Add the garlic cloves and bake for another 15 minutes until tender.

- Half the aubergine and scoop out the flesh into a bowl or a food processor, peel the garlic and add to the aubergine along with the spices, tahini, lemon juice and oil. Process until smooth and season to taste with salt and pepper. Transfer to a bowl, garnish, and cover until serving, or keep it in the fridge for a few days.

Serve with flat bread, pitta bread or experiment accompanying it with other tasty toppings!

Original source:
A collection of essential Mediterranean recipes, p. 20

- Jules

Thursday 25 April 2013

Honey, Oat & Sesame Biscuits

So, I thought I would try making a snack packed full with energy, and so I did! The only thing is that these are very high in fat, BUT it's healthy fat that your body needs. Have one of these after your workout and your body will thank you! Honey heals tissue in your body from within, and seeds help your body take up even more nutrition from the oats than what it normally would without. AND they're tasty too!

Originally they don't come out too sweet, should you want them a little sweeter though, add a drizzle of syrup!

Honey, Oat & Sesame Biscuits
(Makes 12, about 130 calories each)


100 g honey
6 tbsp light tahini
2-3 tbsp water
60 g sesame seeds
120 g porridge oats
Pinch of salt

- Pre-heat the oven at 185°C.

- Combine all the ingredients in a bowl and divide between 12 cupcake moulds, or simply roll into 12 small balls with your hands and set them on a baking paper clad tray. Pop them into the oven for 15-20 minutes until golden.


Simples! Now enjoy them with a cup of tea or coffee, mmm!

Original source:
http://allrecipes.co.uk/recipe/12997/honey--oat-and-tahini-cookies.aspx

- Jules

Monday 15 April 2013

Mushroom Rigatoni

Greetings!

Another day, another week and a fresh start! Here's a simple recipe for a vegetarian dinner. It is delicious as long as you add a good amount of spices, such as chilli powder (or perhaps fresh chillies, deseeded and chopped?), paprika, extra pepper and other such seasoning that take your fancy, experiment!

Mushroom Rigatoni
(Serves 3, about 395 calories each)


225 g uncooked rigatoni pasta
1 tbsp oil
1 red onion, or two small ones
25 g dried mushrooms
30 g fresh mushrooms, sliced
1 tbsp tomato puree
1 tsp thyme, or a few fresh sprigs, leaves only
Salt, pepper and other seasoning to taste (chilli powder, onion powder, smoked paprika etc.)
You can maaaybe even try and toss a clove of garlic in there too, as I think that was missing this time.

- Start off with soaking the dried mushrooms in a bowl with about 175 ml boiling water. Remember when the time comes, that you will need the water it's been sitting in.

- Cook pasta as instructed in a big pot, and remember to stir every once in a while so the rigatoni doesn't catch in the bottom.

- In a large frying pan, heat the oil and fry the onion for five minutes until softened. In the meantime you can slice the mushrooms, bfore adding them to the frying pan. Drain excess water into the frying pan, chop the soaked murhsooms and add them to the pan along with the tomato puree, thyme, salt, pepper and other seasoning that you feel like using.

- After about five minutes of stirring the mushroom mix, drain the pasta and add the sauce into the pot along with it. Put it back on the hob for a few minutes to that it all gets a chance to combine, before serving.

Serve with crusty bread for mopping, or simple on its own!

Original source:
101 Healthy Eats, p. 128

- Jules

Saturday 13 April 2013

Courgette & Mushroom Bread

Another one of the recipes I have yet to post up from when I didn't have the internet in the new flat! This turned out to be deliiiicious, and I will definitely be making it again! Just make sure you squeeze the water off the courgette REALLY well, and drizzle salt on top of the bread before it goes in the oven. If you don't have coarse sea salt, just use some normal table salt, simples!
It's a lovely, very filling bread that is perfect for soups, or some lovely toppings!

Courgette & Mushroom Bread
(Cuts into 10 slices, about 163 calories each)


3 medium courgettes, grated
2 tsp salt
2 tbsp olive oil
100 g chestnut muchrooms, chopped
350 g plain flour
7 g dry yeast
2 tbsp basil
1 tsp coarse sea salt
1 small onion, finely chopped
2 cloves of garlic, finely chopped

- Have the grated courgettes in a colander with 2 tsp salt and let all the water run off. After about half an hour, squeeze off as much excess liquid as you can.

- Whilst waiting for the courgette, you can do the rest or the preparations. Fry the onion and garlic in 1 tbsp oil for 5 minutes until slightly softened, then add the mushrooms.

- In a large bowl, mix all the dry ingredients, stir well before adding 125 ml hot water and the vegetables.

- Knead the dough lightly, before rolling into a ball. Place it back into the bowl and cover with a kitchen towel and let it rise for 20 minutes.

- Pre-heat the oven to 200ºC, place the dough on an oiled baking tray, scatter over the coarse sea salt and leave it in the oven for about 40 minutes. If you're unsure if it's cooked enough, leave it in the oven for an extra 10-20 minutes, checking on it occasionally.

- Leave it on a wire rack to cool before serving. It tastes deeeelicious with soup, or just a big dollop of butter!


Original source:
http://www.bbcgoodfood.com/recipes/2889/courgette-and-mushroom-bread

- Jules

Thursday 11 April 2013

Healthy Sweet Potato Brownie Mud Cake

....quite a name isn't it? Originally, it's called Sweet potato brownie, but because something went slightly wrong (possibly the fact that I didn't spray the dish and baked it in an oven dish rather than a cake tin) it turned out to something that resembled more of a mud cake - except, it tastes sooo good! Next time, instead of steaming the sweet potato, I think I will roast it, so the batter will be slightly thicker!

This cake has no sugar in it other than natural sweetners, how about that?! It had one of the richest and smoothest texture I have tasted before! I have been wanting to make a cake that contained vegetables, and boy will I make this again! No one will notice the fact that you haven't added granulated sugar either!

Healthy Sweet Potato Brownie Mud Cake
(Serves 12, about 210 calories each - Now how's THAT for a treat? You can have two slices without feeling guilty!)


Base:
1 ripe avocado
1 small sweet potato, peeled, chopped and roasted (or 1 cup sweet potato purée)
1/2 cup unsweetened applesauce
1/4 cup date paste (I soaked 5-6 dates in boiling water)
1 tsp pure vanilla extract
2 eggs
1/2 cup flour
1/2 cup cocoa powder
1/2 tsp sea salt
1 tsp bicarbonate of soda
1/2 cup walnuts, roughly chopped

Topping:
1/4 cup date paste (or 5-6 dates soaked)
1/4 cup hazelnut butter
1/2 cup fat free plain Greek Yogurt
1/4 cup cocoa powder
1 tbsp coconut oil, melted (I used sunflower oil)
2 scoops vanilla flavored whey protein powder (original recipe uses 3)
2-3 tbsp agave syrup (optional and depending how sweet the protein powder is)
1/3 packet stevia (optional)
Dash of water and milk
Dessicated coconut for decoration (optional)

- Pre-heat the oven to 190ºC. Spray a 22cm cake tin with cooking spray and line if with baking paper.

- In a bowl, add the avocado, sweet potato, apple sauce, dates, vanilla extract & eggs. Use a stick blender and mix until you have a lump free smooth paste. In another bowl, mix flour, cocoa powder, sea salt, and bicarbonate of soda. Gently combine the two mixes and fold the walnuts through.

- Pour the mixture into the cake tin and bake for about 25 minutes (I had to leave it in for another 10 minutes because I used a smaller and deeper baking dish) or until a butter knife inserted into it comes out clean.

- Set the brownie on a wire-rack to cool for about half an hour. While the brownie is cooling, make the topping, combining all the ingredients and pulsing with the stick blender until you've got a nice creamy chocolate sauce. Pour over the brownie and spread out evenly with a spatula.

- Leave the brownie on a wire rack until it reaches room temperature, then transfer into the fridge until it has completely cooled. Cut into 12 squares and enjoy!

PS. this actually keeps together better when you've left it for a day or two, and it is just as scrummy too!

Should be eaten withing 2-3 days, keep refrigerated!

Oh, and on an artsy note, here's what happened when I couldn't find any fridge magnets that I liked, me and my boyfriend made some plaster one and pimped them up ourselves!


I went for the more classic colour scheme, next time I will try with some different patterns I think!


....perhaps something like this? Aye, he funked the simple plaster right up!

Original source:
http://thehealthyfoodie.com/2012/11/09/deliciously-healthy-sweet-potato-brownies/

- Jules

Wednesday 10 April 2013

Cauliflower Soup

Just a little recipe for cauliflower soup. You can vary this and add different seasonings. Under the recipe I#ve written what additions I made to my bowl of soup. Simple, adjustable, and tasty!

Cauliflower Soup
(Serves 3 as a main, 4 as a starter, about 110 or 85 calories each)


1 cauliflower, about 700 g, cut into small florets
600 ml boiling water
1-2 cloves of garlic, finely chopped, or 1 tsp garlic paste
1-2 tbsp soy sauce
1-2 tsp ground black pepper
1 tsp salt
100 ml skimmed milk

- Boil up water and add the cauliflower, cover and cook for about 15 minutes until the cauliflower is soft. Take out a few florets if you want to use them as decoration when serving.

- Add seasoning and the soy sauce and use a stick blender to make a nice smoothe soup, add the milk and season more to taste. If the soup is too think for your liking, add a bit more water and heat through.

Serve with good crusty bread, and enjoy!

Try - You can also swirl a tablespoon of basil pesto through your soup, that's what I did the second time around.


With the third bowl, I added a little thyme, more soy sauce and onion powder, which was delicious! This one was my favourite I think, what's yours?

Original source:
http://www.kriweb.no/2012/03/08/varm-suppe-i-kaldt-vaer/

- Jules

Thursday 4 April 2013

Mushroom & Barley Soup

...As a christmas present from work last year, we got a recipe book that I hadn't touched since, well...we got it! (The book we had gotten the year prior to last, was not all that inspirational - I think that was the reason) The other week I had a quick browse through it, and it appears to have some really good recipes in it, charming and rustique!

Now, pictures never do GREAT soup any justice, unless it's pureed and has a little fancy piece of green leaves on top accompanied with nice artisan bread. The same goes for this! I have never liked cream of soup before, but this isn't that, so it's all good! This is more brothy, almost stew like. It tastes a lot better than I expected it to, and I even had my hopes up a little! I think I will pack the last portion with me for lunch today, mmmmmm!

Mushroom & Barley Soup
(Serves 3, about 320 calories each, or 4 people as a starter)


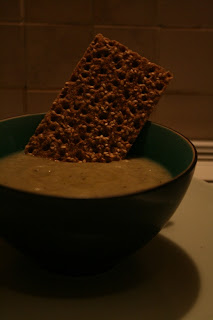
Sorry about the darkness of this picture!

1 small bag dried mushrooms (I used 30g mixed mushrooms)
2 tbsp olive oil
1 onion, diced
2 stalks of celery, sliced
1 carrot, peeled and diced
2 cloves of garlic, peeled and finely chopped
500 g mushrooms (I used 50/50 chestnut mushrooms and white mushrooms)
100 g barley (or spelt)
2 tbsp tomato paste
(Optionally a splash of dry sherry)
4 cups mushroom or vegetable stock
Salt and pepper to taste

- Firstly, soak the dried mushrooms in a bowl of hot water for about 20 minutes (don't throw the water away, keep the bowl with mushrooms and water until it needs used!).

- Heat the oil in a large pot on medium hear and saute the onion, celery and carrots for about 5 minutes. Now chop the garlic and have it in. Followed by the mushrooms. Saute whilst continue to stir occasionally for about 10minutes until the onions start to release juices. Cover with a lid when you're not stirring.

- Stir in the spelt and mix it so that it will absorb the goodness of the vegetable mix. Toss it around for a few minutes, before adding the tomato paste. Combine it all well for a few minutes until you can smell the sweet aroma, then add the sherry if using.

- Pour over the stock until it just covers the vegetables, add a little salt and pepper, stir well, and leave to simmer for about 45 minutes, stirring once about every 15 minutes until the barley (or spelt) is tender.

Serve this pot of goodness with some good, crusty bread.

Original source:
Home Made Winter by Yvette van Boven, p. 114

- Jules