Hello and happy weekend!
I sure gotta take every opportunity and hold on with both hands these days, as Kev, Alphonse and I need to find a new flat to rent as well as looking for a flat to buy - stressful? Aye! We went to our first viewing today, one of many - I assume. It's fun, but also stressful... I just hope that the end result is us finding the perfect home.
So in the meantime, I want to make cakes! I had been craving lemon cake for weeks, as I remember fondly the lemon loaf cake my mormor used to make when I was little - back then I thought "It's more of a grown up cake", but now...well I wont say I have grown up, but lemon cake sure is a wonderful thing, especially with a cup of coffee to go with it, mmmm.
So let's get to it shall we?
Lush Lemon Loaf Cake
(Makes 1 loaf cake)
Ingredients
250g flour
2 tsp baking powder
200g sugar (I used light brown)
75ml sunflower oil
250ml soy milk
2 tsp apple cider vinegar
Juice of 1 lemon
Zest of two lemons
For the icing:
Juice of 2/3 lemon (Or desired thickness of the icing)
75g icing sugar
- Pre-heat oven to 180C.
- Pour vinegar into the milk and let it sit for 5-10 minutes until it looks curdled. Grate lemons and set one aside for the icing.
- In a large bowl, mix the milk, oil, sugar, lemon zest and juice. Stir to combine. Then with a sieve, sift the flour and the baking powder into the mix and stir until combined without over-working the batter.
- Line a pound-cake tin/loaf tin, and pour in the mixture. Bake for 40-50 minutes. Cool down almost completely before mixing icing sugar and lemon juice to an icing and pouring over the cake evenly (You could do the full drizzle-technique, but I decided to go for the easier option).
Serve with a cuppa and enjoy!
Original recipe here.
What is your favourite lemon cake recipe? I would love to hear it, as I am looking forward to trying out all kinds of recipes in the future!
Have a lovely Friday! Currently Alphonse and I are sitting on the sofa listening to some Einaudi, and Kev has gone for a nap. We're wild - I know!
xox J
Showing posts with label Vegetarian. Show all posts
Friday, 3 August 2018
Sunday, 29 July 2018
Rockwell's Gorgie Tofu Scramble
Hello hello!
I hope you are having a lovely weekend thus far! It's not quite over yet and I am clambering on to it like something precious...
Kev and I have just been to Ikea today, got a few chores done, and now it's on to just chilling to the max, ah.
But.... the other week, I got this lovely recipe from a friend of mine.... for tofu scramble! But, it's not like any
scramble I have had before! It tastes the way it smelled when you walked in and granny was making dinner... Before when I have
made scrambled tofu, it's been ok - but this is just... out of this world! My younger sister Camilla tried some, and she
wanted to polish it off!
Anyway, I was given permission to share this special recipe with you, so here it is! It can be served plainly on toast like I
did here, or made as part of a full vegan breakfast! If you use smoked tofu, like Tofoo - it pretty much tastes like you've
added sausages, it's divine *makes Italian gesture for delicious*
Rockwell's Gorgie Tofu Scramble
(Serves 2)
It looks mighty humble here - but trust me: it packs a punch!
Ingredients
1 pack silken or firm tofu (I used firm)
35ml almond or soy milk (I used soy)
3 generous heaped tsp nutritional yeast
1/4-1/2 tsp veggie stock powder
Pinch of turmeric
Dash of soy sauce
Black pepper
Black Salt (Kala Namak) to taste (I only had normal salt, but will try the original once I find it!)
Vegan spread (like Naturli)
- Start by mixing the milk, nutritional yeast, stock powder, turmeric, soy sauce and a little dash of pepper. Mix well and add a splash more milk so that you have a nice runny mixture.
- In a separate bowl (or straight into a cold frying pan), crumble the tofu into the kind of pieces you would normally like your scramble to be. You can do this with a fork or use your hands, I find the latter quicker actually! Pour over the mixture and make sure it is all coated.
- Fry the scramble with a little dash of plant based milk, and stir occasionally - tasting along the way and adding seasoning if needed. If using silken tofu, it requires a bit more reducing than if using firm tofu - but the wait is definitely worth it!
- Near the end, add 1-3 tbsp vegan spread into the mix to achieve that soft, lush scramble texture, sprinkle liberally with black salt and stir to combine.
- Serve on toast, or as part of a full vegan breakfast and enjoy! You can even add this to a breakfast burrito with a few chopped greens, yummy!
Please let me know how you found it if you make it, aaaaaaand I hope you enjoy it as much as I do! I'm pretty addicted to this stuff already....
Have a fantastic rest of your Sunday!
xox J
I hope you are having a lovely weekend thus far! It's not quite over yet and I am clambering on to it like something precious...
Kev and I have just been to Ikea today, got a few chores done, and now it's on to just chilling to the max, ah.
But.... the other week, I got this lovely recipe from a friend of mine.... for tofu scramble! But, it's not like any
scramble I have had before! It tastes the way it smelled when you walked in and granny was making dinner... Before when I have
made scrambled tofu, it's been ok - but this is just... out of this world! My younger sister Camilla tried some, and she
wanted to polish it off!
Anyway, I was given permission to share this special recipe with you, so here it is! It can be served plainly on toast like I
did here, or made as part of a full vegan breakfast! If you use smoked tofu, like Tofoo - it pretty much tastes like you've
added sausages, it's divine *makes Italian gesture for delicious*
Rockwell's Gorgie Tofu Scramble
(Serves 2)
It looks mighty humble here - but trust me: it packs a punch!
Ingredients
1 pack silken or firm tofu (I used firm)
35ml almond or soy milk (I used soy)
3 generous heaped tsp nutritional yeast
1/4-1/2 tsp veggie stock powder
Pinch of turmeric
Dash of soy sauce
Black pepper
Black Salt (Kala Namak) to taste (I only had normal salt, but will try the original once I find it!)
Vegan spread (like Naturli)
- Start by mixing the milk, nutritional yeast, stock powder, turmeric, soy sauce and a little dash of pepper. Mix well and add a splash more milk so that you have a nice runny mixture.
- In a separate bowl (or straight into a cold frying pan), crumble the tofu into the kind of pieces you would normally like your scramble to be. You can do this with a fork or use your hands, I find the latter quicker actually! Pour over the mixture and make sure it is all coated.
- Fry the scramble with a little dash of plant based milk, and stir occasionally - tasting along the way and adding seasoning if needed. If using silken tofu, it requires a bit more reducing than if using firm tofu - but the wait is definitely worth it!
- Near the end, add 1-3 tbsp vegan spread into the mix to achieve that soft, lush scramble texture, sprinkle liberally with black salt and stir to combine.
- Serve on toast, or as part of a full vegan breakfast and enjoy! You can even add this to a breakfast burrito with a few chopped greens, yummy!
Please let me know how you found it if you make it, aaaaaaand I hope you enjoy it as much as I do! I'm pretty addicted to this stuff already....
Have a fantastic rest of your Sunday!
xox J
Sunday, 22 July 2018
Easy Peasy Enchiladas
Guys, guys!
Right, so I have made this for the second time in a couple of weeks now - because I actually craved it so bad! As I have mentioned before, I am not a fan of eating the same all the time, and I try new recipes constantly! So it's a good sign when I want to make it again, and again...and again!
The only enchiladas I have ever made before was one of those kits you buy in a shop, and buy a few ingredients and throw together, but this is so easy to make - not to mention cheap! You wont miss the cheese, even I was surprised by that!
Easy Peasy Enchiladas
(Serves 2-3, or 5 as lunch served with a side salad)
This doesn't photograph well, but it tastes amazing! Like most comfort food, heh!
Ingredients
For the sauce:
2 tbsp vegetable oil
2 tbsp plain flour
2-3 cups boiling water
1 small can passata (about 80ml)
1 tsp hot sauce (I mixed normal hot sauce and sriracha, yum!)
1/2 tsp cumin
1/2 tsp garlic powder
2 tsp smoked paprika
1 tsp salt
For the filling:
400g can black beans, drain and rinsed
400g corn, drained and rinsed
1 onion, finely chopped
1 medium tomato, chopped
1 avocado, mashed
Handful coriander, chopped
1/2 tsp salt
1/2 tsp garlic powder
Small tortillas (both times for my oven proof dish, it's fit five filled tortillas)
- Start by making the sauce: Boil the water and set aside. In a medium pan, heat up the oil and stir in the flour, make sure it doesn't go lumpy. Now, stir continously as you pour in two cups of water. Make sure you have an smooth mixture, and tip in the passata, spices and hot sauce. Once thickened, take it off the heat and set aside.
- Pre-heat oven to 160-180C.
- Prepare all the ingredients for the filling in a bowl and stir well to combine.
- Take an ovenproof dish, and oil a little. Now fill the tortillas with 1 1/2-2 tbsp of the filling and roll up. Place with the edge underneath in the dish so it doesn't come undone. Repeat with remaining tortillas and pour over the sauce evenly.
- Place in the oven and bake for about 25-30 minutes until cooked through, and it's time to tuck in!
Original recipe here.
I hope you have had a nice weekend! Mine has been super busy and sociable! I went to a hen-night last night, and today I kept my sister company as she was looking after two dogs. We went to the park and plop! Into the mud jumped two rebellious dogs! It was quite the site and I got covered in mud! But they were too cute to get angry with...
Last Friday I got my cover-up tattoo worked on a bit, and it is looking sa-weeeeet! Can't wait to get it finished, but I am a sissy and gotta book two hours at a time...
Anyway, I hope you have a crackin' start to a new week tomorrow! And if you try this recipe out, please let me know how you got on!
xox J
Right, so I have made this for the second time in a couple of weeks now - because I actually craved it so bad! As I have mentioned before, I am not a fan of eating the same all the time, and I try new recipes constantly! So it's a good sign when I want to make it again, and again...and again!
The only enchiladas I have ever made before was one of those kits you buy in a shop, and buy a few ingredients and throw together, but this is so easy to make - not to mention cheap! You wont miss the cheese, even I was surprised by that!
Easy Peasy Enchiladas
(Serves 2-3, or 5 as lunch served with a side salad)
This doesn't photograph well, but it tastes amazing! Like most comfort food, heh!
Ingredients
For the sauce:
2 tbsp vegetable oil
2 tbsp plain flour
2-3 cups boiling water
1 small can passata (about 80ml)
1 tsp hot sauce (I mixed normal hot sauce and sriracha, yum!)
1/2 tsp cumin
1/2 tsp garlic powder
2 tsp smoked paprika
1 tsp salt
For the filling:
400g can black beans, drain and rinsed
400g corn, drained and rinsed
1 onion, finely chopped
1 medium tomato, chopped
1 avocado, mashed
Handful coriander, chopped
1/2 tsp salt
1/2 tsp garlic powder
Small tortillas (both times for my oven proof dish, it's fit five filled tortillas)
- Start by making the sauce: Boil the water and set aside. In a medium pan, heat up the oil and stir in the flour, make sure it doesn't go lumpy. Now, stir continously as you pour in two cups of water. Make sure you have an smooth mixture, and tip in the passata, spices and hot sauce. Once thickened, take it off the heat and set aside.
- Pre-heat oven to 160-180C.
- Prepare all the ingredients for the filling in a bowl and stir well to combine.
- Take an ovenproof dish, and oil a little. Now fill the tortillas with 1 1/2-2 tbsp of the filling and roll up. Place with the edge underneath in the dish so it doesn't come undone. Repeat with remaining tortillas and pour over the sauce evenly.
- Place in the oven and bake for about 25-30 minutes until cooked through, and it's time to tuck in!
Original recipe here.
I hope you have had a nice weekend! Mine has been super busy and sociable! I went to a hen-night last night, and today I kept my sister company as she was looking after two dogs. We went to the park and plop! Into the mud jumped two rebellious dogs! It was quite the site and I got covered in mud! But they were too cute to get angry with...
Last Friday I got my cover-up tattoo worked on a bit, and it is looking sa-weeeeet! Can't wait to get it finished, but I am a sissy and gotta book two hours at a time...
Anyway, I hope you have a crackin' start to a new week tomorrow! And if you try this recipe out, please let me know how you got on!
xox J
Sunday, 8 July 2018
Zingy Pasta Salad
Hi and good Sunday!
I hope you have had a lovely weekend! I have taken it a little easier after going to the TRNSMT festival last weekend (I got to see Miles Kane, Sigrid, Nothing but Thieves and ARCTIC MONKEYS! So that was pretty cool :D ). This weekend I have chilled to the max, read. Yesterday my sister Camilla and I went for a long walk, fed the swanlings - the swan couple had FIVE little ones this year, they are the cutest! - and then ordered a large pizza each, becaaaaause it was cheaper than a small pizza, which justifies everything.... Then we watched a couple of chick flicks and generally just had a lovely night!
Today I'm seeing a friend later, but for lunch today, I rattled up this little number! It is suuuper zingy, but has a lovely Asian fusion flavours, and you can serve it with warm or cold pasta depending.
Zingy Pasta Salad
(Serves 2 people)
Ingredients
150g farfalle pasta, uncooked
100g spinach, torn
1 large handful coriander, finely chopped
2 handfuls dried cranberries
1 small can tangerines, drained
1 handful pine nuts
For the dressing
3 tbsp oil
1 tsp rice vinegar
2 tbsp teriyaki sauce
Pinch of salt
Pinch of pepper
Pinch of brown sugar
- Start by cooking the pasta, the butterfly pasta should take approximately 12 minutes, ten for al dente.
- In the mean time, place all the ingredients for the dressing in a jar with a lid and give it a shake. Put aside.
- Prepare the spinach and have it in a medium salad bowl, followed by the coriander, cranberries and tangerines. Toast the pine nuts until nice and golden and fragrant. Stir in the pine nuts, and pasta and stir well to combine and drizzle over the dressing! Serve immediately or leave in fridge to cool until serving!
To make this gluten free, you can easily replace the pasta with cooked, fluffy rice.
xox J
I hope you have had a lovely weekend! I have taken it a little easier after going to the TRNSMT festival last weekend (I got to see Miles Kane, Sigrid, Nothing but Thieves and ARCTIC MONKEYS! So that was pretty cool :D ). This weekend I have chilled to the max, read. Yesterday my sister Camilla and I went for a long walk, fed the swanlings - the swan couple had FIVE little ones this year, they are the cutest! - and then ordered a large pizza each, becaaaaause it was cheaper than a small pizza, which justifies everything.... Then we watched a couple of chick flicks and generally just had a lovely night!
Today I'm seeing a friend later, but for lunch today, I rattled up this little number! It is suuuper zingy, but has a lovely Asian fusion flavours, and you can serve it with warm or cold pasta depending.
Zingy Pasta Salad
(Serves 2 people)
Ingredients
150g farfalle pasta, uncooked
100g spinach, torn
1 large handful coriander, finely chopped
2 handfuls dried cranberries
1 small can tangerines, drained
1 handful pine nuts
For the dressing
3 tbsp oil
1 tsp rice vinegar
2 tbsp teriyaki sauce
Pinch of salt
Pinch of pepper
Pinch of brown sugar
- Start by cooking the pasta, the butterfly pasta should take approximately 12 minutes, ten for al dente.
- In the mean time, place all the ingredients for the dressing in a jar with a lid and give it a shake. Put aside.
- Prepare the spinach and have it in a medium salad bowl, followed by the coriander, cranberries and tangerines. Toast the pine nuts until nice and golden and fragrant. Stir in the pine nuts, and pasta and stir well to combine and drizzle over the dressing! Serve immediately or leave in fridge to cool until serving!
To make this gluten free, you can easily replace the pasta with cooked, fluffy rice.
xox J
Saturday, 30 June 2018
Burrito Salad
Degrees are still way up in the 20Cs, and what better than rattling up a salad - especially burrito style!
Burrito Salad
(Serves 3-4)
140g cooked rice
400g can black beans, rinsed
200g can sweetcorn, rinsed
2 large tomatoes, deseeded and finely chopped
1 red pepper, chopped
1/2 red onion, finely chopped
1 baby gem lettuce, finely chopped
30g fresh coriander, finely chopped
For the dressing:
Juice of 1 lime
1/2 green chilli (or a splash or sriracha sauce)
1 tbsp olive oil
150ml unsweetened plant based milk (I used oat milk)
1 tsp maple syrup or agave
1 tsp garlic powder
Salt and black pepper to taste
- Start by cooking the rice, and leave it to cool whilst cutting the vegetables. Once cooled, fold it all into the rice and stir well.
- For the dressing, simply have it all in a small blender, and blend until smooth. Pour over generously and stir to combine.
There is so much dressing in this salad and it tastes divine! So you could easily serve some garlic bread with it for mopping, scrumptious!
This is what I call a proper dinner for a hot sunny day, or as a healthy lunch, I had it as both to be honest, and it wont be the last time - already craving it!
Original recipe by the Bosh! plant based cook book, I swear I am going through every single recipe in that book! I hope you don't mind, hehe!
xox J
Burrito Salad
(Serves 3-4)
140g cooked rice
400g can black beans, rinsed
200g can sweetcorn, rinsed
2 large tomatoes, deseeded and finely chopped
1 red pepper, chopped
1/2 red onion, finely chopped
1 baby gem lettuce, finely chopped
30g fresh coriander, finely chopped
For the dressing:
Juice of 1 lime
1/2 green chilli (or a splash or sriracha sauce)
1 tbsp olive oil
150ml unsweetened plant based milk (I used oat milk)
1 tsp maple syrup or agave
1 tsp garlic powder
Salt and black pepper to taste
- Start by cooking the rice, and leave it to cool whilst cutting the vegetables. Once cooled, fold it all into the rice and stir well.
- For the dressing, simply have it all in a small blender, and blend until smooth. Pour over generously and stir to combine.
There is so much dressing in this salad and it tastes divine! So you could easily serve some garlic bread with it for mopping, scrumptious!
This is what I call a proper dinner for a hot sunny day, or as a healthy lunch, I had it as both to be honest, and it wont be the last time - already craving it!
Original recipe by the Bosh! plant based cook book, I swear I am going through every single recipe in that book! I hope you don't mind, hehe!
xox J
Tuesday, 26 June 2018
Middle Eastern Pizza
It's Summer, you're feeling a little lazy, but you wany pizza so bad - and you want to be healthy at the same time: contradiction central, however I miiiiight have a recipe that will tick a few of those boxes.
We're talking pizza, but with a home made wholemeal dough, you gotta put some elbow grease into it, but then you can relax with a refreshing drink whilst the dough is rising. And the combo of these veggie toppings work SO well together - I promise you!
As far as additional toppings, you can use homemade vegan pesto, hummus, vegan-style mozzarella.... But personally, I loved this just on it's own!
Middle Eastern Pizza
(Serves 2 hungry people, or 4 with a side salad if you want to be good!)
Ingredients
For the dough:
500g strong wholemeal bread flour
1 sachet dry fast-action yeast
1 1/2 tsp salt
340ml water at 37C (if you drip a drop of it on your wrist, you shouldn't be able to feel it - that's what they taught us in primary and secondary school in home ec! :D)
For the sauce (This is SO tasty by the way!):
1 garlic clove, roughly chopped
Small handful fresh basil, roughly torn
1 tbsp olive oil or rapeseed oil
200g tinned tomatoes (or about 2-3 fresh ones, chopped)
1 tsp red wine vinegar (you can also use white wine vinegar, or cider vinegar)
Toppings:
50g artichokes in oil, finely chopped
1 roasted red pepper from a jar, or a handful of those tiny peppers for a bit of a kick, finely chopped
6 mini plum tomatoes, finely chopped
6 sun dried tomatoes in oil, drained and finely chopped
1/2 red onion, finely sliced
-Start by making the dough: have the flour in a large baking bowl, add the yeast and the salt and stir well to combine. Make a well in the middle and pour in the lukewarm water. Stir with a wooden spoon until it comes together - then flour your work surface and tip the dough onto it. Knead it for about 10-15 minutes until beautifully elastic. Oil the baking bowl, put the dough in, cover with cling film and leave it to rise for an hour.
- In the meantime, make the sauce; put all the ingredients in a little mixer and blitz until smooth, set aside for assembly.
- Once the dough has doubled in size, knead for a further minute, divide into two, and wrap in clingfilm, leave to rise for a second time for 15-30 minutes (it's worth it!). Now chop your vegetables whilst you wait. I placed all of mine in a bowl and stirred so it was ready to be evenly drizzled over the dough as soon as it was ready!
- Pre-heat the oven to 250C, rolle each piece of dough out into a thin pizza base, pour over the sauce evenly out all the way out to the edges, drizzle with vegetables (and vegan mozzarella - if using) and bake in the oven for 10 minutes.
- Once it's done, top with your favourite topping or enjoy on its own!
I hope you love it as much as Kev and I did! I had a couple of slices with me for lunch the next day, and it was delicious, mmmm....
I hope you are having a good week so far! Here in Glasgow the weather's heating up again and I am just getting better after having a ridonculous Summer cold, but I was back at badminton last night - which was awesome!
xoxo
J
Original recipe from Bosh! Plant based cook book
We're talking pizza, but with a home made wholemeal dough, you gotta put some elbow grease into it, but then you can relax with a refreshing drink whilst the dough is rising. And the combo of these veggie toppings work SO well together - I promise you!
As far as additional toppings, you can use homemade vegan pesto, hummus, vegan-style mozzarella.... But personally, I loved this just on it's own!
Middle Eastern Pizza
(Serves 2 hungry people, or 4 with a side salad if you want to be good!)
Ingredients
For the dough:
500g strong wholemeal bread flour
1 sachet dry fast-action yeast
1 1/2 tsp salt
340ml water at 37C (if you drip a drop of it on your wrist, you shouldn't be able to feel it - that's what they taught us in primary and secondary school in home ec! :D)
For the sauce (This is SO tasty by the way!):
1 garlic clove, roughly chopped
Small handful fresh basil, roughly torn
1 tbsp olive oil or rapeseed oil
200g tinned tomatoes (or about 2-3 fresh ones, chopped)
1 tsp red wine vinegar (you can also use white wine vinegar, or cider vinegar)
Toppings:
50g artichokes in oil, finely chopped
1 roasted red pepper from a jar, or a handful of those tiny peppers for a bit of a kick, finely chopped
6 mini plum tomatoes, finely chopped
6 sun dried tomatoes in oil, drained and finely chopped
1/2 red onion, finely sliced
-Start by making the dough: have the flour in a large baking bowl, add the yeast and the salt and stir well to combine. Make a well in the middle and pour in the lukewarm water. Stir with a wooden spoon until it comes together - then flour your work surface and tip the dough onto it. Knead it for about 10-15 minutes until beautifully elastic. Oil the baking bowl, put the dough in, cover with cling film and leave it to rise for an hour.
- In the meantime, make the sauce; put all the ingredients in a little mixer and blitz until smooth, set aside for assembly.
- Once the dough has doubled in size, knead for a further minute, divide into two, and wrap in clingfilm, leave to rise for a second time for 15-30 minutes (it's worth it!). Now chop your vegetables whilst you wait. I placed all of mine in a bowl and stirred so it was ready to be evenly drizzled over the dough as soon as it was ready!
- Pre-heat the oven to 250C, rolle each piece of dough out into a thin pizza base, pour over the sauce evenly out all the way out to the edges, drizzle with vegetables (and vegan mozzarella - if using) and bake in the oven for 10 minutes.
- Once it's done, top with your favourite topping or enjoy on its own!
I hope you love it as much as Kev and I did! I had a couple of slices with me for lunch the next day, and it was delicious, mmmm....
I hope you are having a good week so far! Here in Glasgow the weather's heating up again and I am just getting better after having a ridonculous Summer cold, but I was back at badminton last night - which was awesome!
xoxo
J
Original recipe from Bosh! Plant based cook book
Sunday, 10 June 2018
Scrummy Aubergine Burgers
Hi all!
I hope you're having a lovely weekend so far! It seems forever since my last post, but life has been a little busy as of late! Today my dad is coming to visit, so that'll be awesome! I'm gonna bake some bread later on, as I am sure he will be famished after the journey....
But now - Let's talk burgers!
Normally I am not a fan of aubergine, but when cooked until soft, smokey and lush: I'm all for it!
Scrummy Aubergine Burgers
(Makes six smaller or four big burgers)
Ingredients
100g bulghur wheat, dry
250ml water
1 vegan stock cube
400g aubergine, cut into dice
2 tbsp oil (such as sunflower, where there is no prominent flavour)
60g walnuts
40g fresh spinach, chopped
Juice from 1/2 lemon
1 more vegan stock cube
1 small tsp cinnamon
100g quick-oats
To serve: buns, or pitta, lettuce or spinach leaves, salsa, or ketchup and vegan mayonnaise, etc! So much to choose from :D
- Start by cooking the bulghur wheat in the 250 ml water along with 1 stock cube.
- In the meantime, pre-heat the oven at 225C, and tip the chopped aubergine on a baking tray, drizzle with the oil and bake for about 30 minutes, at the halfway point, turn the pieces over.
- Dry-toast the walnuts lightly until aromatic, this shouldn't take more than a minute or two, then chop them roughly and set aside.
- Now, mix the cooked bulghur, aubergine, walnuts and spinach in a large bowl. Use a stick blender and blend until you have a rough mixture, then stir in the remaining stock, lemon, cinnamon, and oats - plus a little salt and pepper.
- Fry them in a little oil, until crisp and serve up with your favourite accompaniments!
I hope you enjoy these as much as I did! Have a fantasmical Sunday!
xox J
Original recipe from Kjøttfrie burgere <3
I hope you're having a lovely weekend so far! It seems forever since my last post, but life has been a little busy as of late! Today my dad is coming to visit, so that'll be awesome! I'm gonna bake some bread later on, as I am sure he will be famished after the journey....
But now - Let's talk burgers!
Normally I am not a fan of aubergine, but when cooked until soft, smokey and lush: I'm all for it!
Scrummy Aubergine Burgers
(Makes six smaller or four big burgers)
Ingredients
100g bulghur wheat, dry
250ml water
1 vegan stock cube
400g aubergine, cut into dice
2 tbsp oil (such as sunflower, where there is no prominent flavour)
60g walnuts
40g fresh spinach, chopped
Juice from 1/2 lemon
1 more vegan stock cube
1 small tsp cinnamon
100g quick-oats
To serve: buns, or pitta, lettuce or spinach leaves, salsa, or ketchup and vegan mayonnaise, etc! So much to choose from :D
- Start by cooking the bulghur wheat in the 250 ml water along with 1 stock cube.
- In the meantime, pre-heat the oven at 225C, and tip the chopped aubergine on a baking tray, drizzle with the oil and bake for about 30 minutes, at the halfway point, turn the pieces over.
- Dry-toast the walnuts lightly until aromatic, this shouldn't take more than a minute or two, then chop them roughly and set aside.
- Now, mix the cooked bulghur, aubergine, walnuts and spinach in a large bowl. Use a stick blender and blend until you have a rough mixture, then stir in the remaining stock, lemon, cinnamon, and oats - plus a little salt and pepper.
- Fry them in a little oil, until crisp and serve up with your favourite accompaniments!
I hope you enjoy these as much as I did! Have a fantasmical Sunday!
xox J
Original recipe from Kjøttfrie burgere <3
Sunday, 29 April 2018
Lemon & Cardamom Scones
Hello again!
I hope you are having a lovely evening so far! We've had a pretty chilled one, I've done some baking and make this recipe again which I absolutely adore. Back in Norway, cardamom is often used in sweet pastries and so when I came across these scones - I knew I had to make them!
The recipe makes six small scones, so you might want to double it up if you have friends coming over. These would be perfect to make on a morning when you have some extra time.... May day is coming up, treat yourself!
Lemon & Cardamom Scones
(Makes 6 small scones)
Ingredients
225g flour
1/2 tsp baking powder
1/2 tsp bicarbonate of soda
2 tbsp caster sugar
1/2 tsp ground cardamom
Pinch of salt
Zest of 1 lemon
1 tbsp lemon juice
125ml plant milk (I used soy vanilla) + extra for brushing
- Start by pre-heat the oven to 160C (140C fan).
- In a baking bowl, mix all the dry ingredients together, along with the lemon zest.
- Then, make a well in the middle of your mix and pour in the milk, followed by lemon juice. Stir to combine, without over-working it. Now, divide into six scones, place on a baking paper clad tray, and brush with milk. Bake for 18-20 minutes until slightly golden in colour.
You can serve these plain with vegan butter spread, jams and the like! I hope you enjoy them :)
Yesterday Kev and I went to see Avengers: Infinity War - aaaaaand it was pretty darn good! There are so many characters in it now though, I got a little bit confused. Then we went to Nanakusa for sushi and other tasty dishes, yum....
I hope you have a great new week ahead!
Original recipe here.
I hope you are having a lovely evening so far! We've had a pretty chilled one, I've done some baking and make this recipe again which I absolutely adore. Back in Norway, cardamom is often used in sweet pastries and so when I came across these scones - I knew I had to make them!
The recipe makes six small scones, so you might want to double it up if you have friends coming over. These would be perfect to make on a morning when you have some extra time.... May day is coming up, treat yourself!
Lemon & Cardamom Scones
(Makes 6 small scones)
Ingredients
225g flour
1/2 tsp baking powder
1/2 tsp bicarbonate of soda
2 tbsp caster sugar
1/2 tsp ground cardamom
Pinch of salt
Zest of 1 lemon
1 tbsp lemon juice
125ml plant milk (I used soy vanilla) + extra for brushing
- Start by pre-heat the oven to 160C (140C fan).
- In a baking bowl, mix all the dry ingredients together, along with the lemon zest.
- Then, make a well in the middle of your mix and pour in the milk, followed by lemon juice. Stir to combine, without over-working it. Now, divide into six scones, place on a baking paper clad tray, and brush with milk. Bake for 18-20 minutes until slightly golden in colour.
You can serve these plain with vegan butter spread, jams and the like! I hope you enjoy them :)
Yesterday Kev and I went to see Avengers: Infinity War - aaaaaand it was pretty darn good! There are so many characters in it now though, I got a little bit confused. Then we went to Nanakusa for sushi and other tasty dishes, yum....
I hope you have a great new week ahead!
Original recipe here.
Friday, 27 April 2018
Super Healthy Chocolate Orange Smoothie
Hello hello and thank Faramir it’s Friday - am I right?!
So I found out last week that I have iron deficiency, wompwomp - so I reached out to a local vegan community asking for their assistance, and they were really helpful! I even got this here recipe that I wanted to share with you as I have made it now for a second time, and am currently enjoying it thinking “this has got to be shared!”.
Not a bad ingredient in sight and it’s magic for uptake of iron!
Super Healthy Chocolate Orange Smoothie
(Makes 1 serving)
Ingredients
1 frozen banana, chopped into chunks
1 orange - juice and zest
Handful of spinach
1-2 tbsp cocoa powder (unsweetened) or cacao
200ml plant based milk (I used soy vanilla)
1 tbsp flaxseed
- Simply blitz until smooth, and enjoy!
I hope you have a wonderful weekend ahead! I started mine early by visiting a friend's allotment last night and we planted a black currant bush and turned some soil in the planting beds, it was good fun! And so nice being out in nature! Tomorrow Kev and I are going to see the new Avengers film - that should be good! Today I'll just get a few housey things ticked off though, have a leisurely one *smiles*
So I found out last week that I have iron deficiency, wompwomp - so I reached out to a local vegan community asking for their assistance, and they were really helpful! I even got this here recipe that I wanted to share with you as I have made it now for a second time, and am currently enjoying it thinking “this has got to be shared!”.
Not a bad ingredient in sight and it’s magic for uptake of iron!
Super Healthy Chocolate Orange Smoothie
(Makes 1 serving)
Ingredients
1 frozen banana, chopped into chunks
1 orange - juice and zest
Handful of spinach
1-2 tbsp cocoa powder (unsweetened) or cacao
200ml plant based milk (I used soy vanilla)
1 tbsp flaxseed
- Simply blitz until smooth, and enjoy!
I hope you have a wonderful weekend ahead! I started mine early by visiting a friend's allotment last night and we planted a black currant bush and turned some soil in the planting beds, it was good fun! And so nice being out in nature! Tomorrow Kev and I are going to see the new Avengers film - that should be good! Today I'll just get a few housey things ticked off though, have a leisurely one *smiles*
Wednesday, 18 April 2018
Pistachio & Rose Loaf Cake
So, tonight I had to use the shoe horn to fish out my wireless mouse that Alphonse had been playing with, haha! What even!
The other week I had a charity bake night with some of my friends, and it was a success! I got asked a couple of times "Are all these vegan?" - and they were indeed,not the people; but the cakes and scones and that! I am so pleased it was a success *smiles*
The favourite of the night was this pistachio and rose cake - which is exactly why I wanted to share this recipe with you! Because we use a bunch of ground pistachios, the cake is a little dense, but it is supposed to be! And it is even pretty healthy too! I only added icing sugar to the icing as the original was a little too.... meh for me, and it worked great!
Pistachio & Rose Loaf Cake
Ingredients:
125g ground pistachios
70g oats - ground
40g flour
1 tsp baking powder
1/2 tsp bicarbonate of soda
A good pinch of salt
1/2 tsp cardamom
120ml vegan yoghurt (I jused Alpro coconut)
80ml maple of agave syrup
For the frostings:
Pink:
75g cashews
60ml milk
2 tbsp maple or agave syrup
100g icing sugar
1/2 tsp pink food colouring
1/2 tsp vanilla
1/4 tsp rose water (be very careful with this!)
White:
100g icing sugar
Just enough lemon juice
A tiny bit of soy or almond milk
To decorate:
Chopped pistachios
- Start by pre-heating your oven to 180C.
- In a large bowl,mix all the dry ingredients for the cake. Then, make a well in the middle, and add your yoghurtand syrup. Stir well to combine, then tip into a lightly oiled loaf tin. Bake for 35-40 minutes.
- Allow to cool slightly before popping it out of the mould. Then cool completely before decorating it! Have all the ingredients for the pink frosting in a blender and whizz until smooth (Add more icing sugar if necessary). Drizzle generously over the cake. Then, mix the remaining 100g of icing sugar with juice of 1/4 lemon and just enough milk to get a lush white frosting, drizzle this across the white to create that pink-zebra look!
- Decorate with chopped pistachios and you are ready to serve up this cake! I daresay you could even have a slice for breakfast if you wanted!
What is your favourite nutty cake? I'd love to hear it!
And I hope you are having a great week so far! I just finished up my working week today, but I have a tight schedule for the rest of the week, running errands and going to an Escape Room for the first time - yay! :D
Have a good evening!
xox J
Original recipe here
The other week I had a charity bake night with some of my friends, and it was a success! I got asked a couple of times "Are all these vegan?" - and they were indeed,not the people; but the cakes and scones and that! I am so pleased it was a success *smiles*
The favourite of the night was this pistachio and rose cake - which is exactly why I wanted to share this recipe with you! Because we use a bunch of ground pistachios, the cake is a little dense, but it is supposed to be! And it is even pretty healthy too! I only added icing sugar to the icing as the original was a little too.... meh for me, and it worked great!
Pistachio & Rose Loaf Cake
Ingredients:
125g ground pistachios
70g oats - ground
40g flour
1 tsp baking powder
1/2 tsp bicarbonate of soda
A good pinch of salt
1/2 tsp cardamom
120ml vegan yoghurt (I jused Alpro coconut)
80ml maple of agave syrup
For the frostings:
Pink:
75g cashews
60ml milk
2 tbsp maple or agave syrup
100g icing sugar
1/2 tsp pink food colouring
1/2 tsp vanilla
1/4 tsp rose water (be very careful with this!)
White:
100g icing sugar
Just enough lemon juice
A tiny bit of soy or almond milk
To decorate:
Chopped pistachios
- Start by pre-heating your oven to 180C.
- In a large bowl,mix all the dry ingredients for the cake. Then, make a well in the middle, and add your yoghurtand syrup. Stir well to combine, then tip into a lightly oiled loaf tin. Bake for 35-40 minutes.
- Allow to cool slightly before popping it out of the mould. Then cool completely before decorating it! Have all the ingredients for the pink frosting in a blender and whizz until smooth (Add more icing sugar if necessary). Drizzle generously over the cake. Then, mix the remaining 100g of icing sugar with juice of 1/4 lemon and just enough milk to get a lush white frosting, drizzle this across the white to create that pink-zebra look!
- Decorate with chopped pistachios and you are ready to serve up this cake! I daresay you could even have a slice for breakfast if you wanted!
What is your favourite nutty cake? I'd love to hear it!
And I hope you are having a great week so far! I just finished up my working week today, but I have a tight schedule for the rest of the week, running errands and going to an Escape Room for the first time - yay! :D
Have a good evening!
xox J
Original recipe here
Wednesday, 11 April 2018
Delicious Korean Vegan Mince with Rice
From Italian-style to Korean-style!
Honestly I have already made this twice in less than two weeks, it is the ultimate comfort food and only takes about 20 minutes to make; the same amount of time it takes to cook your rice to perfection.
You might just love it...
Delicious Korean Vegan Mince with Rice
(Serves about 2-3 people)
Ingredients
1 tbsp sunflower oil
200 g vegan mince (I used Sainbury's own - it's delicious! You can use this from frozen)
3/4 cup white rice
3 garlic cloves, minced
3 Spring onions, finely chopped
1/2 tsp ginger (fresh or ground)
2 tsp sesame oil
2 tbsp brown sugar
4 tbsp soy sauce
1/4 tsp pepper
1/4 tsp pepper flakes (or a quarter of a fresh red chilli, I seem to always have some that needs used up)
Sesame seeds to garnish
- Right, let's go! Start by cooking the rice as instructed on the packaging (I always rinse it three times, and also add a bit of oil and salt to the cooking water).
- Now, in a frying pan, turn the heat up to medium, add the sunflower oil, follower by the vegan mince and the garlic cloves. Cook until defrosted and heated through if using frozen, and make sure the garlic is nice and fragrant. Then add your Spring onions and cook for a few minutes.
- In the mean time, in a bowl - mix the soy sauce, sesame oil, brown sugar, pepper, pepper flakes and ginger and stir well to combine. When your mince mixture is done, pour this sauce over and fry so everything gets coated.
- Serve the mince over a nice bowl of rice and tuck in!
What's not to love? :D
So today I actually had to leave work because I was feeling really light headed and unwell... It might be the whole going back to work and it getting to me physically, but I have a doctor's appointment tomorrow as I have a few things I want to discuss anyway. Wish me luck!
Other than that I am just gonna try and recover as I am hosting a charity bake night for some girls on Saturday and I really need to be on the ball for that - there are so many things I have to make! But I am excited about it...
How about you? Have you had a good week so far? I really hope so!
Also, if you have any more Korean food inspiration, please feel free to share in the comments below!
xox J
Original recipe here.
Honestly I have already made this twice in less than two weeks, it is the ultimate comfort food and only takes about 20 minutes to make; the same amount of time it takes to cook your rice to perfection.
You might just love it...
Delicious Korean Vegan Mince with Rice
(Serves about 2-3 people)
Ingredients
1 tbsp sunflower oil
200 g vegan mince (I used Sainbury's own - it's delicious! You can use this from frozen)
3/4 cup white rice
3 garlic cloves, minced
3 Spring onions, finely chopped
1/2 tsp ginger (fresh or ground)
2 tsp sesame oil
2 tbsp brown sugar
4 tbsp soy sauce
1/4 tsp pepper
1/4 tsp pepper flakes (or a quarter of a fresh red chilli, I seem to always have some that needs used up)
Sesame seeds to garnish
- Right, let's go! Start by cooking the rice as instructed on the packaging (I always rinse it three times, and also add a bit of oil and salt to the cooking water).
- Now, in a frying pan, turn the heat up to medium, add the sunflower oil, follower by the vegan mince and the garlic cloves. Cook until defrosted and heated through if using frozen, and make sure the garlic is nice and fragrant. Then add your Spring onions and cook for a few minutes.
- In the mean time, in a bowl - mix the soy sauce, sesame oil, brown sugar, pepper, pepper flakes and ginger and stir well to combine. When your mince mixture is done, pour this sauce over and fry so everything gets coated.
- Serve the mince over a nice bowl of rice and tuck in!
What's not to love? :D
So today I actually had to leave work because I was feeling really light headed and unwell... It might be the whole going back to work and it getting to me physically, but I have a doctor's appointment tomorrow as I have a few things I want to discuss anyway. Wish me luck!
Other than that I am just gonna try and recover as I am hosting a charity bake night for some girls on Saturday and I really need to be on the ball for that - there are so many things I have to make! But I am excited about it...
How about you? Have you had a good week so far? I really hope so!
Also, if you have any more Korean food inspiration, please feel free to share in the comments below!
xox J
Original recipe here.
Wednesday, 4 April 2018
Creamy Vegan Rosemary Risotto
Risottos never fail - it's creamy and comforting and is SO worth the 40 minutes of stirring. Not to mention that it's inexpensive which is always a bonus, right? People might ask - but parmesan! And butter?! But trust me, you don't need it... true story!
Creamy Vegan Rosemary Risotto
(Serves 3-4 people)
Ingredients
1 tbsp olive oil
1 large onion, finely chopped
2 garlic cloves, minced
1 large carrot (optional), finely chopped
1 litre vegetable stock (I used three cubes of Knorr vegetable stock)
2 tbsp cider vinegar (or white wine vinegar, or 1/2 glass white wine)
1 cup arborio rice (or other risotto rice)
1 tsp garlic powder
1 tbsp onion powder
1 + 1/2 sprig rosemary, 1 whole and 1/2 finely chopped
Salt and pepper
60g vegan spread,such as Pure
- Start by heating the oil in a large pot, and saute the onion for about five minutes, before adding the garlic cloves - cook for a further couple of minutes.
- Add the carrot, and the rice and stir for a couple of minutes, add another glug of oil if necessary.
- Then add a ladleful of the stock the cider vinegar, garlic and onion, add the full sprig of rosemary. Keep stirring and feeding the risotto more stock as it gets drier - once you feel it is close to done (about 35 minutes in, but taste to check earlier), take out the rosemary sprig, and add the chopped rosemary, add the last ladleful of stock and the vegan spread to fluff it up! Season to taste with salt and pepper.
And there you have it! Delicious, simple food, that just asks for a little bit of attention!
What is your favourite type of risotto? Mine varies depending on the day, and it depends what types of vegetables I have or crave, but usually I always use a lot of garlic - because yum!
How has your week been?
I have been working, and managed to fit in two badminton sessions! Yesterday I'm being an adult and waiting for a new washing machine being installed, but come Friday - I have a girls' night with a good friend of mine, and the rest of the week I'll improvise!
Creamy Vegan Rosemary Risotto
(Serves 3-4 people)
Ingredients
1 tbsp olive oil
1 large onion, finely chopped
2 garlic cloves, minced
1 large carrot (optional), finely chopped
1 litre vegetable stock (I used three cubes of Knorr vegetable stock)
2 tbsp cider vinegar (or white wine vinegar, or 1/2 glass white wine)
1 cup arborio rice (or other risotto rice)
1 tsp garlic powder
1 tbsp onion powder
1 + 1/2 sprig rosemary, 1 whole and 1/2 finely chopped
Salt and pepper
60g vegan spread,such as Pure
- Start by heating the oil in a large pot, and saute the onion for about five minutes, before adding the garlic cloves - cook for a further couple of minutes.
- Add the carrot, and the rice and stir for a couple of minutes, add another glug of oil if necessary.
- Then add a ladleful of the stock the cider vinegar, garlic and onion, add the full sprig of rosemary. Keep stirring and feeding the risotto more stock as it gets drier - once you feel it is close to done (about 35 minutes in, but taste to check earlier), take out the rosemary sprig, and add the chopped rosemary, add the last ladleful of stock and the vegan spread to fluff it up! Season to taste with salt and pepper.
And there you have it! Delicious, simple food, that just asks for a little bit of attention!
What is your favourite type of risotto? Mine varies depending on the day, and it depends what types of vegetables I have or crave, but usually I always use a lot of garlic - because yum!
How has your week been?
I have been working, and managed to fit in two badminton sessions! Yesterday I'm being an adult and waiting for a new washing machine being installed, but come Friday - I have a girls' night with a good friend of mine, and the rest of the week I'll improvise!
Saturday, 24 March 2018
Delicious Spiced Carrot Cake
Hello everyone and happy Saturday! Today has been amazing here in Glasgow, sunshine all day long! And then a sliiiiiight shower, but we can take it...
And if you have a rain day, then why not rattle up a quick, simple, but more importantly de-friggin-licious carrot cake?
My favourite local cafe always has a handful of loaf cakes to choose from, they're not overly fancy, but always topped with delicious frosting and some sort of decor... And the flavours.... yum! But since I am eating vegan now, I have to make my own. I don't mind though, because this was a treat!
Delicious Spiced Carrot Cake
(Makes 1 loaf)
Cake:
1 large carrot, grated
120g brown sugar
3/4 cup apple sauce
90ml sunflower oil
185g wholemeal flour
1 tsp baking powder
1 tsp bicarbonate of soda
Pinch of salt
1 tsp cinnamon
1/2 tsp cloves
1/2 tsp nutmeg
1/2 tsp ground ginger
Frosting:
4 vegan spread sticks
1 cup icing sugar
Juice of 1/4 lemon
(add more icing sugar if needed)
- Start by pre-heating the oven to 180C.
- Then in a bowl, mix the carrot, sugar, apple sauce and oil in a bowl and stir. In a separate bowl, mix all the dry ingredients for the cake. Tip into the wet mix and stir until just combined - don't over work the mixture.
- Oil a tin, and spoon the mixture in and distribute evenly. Bake for 40-50 minutes; my oven is quite aggressive, so 40 minutes will do, but otherwise give it at least an extra 5-10 minutes.
- Once baked, allowed to cool aaaaaalmost completely until mixing together the butter cream and top the cake with it.
Now, your place smells great, you're hungry - and the kettle is waiting for you to brew a cuppa to accompany it....
I used Pure vegan spread which crumpled up a little, but the lush flavour is still there!
I hope you love it as much as I do, even Kev was convinced and agreed I can make this all the time if I feel like it, YAY!
Are you having a good weekend so far?
Here, I have been taking it easy... Kev and I went out for lunch today at a new cafe called Tulipane. We did the weekly food shop, and watched some TV.
On Monday I am starting work again, so I am just enjoying this weekend and taking it easy.
xox J
Original Recipe:
https://www.lazycatkitchen.com/vegan-carrot-cake/
And if you have a rain day, then why not rattle up a quick, simple, but more importantly de-friggin-licious carrot cake?
My favourite local cafe always has a handful of loaf cakes to choose from, they're not overly fancy, but always topped with delicious frosting and some sort of decor... And the flavours.... yum! But since I am eating vegan now, I have to make my own. I don't mind though, because this was a treat!
Delicious Spiced Carrot Cake
(Makes 1 loaf)
Cake:
1 large carrot, grated
120g brown sugar
3/4 cup apple sauce
90ml sunflower oil
185g wholemeal flour
1 tsp baking powder
1 tsp bicarbonate of soda
Pinch of salt
1 tsp cinnamon
1/2 tsp cloves
1/2 tsp nutmeg
1/2 tsp ground ginger
Frosting:
4 vegan spread sticks
1 cup icing sugar
Juice of 1/4 lemon
(add more icing sugar if needed)
- Start by pre-heating the oven to 180C.
- Then in a bowl, mix the carrot, sugar, apple sauce and oil in a bowl and stir. In a separate bowl, mix all the dry ingredients for the cake. Tip into the wet mix and stir until just combined - don't over work the mixture.
- Oil a tin, and spoon the mixture in and distribute evenly. Bake for 40-50 minutes; my oven is quite aggressive, so 40 minutes will do, but otherwise give it at least an extra 5-10 minutes.
- Once baked, allowed to cool aaaaaalmost completely until mixing together the butter cream and top the cake with it.
Now, your place smells great, you're hungry - and the kettle is waiting for you to brew a cuppa to accompany it....
I used Pure vegan spread which crumpled up a little, but the lush flavour is still there!
I hope you love it as much as I do, even Kev was convinced and agreed I can make this all the time if I feel like it, YAY!
Are you having a good weekend so far?
Here, I have been taking it easy... Kev and I went out for lunch today at a new cafe called Tulipane. We did the weekly food shop, and watched some TV.
On Monday I am starting work again, so I am just enjoying this weekend and taking it easy.
xox J
Original Recipe:
https://www.lazycatkitchen.com/vegan-carrot-cake/
Tuesday, 20 March 2018
Vegan Herby Breadsticks with Tomato Sauce
Hello all and happy Tuesday!
Thanks for stopping by! Today I thought I would share with you a nifty way of making garlic bread. After I made it I realised that it would have been better to put the herbs IN the dough along with garlic that youæd just fry off... So I will write that down in the recipe - because the garlic that I scattered on top burnt a little in the oven - still tasty, but I'd rather you learn from my mistakes than having the same thing happening *smiles*
Vegan Herby Breadsticks with Tomato Sauce
(Makes about 6)
Garlic Herb Mix:
3 cloves of garlic, minced
1 1/2 tbsp dried mixed herbs
1 tbsp olive oil
For the dough:
1 sachet dried active yeast
1 1/4 cup luke warm water (when you apply a drop to your skin, you shouldn't feel it)
2 tbsp brown sugar
1 tsp salt
1/4 cup olive oil
3 cups spelt flour (I used 1 cup plain and 2 cups spelt)
Oil for brushing
1 jar of good tomato sauce (like a roasted red pepper and tomato pasta sauce, or you can make one from scratch!)
- Start by heating 1 tbsp oil in a small frying pan, and fry off the garlic for 1 minute until fragrant. Take off the heat and stir in the herbs - set aside.
- Now, mix your luke warm water with the brown sugar and the yeast. Stir until the lumps have smoothened out, and leave to sit for about 5-10 minutes until the mixture starts to form bubbles on the surface; this is the yeast doing it's thing!
- Tip in the flour, the salt and the oil, and stir to combine. Knead well for about five minutes, before swirl through the garlic and herbs. Shape into 6 even small breads, and cover with a clean kitchen towel for 50 minutes to allow the breads to rise.
- Pre-heat the oven to 200C, brush the loaves with oil and place them in the middle of the oven to bake for about 20 minutes.
- Heat your sauce through 5 minutes before the breads are done. And once out the oven, you can brush them with butter and sprinkle of garlic powder - if you want!
And that's it! The easies lil' loaves I have made in a while, and this was awesome to have right before a badminton session, I carbed up like a pro!
Today, I have taken it easy - run a few errands in this part of Glasgow, bought some prizes for a charity bake off I'm hosting for some friends next month, and met up with a friends for a little bit. Then came home, made dinner and chilled out! Hopefully I'll get a wee heads up for when I start working. Tomorrow Alphonse and I are going to the vets for his annual vaccination.
What have you been up to so far this week?
xox J
Thanks for stopping by! Today I thought I would share with you a nifty way of making garlic bread. After I made it I realised that it would have been better to put the herbs IN the dough along with garlic that youæd just fry off... So I will write that down in the recipe - because the garlic that I scattered on top burnt a little in the oven - still tasty, but I'd rather you learn from my mistakes than having the same thing happening *smiles*
Vegan Herby Breadsticks with Tomato Sauce
(Makes about 6)
Garlic Herb Mix:
3 cloves of garlic, minced
1 1/2 tbsp dried mixed herbs
1 tbsp olive oil
For the dough:
1 sachet dried active yeast
1 1/4 cup luke warm water (when you apply a drop to your skin, you shouldn't feel it)
2 tbsp brown sugar
1 tsp salt
1/4 cup olive oil
3 cups spelt flour (I used 1 cup plain and 2 cups spelt)
Oil for brushing
1 jar of good tomato sauce (like a roasted red pepper and tomato pasta sauce, or you can make one from scratch!)
- Start by heating 1 tbsp oil in a small frying pan, and fry off the garlic for 1 minute until fragrant. Take off the heat and stir in the herbs - set aside.
- Now, mix your luke warm water with the brown sugar and the yeast. Stir until the lumps have smoothened out, and leave to sit for about 5-10 minutes until the mixture starts to form bubbles on the surface; this is the yeast doing it's thing!
- Tip in the flour, the salt and the oil, and stir to combine. Knead well for about five minutes, before swirl through the garlic and herbs. Shape into 6 even small breads, and cover with a clean kitchen towel for 50 minutes to allow the breads to rise.
- Pre-heat the oven to 200C, brush the loaves with oil and place them in the middle of the oven to bake for about 20 minutes.
- Heat your sauce through 5 minutes before the breads are done. And once out the oven, you can brush them with butter and sprinkle of garlic powder - if you want!
And that's it! The easies lil' loaves I have made in a while, and this was awesome to have right before a badminton session, I carbed up like a pro!
Today, I have taken it easy - run a few errands in this part of Glasgow, bought some prizes for a charity bake off I'm hosting for some friends next month, and met up with a friends for a little bit. Then came home, made dinner and chilled out! Hopefully I'll get a wee heads up for when I start working. Tomorrow Alphonse and I are going to the vets for his annual vaccination.
What have you been up to so far this week?
xox J
Thursday, 8 March 2018
Save the Fish Cakes!
Heya everyone!
I hope you are having a great day/morning/evening!
My sister and I just got home from Katherine Ryan's show Glitter Room, and dayum girl can she make you laugh! We had such a
good time *smiles*
So, anyway... Yesterday I tried this recipe from a Norwegian vegan burger book "Kjøttfrie Burgere" (meatfree burgers)...
Before I had finished my dinner I shared it on Instagram, cause I was just that blown away by it! I made up my own
sides, and it turns out adding half a can of butterbeans to your mash makes ALL the difference! Are you ready? You sure?
Brace yourself!
Save the Fish Cakes!
(Serves 2 hungry people)
Ingredients
125g firm tofu, crumbled
Half of 400g can butter beans, drained and rinsed (save the rest for the mash!)
4g seaweed, soaked in cold water, squeezed and chopped into small bits
20g chickpea flower (I used 2tbsp linseeds and 4tbsp water to make linseed egg instead of chickpea flower, and upped the oats to 50g)
30g oats
2 vegetable stock cubes
1tbsp onion powder
1/2tsp nutmeg
50g bamboo shots, cut into small pieces
Salt and pepper
For the mash
2 baking potatoes cut into small dice
2-3 tbsp vegan spread (I use Pure)
1/2 can butterbeans
Salt to taste
For the peas
1 cup peas (I used frozen)
2 tbsp neutral oil, like sunflower oil
1 garlic clove
A good pinch of salt
Soy sauce to serve
- Start by dicing your potatoes and boil until soft in some salted water. After ten minutes chuck in half of the can of butterbeans.
- In a bowl, mix all but the seaweed and bamboo and process in a blender or with a stick mixer until you have a coarse mixture. Add the bamboo and seaweed and fold through. With wet hands, shape into small patties (I got 8 patties in total), fry in pan with 1 tbsp oil for a few minutes on each side until golden.
- For the peas, add oil in a small saucepan, followed by a pinch of salt. If you are cooking these from frozen allow them to defrost, before adding the garlic, the saute for about 5 minutes until fragrant.
- Once the potatoes are ready, mash thoroughly, and add the vegan spread and a little bit of salt - mash, mash, mash and just like that; it is ready to plate up!
Serve with soy sauce and enjoy!
I thought these were like a hybrid between sushi and fishcakes, hence the soy sauce. If you want, you can serve the patties with vegetable fried rice, or sushi rice! I just needed comfort... And mash rules... So mash won!
What is your favourite "mock" seafood dish? I reckon these'll definitely become a staple at ours, yum! Otherwise, I have made vegan sushi before as well which turned out pretty darn good!
I hope you are having a fantastic week y'all! The weekend is juuuust around the corner!
Let's just take a moment and appreciate Miss Ryan.... What a lady!
Lot'o'luv
xox Jules
I hope you are having a great day/morning/evening!
My sister and I just got home from Katherine Ryan's show Glitter Room, and dayum girl can she make you laugh! We had such a
good time *smiles*
So, anyway... Yesterday I tried this recipe from a Norwegian vegan burger book "Kjøttfrie Burgere" (meatfree burgers)...
Before I had finished my dinner I shared it on Instagram, cause I was just that blown away by it! I made up my own
sides, and it turns out adding half a can of butterbeans to your mash makes ALL the difference! Are you ready? You sure?
Brace yourself!
Save the Fish Cakes!
(Serves 2 hungry people)
Ingredients
125g firm tofu, crumbled
Half of 400g can butter beans, drained and rinsed (save the rest for the mash!)
4g seaweed, soaked in cold water, squeezed and chopped into small bits
20g chickpea flower (I used 2tbsp linseeds and 4tbsp water to make linseed egg instead of chickpea flower, and upped the oats to 50g)
30g oats
2 vegetable stock cubes
1tbsp onion powder
1/2tsp nutmeg
50g bamboo shots, cut into small pieces
Salt and pepper
For the mash
2 baking potatoes cut into small dice
2-3 tbsp vegan spread (I use Pure)
1/2 can butterbeans
Salt to taste
For the peas
1 cup peas (I used frozen)
2 tbsp neutral oil, like sunflower oil
1 garlic clove
A good pinch of salt
Soy sauce to serve
- Start by dicing your potatoes and boil until soft in some salted water. After ten minutes chuck in half of the can of butterbeans.
- In a bowl, mix all but the seaweed and bamboo and process in a blender or with a stick mixer until you have a coarse mixture. Add the bamboo and seaweed and fold through. With wet hands, shape into small patties (I got 8 patties in total), fry in pan with 1 tbsp oil for a few minutes on each side until golden.
- For the peas, add oil in a small saucepan, followed by a pinch of salt. If you are cooking these from frozen allow them to defrost, before adding the garlic, the saute for about 5 minutes until fragrant.
- Once the potatoes are ready, mash thoroughly, and add the vegan spread and a little bit of salt - mash, mash, mash and just like that; it is ready to plate up!
Serve with soy sauce and enjoy!
I thought these were like a hybrid between sushi and fishcakes, hence the soy sauce. If you want, you can serve the patties with vegetable fried rice, or sushi rice! I just needed comfort... And mash rules... So mash won!
What is your favourite "mock" seafood dish? I reckon these'll definitely become a staple at ours, yum! Otherwise, I have made vegan sushi before as well which turned out pretty darn good!
I hope you are having a fantastic week y'all! The weekend is juuuust around the corner!
Let's just take a moment and appreciate Miss Ryan.... What a lady!
Lot'o'luv
xox Jules
Tuesday, 6 March 2018
Anka's Vegan Cherry, Lemon and Poppyseed Bonanza Cupcakes
Hello hello!
Today I finally got around to make the recipe for these cupcakes that an old colleague and friend sent me a little while back. I was out adventuring, getting a few bits and bobs done and out of the way and thought to myself - I need a treat!
I tweaked the recipe a little bit, and I also asked if it was OK if I shared these with you; and it was - score!
They don't have too much sugar in them, so they are TOTALLY OK to have for breakfast... just sayin' *wink*
Anka's Vegan Cherry, Lemon and Poppyseed Bonanza Cupcakes
(Makes about 12 cupcakes)
I put the buttercream in the fridge to chill, but it seemed to just lump up a little bit - it still tasted great! I suppose it is just due to using vegan spread :)
Ingredients
1 1/2 cup plain or self-raising flour (If using self-raising, cut the amount of bicarbonate of soda in half)
1 1/2 cup poppyseeds, that's right! Three of those jars you get in the spice aisle!
1 tsp bicarbonate of soda (or half)
1 tsp baking powder
3/4 cup of sugar (I used a mixture of demerara and coconut sugar)
Zest of 1 lemon
Juice of 1 1/2 lemon
400g can of pitted cherries in light syrup, cut into halves (save the syrup!)
Use 1/3 cup of the cherry syrup (You can use the rest in a cherrylicious smoothie!)
1 banana, mashed
2 tbsp neutral oil, like sunflower oil
For the buttercream
1/2 cup vegan spread (I used Pure)
1 cup icing sugar
A few drops of colouring, optional (Make sure it is flavourless)
- Pre-heat the oven to 180C.
-Start by making the batter: In a bowl, have the flour, poppyseeds, bicarb, baking powder, and sugar - and mix well.
- In a small bowl, mix the juice of the lemon, the syrup, 2 tbsp oil, and the mashed banana along with the lemon zest.
- Make a well in the middle of your flour and poppyseed mixture, and pour the liquid in, stir well to combine and then fold in the halved cherries.
- Divide mixture between about 12 medium sized cupcake cases, it should be filled up 3/4 of the way. Pop them on a tray and place them in the middle of the oven to bake for 25 minutes.
- Allow to cool before making the buttercream, spread it neatly over the cupcakes and enjoy!
So many poppyseeeeeeeeds <3
I also enjoyed them just as much without the frosting, making them perfect to serve for breakfast with a cuppa, or as a little treat in your lunch box!
Do you enjoy poppyseeds in baking? I'd love to hear from you!
Today I started doing some homework at MIDNIGHT.... But I got it done eventually, and we are handing some floristry tasks in tomorrow, so it was about time I got it done, phew! I hope you have had a good start to the week!
PS. I know a couple of bloggers have told me that my posts aren't showing up in their reading list, and that it isn't allowing them to comment. You could try and delete and re-add me to your reading list, and then try and see if that works - let me know if it doesn't and I'll try and see if there is something else that needs to be done!
xox Jules
Today I finally got around to make the recipe for these cupcakes that an old colleague and friend sent me a little while back. I was out adventuring, getting a few bits and bobs done and out of the way and thought to myself - I need a treat!
I tweaked the recipe a little bit, and I also asked if it was OK if I shared these with you; and it was - score!
They don't have too much sugar in them, so they are TOTALLY OK to have for breakfast... just sayin' *wink*
Anka's Vegan Cherry, Lemon and Poppyseed Bonanza Cupcakes
(Makes about 12 cupcakes)
I put the buttercream in the fridge to chill, but it seemed to just lump up a little bit - it still tasted great! I suppose it is just due to using vegan spread :)
Ingredients
1 1/2 cup plain or self-raising flour (If using self-raising, cut the amount of bicarbonate of soda in half)
1 1/2 cup poppyseeds, that's right! Three of those jars you get in the spice aisle!
1 tsp bicarbonate of soda (or half)
1 tsp baking powder
3/4 cup of sugar (I used a mixture of demerara and coconut sugar)
Zest of 1 lemon
Juice of 1 1/2 lemon
400g can of pitted cherries in light syrup, cut into halves (save the syrup!)
Use 1/3 cup of the cherry syrup (You can use the rest in a cherrylicious smoothie!)
1 banana, mashed
2 tbsp neutral oil, like sunflower oil
For the buttercream
1/2 cup vegan spread (I used Pure)
1 cup icing sugar
A few drops of colouring, optional (Make sure it is flavourless)
- Pre-heat the oven to 180C.
-Start by making the batter: In a bowl, have the flour, poppyseeds, bicarb, baking powder, and sugar - and mix well.
- In a small bowl, mix the juice of the lemon, the syrup, 2 tbsp oil, and the mashed banana along with the lemon zest.
- Make a well in the middle of your flour and poppyseed mixture, and pour the liquid in, stir well to combine and then fold in the halved cherries.
- Divide mixture between about 12 medium sized cupcake cases, it should be filled up 3/4 of the way. Pop them on a tray and place them in the middle of the oven to bake for 25 minutes.
- Allow to cool before making the buttercream, spread it neatly over the cupcakes and enjoy!
So many poppyseeeeeeeeds <3
I also enjoyed them just as much without the frosting, making them perfect to serve for breakfast with a cuppa, or as a little treat in your lunch box!
Do you enjoy poppyseeds in baking? I'd love to hear from you!
Today I started doing some homework at MIDNIGHT.... But I got it done eventually, and we are handing some floristry tasks in tomorrow, so it was about time I got it done, phew! I hope you have had a good start to the week!
PS. I know a couple of bloggers have told me that my posts aren't showing up in their reading list, and that it isn't allowing them to comment. You could try and delete and re-add me to your reading list, and then try and see if that works - let me know if it doesn't and I'll try and see if there is something else that needs to be done!
xox Jules
Sunday, 4 March 2018
No-Time Smoothie
Hi! And happy Sunday!
I hope you have had a great weekend so far! Here in Glasgow most people I know got one or two days off work due to the crazy amounts of snow we've had! Today I have just plodded along doing housey things after catching up with several lovelies on Friday and Saturday.
What have you guys been up to?
I thought I would post this recipe up, as it is literally two ingredients, but it has become my go to smoothie! Pink, red, yellow - it can be whatever colour you like, the orange base just gives you a really fresh start-point!
No-Time Smoothie
(Serves 1)
Ingredients
1/2 cup frozen fruit or berries (ANY kind will taste delicious, here I have a tropical mix with mango and pineapple)
1 cup orange juice
- Simply blitz and enjoy! It really is that simple....
This is also a super easy way to get 2-3 of your 5 a day in one go! I've definitely needed these vitamin boosts this Winter, brrrrr!
What is your go-to snack/drink when you are in a hurry?
xox J
I hope you have had a great weekend so far! Here in Glasgow most people I know got one or two days off work due to the crazy amounts of snow we've had! Today I have just plodded along doing housey things after catching up with several lovelies on Friday and Saturday.
What have you guys been up to?
I thought I would post this recipe up, as it is literally two ingredients, but it has become my go to smoothie! Pink, red, yellow - it can be whatever colour you like, the orange base just gives you a really fresh start-point!
No-Time Smoothie
(Serves 1)
Ingredients
1/2 cup frozen fruit or berries (ANY kind will taste delicious, here I have a tropical mix with mango and pineapple)
1 cup orange juice
- Simply blitz and enjoy! It really is that simple....
This is also a super easy way to get 2-3 of your 5 a day in one go! I've definitely needed these vitamin boosts this Winter, brrrrr!
What is your go-to snack/drink when you are in a hurry?
xox J
Tuesday, 27 February 2018
Falafel Dreams
...yes! Because I do not have a count of how many falafels I have eaten in my life!
Kev and I used to joke/point out when we first met, that no matter where our conversation went... I would at least mention falafel once... But it's so tasty! And versatile too, if you make it yourself.
So, after going over to a vegan diet this year (from vegetarian, so not a huge leap), I thought "but how am I going to make my falafels now?" cause I used to add an egg and a few handfuls of oats, but it turns out - if you are gentle - you can make them without!
Vegan Falafel
(Serves about 2-3...but usually just one if you are me...oops)
Ingredients
1 tbsp neutral oil,like sunflower
1 small onion, peeled and finely chopped
2 garlic cloves, crushed
1/2 tsp turmeric
1 tsp cumin
1/2 tsp smoked paprika
1 tsp Garam Masala
salt and pepper
1/2 tsp ground coriander (or a handful fresh, finely chopped)
400g tin chickpeas, drained and rinsed
Pita bread + whatever else you liked! In the picture I served it with hummus and red pepper paste - yum!
- Start by frying the onion for five minutes on medium heat, then add garlic and continue stirring for a few minutes. Add the spices, fry until fragrant (about a minute), then tip in your chickpeas. Heat through, and then turn off the heat. Mash thoroughly until it is sort of grainy and sort of pasty, basically the consistency that gives you the confidence that tells you "Hey! I can shape that!"
- Transfer the mixture into a large bowl. Wash your frying pan, and then start again by having a little oil in the pan. Shape walnut sized balls, and tip into the frying pan. Make sure you have an order so you know which ones to turn when! Fry a few minutes all over, until they are the way you like them! If you want to make them quite firm, you could also bake them.
- Serve on toasted pita with hummus, salad, pepper paste or whatever else you like! That's the beauty of it! :D
What is your favourite falafel recipe? I'd love to give it a go! One can never get to many falafel recipes... That's my motto!
Also, at the end of last year/beginning of this year - Glasgow got it's very own Purrple Cat Cafe! I went there yesterday to say hello to some feline critters... Here are a few of my favourites (Also - great selection of vegan and other cakes, and their coffee is deeeeeeeelicious!)
I think I will leave it with that cuteness fresh in mind! I have also been working towards a less plastic-filled every day and have been doing some DIY home products that I might share with you in the near future - is that something you might like to read about?
Today however, I went to Lush and got me some lovely things - sometimes you are allowed to be a little lazy and leave it to the professionals!
I hope you are having a lovely week so far!
xox J
Kev and I used to joke/point out when we first met, that no matter where our conversation went... I would at least mention falafel once... But it's so tasty! And versatile too, if you make it yourself.
So, after going over to a vegan diet this year (from vegetarian, so not a huge leap), I thought "but how am I going to make my falafels now?" cause I used to add an egg and a few handfuls of oats, but it turns out - if you are gentle - you can make them without!
Vegan Falafel
(Serves about 2-3...but usually just one if you are me...oops)
Ingredients
1 tbsp neutral oil,like sunflower
1 small onion, peeled and finely chopped
2 garlic cloves, crushed
1/2 tsp turmeric
1 tsp cumin
1/2 tsp smoked paprika
1 tsp Garam Masala
salt and pepper
1/2 tsp ground coriander (or a handful fresh, finely chopped)
400g tin chickpeas, drained and rinsed
Pita bread + whatever else you liked! In the picture I served it with hummus and red pepper paste - yum!
- Start by frying the onion for five minutes on medium heat, then add garlic and continue stirring for a few minutes. Add the spices, fry until fragrant (about a minute), then tip in your chickpeas. Heat through, and then turn off the heat. Mash thoroughly until it is sort of grainy and sort of pasty, basically the consistency that gives you the confidence that tells you "Hey! I can shape that!"
- Transfer the mixture into a large bowl. Wash your frying pan, and then start again by having a little oil in the pan. Shape walnut sized balls, and tip into the frying pan. Make sure you have an order so you know which ones to turn when! Fry a few minutes all over, until they are the way you like them! If you want to make them quite firm, you could also bake them.
- Serve on toasted pita with hummus, salad, pepper paste or whatever else you like! That's the beauty of it! :D
What is your favourite falafel recipe? I'd love to give it a go! One can never get to many falafel recipes... That's my motto!
Also, at the end of last year/beginning of this year - Glasgow got it's very own Purrple Cat Cafe! I went there yesterday to say hello to some feline critters... Here are a few of my favourites (Also - great selection of vegan and other cakes, and their coffee is deeeeeeeelicious!)
I think I will leave it with that cuteness fresh in mind! I have also been working towards a less plastic-filled every day and have been doing some DIY home products that I might share with you in the near future - is that something you might like to read about?
Today however, I went to Lush and got me some lovely things - sometimes you are allowed to be a little lazy and leave it to the professionals!
I hope you are having a lovely week so far!
xox J
Tuesday, 20 February 2018
A Small Feast feat. Hummus, Ful and Goodballs!
Hello and happy Tuesday!
Today I thought I would share with you this little platter of goodies that can be served up in no time at all! I have already got a few hummus recipes,but you can never get enough - especially when Yotam Ottolenghi gives you the how to! The "goodballs" are from a lovely Norwegian woman's cook book, "Kjøttfrie Burgere" - and they worked really well with these other dishes!
Hummus, Ful and Goodballs
(Serves 3-4 as a lunch with some pitta bread)
Let's start with the vegetarian patties:
Ingredients
70g dry soy granules
50g wholemeal breadcrumbs
1 tbsp oregano
1 tbsp onion powder
1 tbsp stock powder (or 1 cube)
1/2 tsp salt
250ml cold water
2 tbspketchup
- Put all the ingredients in a bowl and mix well. Leave it for 10-15 minutes before crushing with a wooden spoon. Now roll them into small balls, brush with a little oil and bake in the oven at 225C for 15 minutes.
You can also fry them if you prefer, but it'll take roughly the same time.
For the ful
Ingredients
150g tin butter beans
50ml olive oil
Juice of 1 lemon
1 tbsp cumin
4 garlic cloves, crushed
1 tsp salt
- Have the beans in a medium saucepan with the oil and fry for 5-10 minutes until the beans are tender, add the garlic and cumin and fry for a further minute. Season with the salt, take off the heat and add the lemon juice, and crush gently with a masher. Keep warm until serving.
For the hummus
Ingredients
400g tin chickpeas, drained
2-3 tbsp tahini
Juice of 1 lemon
3 garlic cloves, crushed
Salt to taste
A good splash of boiling water
Smoked paprika to sprinkle on top
- Have all the ingredients apart from the water in a deep dish or a measuring jug, and whizz totally smooth with a stick blender - add the water in order to fluff up the hummus. Sprinkle the hummus with smoked paprika - Et voila! Serve with the other two dishes and some toasted pitta bread - perhaps some mint tea just to take you into that relaxed almost holiday state of mind!
I hope you have a fantastic week so far! It's getting lighter out, which is much needed for me at least. And today it's so beautiful here in Glasgow!
Today I've got an assessment in college... just a small one, but still - wish me luck!
xox J
Today I thought I would share with you this little platter of goodies that can be served up in no time at all! I have already got a few hummus recipes,but you can never get enough - especially when Yotam Ottolenghi gives you the how to! The "goodballs" are from a lovely Norwegian woman's cook book, "Kjøttfrie Burgere" - and they worked really well with these other dishes!
Hummus, Ful and Goodballs
(Serves 3-4 as a lunch with some pitta bread)
Let's start with the vegetarian patties:
Ingredients
70g dry soy granules
50g wholemeal breadcrumbs
1 tbsp oregano
1 tbsp onion powder
1 tbsp stock powder (or 1 cube)
1/2 tsp salt
250ml cold water
2 tbspketchup
- Put all the ingredients in a bowl and mix well. Leave it for 10-15 minutes before crushing with a wooden spoon. Now roll them into small balls, brush with a little oil and bake in the oven at 225C for 15 minutes.
You can also fry them if you prefer, but it'll take roughly the same time.
For the ful
Ingredients
150g tin butter beans
50ml olive oil
Juice of 1 lemon
1 tbsp cumin
4 garlic cloves, crushed
1 tsp salt
- Have the beans in a medium saucepan with the oil and fry for 5-10 minutes until the beans are tender, add the garlic and cumin and fry for a further minute. Season with the salt, take off the heat and add the lemon juice, and crush gently with a masher. Keep warm until serving.
For the hummus
Ingredients
400g tin chickpeas, drained
2-3 tbsp tahini
Juice of 1 lemon
3 garlic cloves, crushed
Salt to taste
A good splash of boiling water
Smoked paprika to sprinkle on top
- Have all the ingredients apart from the water in a deep dish or a measuring jug, and whizz totally smooth with a stick blender - add the water in order to fluff up the hummus. Sprinkle the hummus with smoked paprika - Et voila! Serve with the other two dishes and some toasted pitta bread - perhaps some mint tea just to take you into that relaxed almost holiday state of mind!
I hope you have a fantastic week so far! It's getting lighter out, which is much needed for me at least. And today it's so beautiful here in Glasgow!
Today I've got an assessment in college... just a small one, but still - wish me luck!
xox J
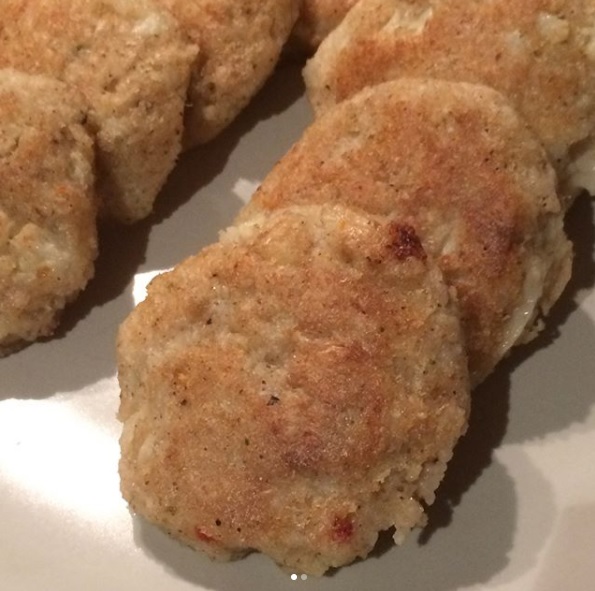
Wednesday, 14 February 2018
Festive Cauliflower Patties (Vegisterkaker)
Hello!
I hope your week is going well so far!
When I was a child back home in Norway, I was never really into the Olympics... Then, I sat down the other night when I couldn't sleep and watched some... and guys - the Olympics fanatic in me has awoken! I have been watching quiiiite a lot of it, and the snowboarding especially has been fantastic!
Anyways, I thought I would give you a vegan twist to a Norwegian favourite - particularly over christmas, but I never had them for christmas as usually each part of Norway has a different christmas dinner tradition. So when I had these, I thought: I could genuinely have these a lot more often!
And the recipe is easy! You just need a little bit of patience. Instead of fancy rice flour, we are using cooked rice as an actual binder! I made them bigger than the original, but the recipe should make about 30-35 mini patties, I think I got about 12.
Just remember that they should be eaten within 2-3 days, and re-heat properly since there is rice in these patties. I had them mainly on their own with some sweet chilli sauce or ketchup, you can make a fancy sandwich for lunch, OR have as a side to a main meal, or as a starter.
Festive Cauliflower Patties (Vegisterkaker)
(Makes 30 small ones, or about 12 big ones)
Ingredients
200ml white rice + 400ml water + 1 tsp salt
1 large cauliflower, cut into small florets
200ml fast-cook oats
1-2 vegan vegetable stock cubes (or 1-2 topped tsp stock powder)
1 tsp ground ginger
About 1 tsp ground nutmeg
Pepper and salt to taste
Oil for frying
- Start by cooking the rice with the salt and water, until soft, which should take about 20 minutes.
- Boil the cauliflower for a few minutes and the drain off the water.
- Have the cooked rice, cauliflower, and remaining ingredients in a large bowl, and use a stick blender to whizz to a rough paste.
- Shape into small patties, and fry in oil on medium heat until golden on both sides.
Et voila! Simple as that *smiles*
Original recipe can be found here.
Have you been watching the Olympics or tried these patties before?
I hope you have a wonderful Valentine's Day! I'm heading to the docs afterwards (fun, fun, fun!), but then I have badminton, and the last two episodes of Fargo Season 3 ahead of me... And probably some more Olympics, ha!
Take it easy!
xox J
I hope your week is going well so far!
When I was a child back home in Norway, I was never really into the Olympics... Then, I sat down the other night when I couldn't sleep and watched some... and guys - the Olympics fanatic in me has awoken! I have been watching quiiiite a lot of it, and the snowboarding especially has been fantastic!
Anyways, I thought I would give you a vegan twist to a Norwegian favourite - particularly over christmas, but I never had them for christmas as usually each part of Norway has a different christmas dinner tradition. So when I had these, I thought: I could genuinely have these a lot more often!
And the recipe is easy! You just need a little bit of patience. Instead of fancy rice flour, we are using cooked rice as an actual binder! I made them bigger than the original, but the recipe should make about 30-35 mini patties, I think I got about 12.
Just remember that they should be eaten within 2-3 days, and re-heat properly since there is rice in these patties. I had them mainly on their own with some sweet chilli sauce or ketchup, you can make a fancy sandwich for lunch, OR have as a side to a main meal, or as a starter.
Festive Cauliflower Patties (Vegisterkaker)
(Makes 30 small ones, or about 12 big ones)
Ingredients
200ml white rice + 400ml water + 1 tsp salt
1 large cauliflower, cut into small florets
200ml fast-cook oats
1-2 vegan vegetable stock cubes (or 1-2 topped tsp stock powder)
1 tsp ground ginger
About 1 tsp ground nutmeg
Pepper and salt to taste
Oil for frying
- Start by cooking the rice with the salt and water, until soft, which should take about 20 minutes.
- Boil the cauliflower for a few minutes and the drain off the water.
- Have the cooked rice, cauliflower, and remaining ingredients in a large bowl, and use a stick blender to whizz to a rough paste.
- Shape into small patties, and fry in oil on medium heat until golden on both sides.
Et voila! Simple as that *smiles*
Original recipe can be found here.
Have you been watching the Olympics or tried these patties before?
I hope you have a wonderful Valentine's Day! I'm heading to the docs afterwards (fun, fun, fun!), but then I have badminton, and the last two episodes of Fargo Season 3 ahead of me... And probably some more Olympics, ha!
Take it easy!
xox J
Subscribe to:
Posts (Atom)


