Aaaaaaand it's time for yet another update here directly from Glasgow, UK!
First of all, I would like to mention that the past Friday was Burns Night, in ode to the Scottish poet who wrote "Address to a Haggis" amongst other well known Scottish poems. What more befitting than to serve up a haggis supper? This is the third year in a row I've done it, and it's always a treat! I don't just have haggis on this day, but there's something a little special about doing something for the occasion itself!
Secondly, I am about to post up a recipe for a drink that is well overdue!
I made this in December as a sort of christmassy drink however, I was meant to give it as presents, or use it in a punch for a party I was meant to have but never got around to... It was only last night I got people to actually taste it, and it went down really well mixed with either some coke or fizzy lemondade! Personally, I don't drink vodka, BUT I did taste this one making sure it would be good to give away to friends - it's tasty! PS. You need to be patient with this one, it takes two weeks to "brew"....
Spiced Arancello (Makes about 2.5 litres)
5 large oranges
1 cinnamon stick
2-3 cardamom pods
1 vanilla pod
1 l bottle of vodka (I used Russian Standard)
600 g caster sugar
+ a few extra oranges, cinnamon sticks and vanilla pods for decorating purposes!
Before you start, make sure you have a bottle with a wide top to put this in, as you will have to transfer it to a bigger bottle later on in the process! I was fighting with getting the peel out of the actual vodka bottle whenever I made it - you live and you learn! If you have a bottle that can contain 2.5 - 3 litres, then that will definitely come in handy here!
- Pare the zest from five oranges using a peeler, make sure not to use any of the white bitter layer. Put zest, spices and vanilla pod in a large bottle along with the vodka. Seal the bottle and leave it in a dark place for a week, shake it once or twice a day.
SEVEN DAYS LATER
- Have the sugar in a heatproof bowl along with 500 ml boiling water. Stir until the sugar has dissolved. Cool slightly before adding to the vodka mix. Leave for another week, and shake once a day to make sure it is all mixed well.
- Strain into decorative bottles, throw away the peel and spices. Before giving it away, Put a vanilla pod and/or cinnamon stick along with some fresh spices.
These will make perfect christmas presents, or additional hamper gifts. It goes well with fizzy lemonade and can also be mixed with coke.
Original source:
http://www.bbcgoodfood.com/recipes/8025/spiced-arancello
- Jules
Sunday, 27 January 2013
Sunday, 20 January 2013
Bananabread
About five or six years ago, when I was working at the fishmarket in Bergen, I was lucky to have some of the best colleagues one could ever ask for. One of them sometimes brought in quiches and loaves straight from the oven and to work. Whenever I came across this tasty treat here, I couldn't help but ask for the recipe - bananabread, what was this ingenious bread with all the sweetness packed inside?
Bananabread
(Serves 12, 220 calories without topping, 265 calories with)
Straaaight from the oven, and the crust came out better than I expected
2 large cups of flour
1/4 tsp salt
1 tsp bicarbonate of soda
1/4 - 1/2 cup of sugar (depending on how ripened the bananas are)
1/2 cup sunflower oil
5 bananas squished
For the top crust:
About 1/2 cup sugar
50 g butter (I used Flora light)
- In a bowl, mix all the dry ingredients, stir well.
- Now, make a well in the centre and pour in the sunflower oil. Pre-heat the oven to 160 °C.
- Squish the bananas, I always do this using the simple tools of a mug and a fork - works a treat! Now mix it into the bowl along with the rest of the ingredients and combine well until you have a really sticky breadmix.
- Pour it into a quite large bread tin, it should reach just above the middle of it, as it will rise quite a bit. Finally, mix the butter and sugar together in a mug or small bowl, and crumble over the top of the bread.
- Place it in the middle of the oven, for about an hour. The trick of making a good bananabread is to NOT open the oven during the cooking time. If you have to check in on it, look through the window of the oven instead, as if you open it the bread will collapse and not cook through.
- Once taken out of the oven, leave for 5 - 10 minutes before taking it out of the tin. I usually keep it in the tin even when serving. It can keep in room temperature for a few days, or refrigerated for at least 5 days.
I hope you enjoy it as much as I do!
Original source:
Santiago y Paola
- Jules
PS. You can also add nuts, sultanas and other such things that you feel like adding to it. It's amazing with walnuts!
Bananabread
(Serves 12, 220 calories without topping, 265 calories with)
Straaaight from the oven, and the crust came out better than I expected
2 large cups of flour
1/4 tsp salt
1 tsp bicarbonate of soda
1/4 - 1/2 cup of sugar (depending on how ripened the bananas are)
1/2 cup sunflower oil
5 bananas squished
For the top crust:
About 1/2 cup sugar
50 g butter (I used Flora light)
- In a bowl, mix all the dry ingredients, stir well.
- Now, make a well in the centre and pour in the sunflower oil. Pre-heat the oven to 160 °C.
- Squish the bananas, I always do this using the simple tools of a mug and a fork - works a treat! Now mix it into the bowl along with the rest of the ingredients and combine well until you have a really sticky breadmix.
- Pour it into a quite large bread tin, it should reach just above the middle of it, as it will rise quite a bit. Finally, mix the butter and sugar together in a mug or small bowl, and crumble over the top of the bread.
- Place it in the middle of the oven, for about an hour. The trick of making a good bananabread is to NOT open the oven during the cooking time. If you have to check in on it, look through the window of the oven instead, as if you open it the bread will collapse and not cook through.
- Once taken out of the oven, leave for 5 - 10 minutes before taking it out of the tin. I usually keep it in the tin even when serving. It can keep in room temperature for a few days, or refrigerated for at least 5 days.
I hope you enjoy it as much as I do!
Original source:
Santiago y Paola
- Jules
PS. You can also add nuts, sultanas and other such things that you feel like adding to it. It's amazing with walnuts!
Sunday, 13 January 2013
Hummus B'il Tahina
It wasn't until I moved to Glasgow that I came to discover the amazing thing that is..humous! My favourite would probably be the red pepper humous, but the other day I decided to make my own plane one. You can probably add vegetables or chilies to it if you want, but if you want it nice and simple, here's what to do:
Hummus B'il Tahina
(Serves 4, 180 calories each)
400 g can chickpeas/240 g soaked ones, leave a few aside for garnish
2 tbsp extra virgin olive oil
2 tbsp Tahini (I used the light one)
3 tbsp lemon juice
1/2 tsp salt
A pinch of cumin
1 clove of garlic, finely chopped
A sprig of fresh parsley, garnish
- In a bowl, mix chickpeas, oil, tahini, lemon, garlic and salt. Use a stick-blender to make a nice fluffy paste.
- Add the cumin and stir. Transfer to a serving bowl. You can try and create a whirlpool effect with a spoon and drizzle a little more oil over for presentation if you want. For garnish, top with the extra chickpeas and a sprig or two of fresh parsley.
Serve with anything from nice crispy biscuits to bread and vegetable sticks - hopefully you'll like it!
Original source:
http://www.alternativeegypt.com/Food-&-Recipes/Egyptian-Hummus-Recipe.html
- Jules
Hummus B'il Tahina
(Serves 4, 180 calories each)
400 g can chickpeas/240 g soaked ones, leave a few aside for garnish
2 tbsp extra virgin olive oil
2 tbsp Tahini (I used the light one)
3 tbsp lemon juice
1/2 tsp salt
A pinch of cumin
1 clove of garlic, finely chopped
A sprig of fresh parsley, garnish
- In a bowl, mix chickpeas, oil, tahini, lemon, garlic and salt. Use a stick-blender to make a nice fluffy paste.
- Add the cumin and stir. Transfer to a serving bowl. You can try and create a whirlpool effect with a spoon and drizzle a little more oil over for presentation if you want. For garnish, top with the extra chickpeas and a sprig or two of fresh parsley.
Serve with anything from nice crispy biscuits to bread and vegetable sticks - hopefully you'll like it!
Original source:
http://www.alternativeegypt.com/Food-&-Recipes/Egyptian-Hummus-Recipe.html
- Jules
Sunday, 6 January 2013
152 Baked Courgette and "Tamed" Mushroom Risotto
I got a couple of cook books for christmas, and "Ramsay's Best Menus" was one of them, so I thought I had to try and make something out of it. And it turned out pretty darn tasty, I must say! Originally it should have been made with wild mushrooms, but there were none in sight this Sunday afternoon, so I made it 50/50 with button mushrooms and chestnut mushrooms, trying to slice them nicely for extra texture and presentation.
152 Baked Courgette and "Tamed" Mushroom Risotto
(Serves 4, about 400 calories each)
4 courgettes
Sea salt and freshly ground black pepper
2 large garlic cloves, finely sliced
Basil sprigs, leaves only, finely chopped
2-3 tbsp olive oil, plus extra to drizzle
A squeeze of lemon juice
550-600 ml vegetable- or chicken stock
200 g arborio rice
100 ml dry white wine
200 g mushrooms, preferably wild, but like I mentioned I used 100 g of each button- and chestnut mushrooms - cleaned and halved, sliced if they are quite large
2-3 tbsp freshly grated parmesan
- Heat oven to 200°C, and line a large baking tray with foil.
-Half the cougettes lengthways, and slice it criss-cross over the surcafe of each courgette, it looks rather fancy! Now, place them on the baking tray - cut side up, and season with a little salt and pepper, followed by garlic slices and basil. Finish off with a drizzle of olive oil and a squeeze of lemon juice. Bake for 30-40 minutes until they're roasted.
- In the meantime, you can chop the mushrooms, and make everything prepared. Boil up water and resolve the stock, leave it in a small pan on the side.
- Heat 1 tbsp of oil in a large pan and add the risotto rice, stir for about a minute before adding the wine. Bubble it up and as soon as it has soaked up most of the wine, add a ladleful of the stock and stir. Now you can chop up your courgettes nicely and leave them until they're required. Stir regularly!
- Keep feeding the risotto with a little stock at a time, wait until it has absorbed it almost fully before adding more, this will give it a really nice, creamy texture.
- Once out of stock the rice should still be a little tough, but close to cooked, turn off the heat, stir in the chopped courgettes and leave for a few minutes.
- Now is a great time to get a frying pan out, heat up about 1 tbsp of olive oil and fry the mushrooms with a little salt and pepper. Leave them for about 3-4 minutes until they're starting to release their juices.
- If desired, add a little more stock to the risotto as you turn the hob on a low heat to heat it up. Season with salt and pepper to taste (I only needed to add a little bit of each, but it made all the difference!), grate in most of the parmesan and stir in the mushrooms - you can save a little for garnish if you want.
- Divide the risotto between four deep plates or shallow bowls and top with a little grated parmesan, and optionally some of the mushroom if you reserved some of it. Enjoy - I know I sure did!
Original source:
Ramsay's Best Menus, NO 152
- Jules
PS. For a vegan risotto, just opt out on the parmesan, it will still be really creamy!
152 Baked Courgette and "Tamed" Mushroom Risotto
(Serves 4, about 400 calories each)
4 courgettes
Sea salt and freshly ground black pepper
2 large garlic cloves, finely sliced
Basil sprigs, leaves only, finely chopped
2-3 tbsp olive oil, plus extra to drizzle
A squeeze of lemon juice
550-600 ml vegetable- or chicken stock
200 g arborio rice
100 ml dry white wine
200 g mushrooms, preferably wild, but like I mentioned I used 100 g of each button- and chestnut mushrooms - cleaned and halved, sliced if they are quite large
2-3 tbsp freshly grated parmesan
- Heat oven to 200°C, and line a large baking tray with foil.
-Half the cougettes lengthways, and slice it criss-cross over the surcafe of each courgette, it looks rather fancy! Now, place them on the baking tray - cut side up, and season with a little salt and pepper, followed by garlic slices and basil. Finish off with a drizzle of olive oil and a squeeze of lemon juice. Bake for 30-40 minutes until they're roasted.
- In the meantime, you can chop the mushrooms, and make everything prepared. Boil up water and resolve the stock, leave it in a small pan on the side.
- Heat 1 tbsp of oil in a large pan and add the risotto rice, stir for about a minute before adding the wine. Bubble it up and as soon as it has soaked up most of the wine, add a ladleful of the stock and stir. Now you can chop up your courgettes nicely and leave them until they're required. Stir regularly!
- Keep feeding the risotto with a little stock at a time, wait until it has absorbed it almost fully before adding more, this will give it a really nice, creamy texture.
- Once out of stock the rice should still be a little tough, but close to cooked, turn off the heat, stir in the chopped courgettes and leave for a few minutes.
- Now is a great time to get a frying pan out, heat up about 1 tbsp of olive oil and fry the mushrooms with a little salt and pepper. Leave them for about 3-4 minutes until they're starting to release their juices.
- If desired, add a little more stock to the risotto as you turn the hob on a low heat to heat it up. Season with salt and pepper to taste (I only needed to add a little bit of each, but it made all the difference!), grate in most of the parmesan and stir in the mushrooms - you can save a little for garnish if you want.
- Divide the risotto between four deep plates or shallow bowls and top with a little grated parmesan, and optionally some of the mushroom if you reserved some of it. Enjoy - I know I sure did!
Original source:
Ramsay's Best Menus, NO 152
- Jules
PS. For a vegan risotto, just opt out on the parmesan, it will still be really creamy!
Sunday, 23 December 2012
Sandkaker - Sand Biscuits
I am proud to present to you - the Seventh Kind!
I only just got there in time, but the point is that I made the finish line, phew! I even brought some biscuits across the road to my Aunt and Uncle.
Usually, these are made in a special biscuit tin, but neither my mum nor me have any, and so I had to make them the way my grandmother made them, which is a little easier! I also added an almond on top for good measure - they're healthy after all! And ooooh so tasty!
Sandkaker - Sand Biscuits
(Makes about 34, 110 calories each)
Ho-ho-holey moley!
200 g butter
250 g plain flour
100 g ground almonds
1 egg
100 g sugar
- Crumble the butter in with the flour, and then add the rest of the ingredients. Work with it until you have a nice dough, shape it into a ball and leave it in the fridge to cool for at least an hour.
- Pre-heat the oven to 175°C.
- IF you have the biscuit tins required, use them to put the dough in and press it around so that you end up with a 3-5 mm thick biscuit "bowl", if you don't have them - worry not! Just roll them into balls the size of a walnut, and optionally press and almond on top. Bake the biscuit tins for 10-15 minutes, and the biscuit balls for 15-20 minutes. The latter are thicker and therefore need a few more minutes in the oven to cook through.
Enjoy - and I hope you have a wonderful holiday! And if you don't celebrate christmas and like almonds, why not give these a shot anyway?
Oh, oh! And it turns out I have a least been a wee bit of a good girl this year, as my stocking that has been with me since I was three months old has been filled by "santa" - win! *grins*
Original source:
http://oppskrift.klikk.no/sandkaker/1723/
- Jules
I only just got there in time, but the point is that I made the finish line, phew! I even brought some biscuits across the road to my Aunt and Uncle.
Usually, these are made in a special biscuit tin, but neither my mum nor me have any, and so I had to make them the way my grandmother made them, which is a little easier! I also added an almond on top for good measure - they're healthy after all! And ooooh so tasty!
Sandkaker - Sand Biscuits
(Makes about 34, 110 calories each)
Ho-ho-holey moley!
200 g butter
250 g plain flour
100 g ground almonds
1 egg
100 g sugar
- Crumble the butter in with the flour, and then add the rest of the ingredients. Work with it until you have a nice dough, shape it into a ball and leave it in the fridge to cool for at least an hour.
- Pre-heat the oven to 175°C.
- IF you have the biscuit tins required, use them to put the dough in and press it around so that you end up with a 3-5 mm thick biscuit "bowl", if you don't have them - worry not! Just roll them into balls the size of a walnut, and optionally press and almond on top. Bake the biscuit tins for 10-15 minutes, and the biscuit balls for 15-20 minutes. The latter are thicker and therefore need a few more minutes in the oven to cook through.
Enjoy - and I hope you have a wonderful holiday! And if you don't celebrate christmas and like almonds, why not give these a shot anyway?
Oh, oh! And it turns out I have a least been a wee bit of a good girl this year, as my stocking that has been with me since I was three months old has been filled by "santa" - win! *grins*
Original source:
http://oppskrift.klikk.no/sandkaker/1723/
- Jules
Labels:
Baking,
Cookies,
Recipe,
Scandinavian,
Vegetarian
Peppernøtter - Pepper Nuts
First of all - Happy little christmas!
I would like to apologise for my absence, but I am currently on Christmas holiday in Norway with my family. I was panicking a bit as I hadn't finished my "Seven Kinds" biscuit project, but today I had some time to spare tonight and finished off the project.
Before that, we had "Santa Porridge", which is a tradition for my family to have on the 23rd. It's rice porridge that we serve hot sprinkled with sugar, cinnamon and a little knob of butter in the centre. It is a little different from family to family, but I think the point of it is to have a cheap nice meal before celebrating with a huge dinner on the 24th.
To make a little bit more out of it than just, well...rice porridge - we add an almond in the casserole, and whoever gets it wins a prize, which is usually a marzipan pig! This year, my mother got it! We always save a little of the leftover porridge and sets it out in a bowl for Santa - the man needs a little porridge to keep him going!
I would have tried to make it from scratch if it was up to me, it only takes pudding rice, a tiny bit of salt, a little more sugar, and a few drops of vanilla extract, and then you boil it like a risotto, only with milk. Cook it for about an hour until the rice is nice and soft. ANYWHOOOO, mum suggested we did as we usually do and cheated with a little hand from Toro, and to be honest, it is a pretty good substitute
I'm rambling, anyway, now for the sixth type of christmas biscuits - peppernøtter, which means peppernuts, but are basically gingernuts, and these came out better than the ones I made last year, result!
Peppernøtter - Pepper Nuts
(Makes about 60, 80 calories each)
250 g butter
200 g sugar
1 tbsp dark or light syrup
1 egg
2 ts ground ginger
2 ts ground cinnamon
2 ts ground cloves
1 ts cardamom (optional)
2 ts bicarbonate of soda
650 ml flour
- Mix sugar, butter and syrup. Then add the egg and stir well to combine.
- Now, add the spices, followed by bicarbonate of soda and the most of the flour. Combine this to a nice dough, add more of the flour until it is easy to handle without it sticking to your hands too much.
- Pre-heat the oven to 150°C. And on a baking paper clad tray roll the dough into balls the size of large hazelnuts. These will spread out a little, so keep some distance between them.
- Place in the middle of the oven and bake for about 15 minutes until nice and golden.
Original source:
http://www.dansukker.no/no/oppskrifter/fine-peppernotter.aspx
- Jules
I would like to apologise for my absence, but I am currently on Christmas holiday in Norway with my family. I was panicking a bit as I hadn't finished my "Seven Kinds" biscuit project, but today I had some time to spare tonight and finished off the project.
Before that, we had "Santa Porridge", which is a tradition for my family to have on the 23rd. It's rice porridge that we serve hot sprinkled with sugar, cinnamon and a little knob of butter in the centre. It is a little different from family to family, but I think the point of it is to have a cheap nice meal before celebrating with a huge dinner on the 24th.
To make a little bit more out of it than just, well...rice porridge - we add an almond in the casserole, and whoever gets it wins a prize, which is usually a marzipan pig! This year, my mother got it! We always save a little of the leftover porridge and sets it out in a bowl for Santa - the man needs a little porridge to keep him going!
I would have tried to make it from scratch if it was up to me, it only takes pudding rice, a tiny bit of salt, a little more sugar, and a few drops of vanilla extract, and then you boil it like a risotto, only with milk. Cook it for about an hour until the rice is nice and soft. ANYWHOOOO, mum suggested we did as we usually do and cheated with a little hand from Toro, and to be honest, it is a pretty good substitute
I'm rambling, anyway, now for the sixth type of christmas biscuits - peppernøtter, which means peppernuts, but are basically gingernuts, and these came out better than the ones I made last year, result!
Peppernøtter - Pepper Nuts
(Makes about 60, 80 calories each)
250 g butter
200 g sugar
1 tbsp dark or light syrup
1 egg
2 ts ground ginger
2 ts ground cinnamon
2 ts ground cloves
1 ts cardamom (optional)
2 ts bicarbonate of soda
650 ml flour
- Mix sugar, butter and syrup. Then add the egg and stir well to combine.
- Now, add the spices, followed by bicarbonate of soda and the most of the flour. Combine this to a nice dough, add more of the flour until it is easy to handle without it sticking to your hands too much.
- Pre-heat the oven to 150°C. And on a baking paper clad tray roll the dough into balls the size of large hazelnuts. These will spread out a little, so keep some distance between them.
- Place in the middle of the oven and bake for about 15 minutes until nice and golden.
Original source:
http://www.dansukker.no/no/oppskrifter/fine-peppernotter.aspx
- Jules
Labels:
Baking,
Cookies,
Recipe,
Scandinavian,
Vegetarian
Tuesday, 18 December 2012
Jødekaker - Jew's Biscuits
First of all, I found some of the biggest red apples I have ever seen in our local fruit and vegetable shop! Take a look at this....
Secondly -
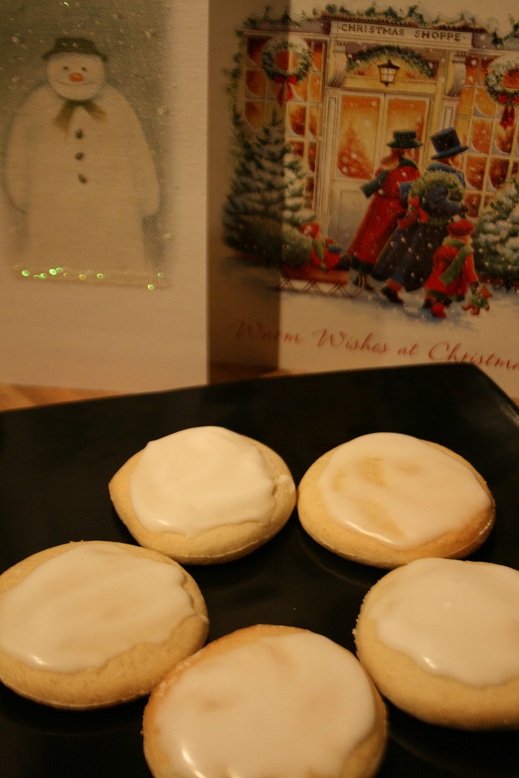
My fifth out of seven kinds of christmas biscuits! These go by different names, but I will use the one that I found in my grandmother's recipe book. Now, I don't know the story behind them, I just remember them from my childhood. Easy to make, really quick as soon as the dough has been left to cool for a little while, and sweet on the tongue. These are crumblicious!
PS. Icing is essential!
Jødekaker
(Makes about 46, 55 calories each without icing)
1 egg medium
125 g sugar
175 g butter (I used Flora), melted and slightly cooled
300 g plain flour
1 lemon, zest
1 tsp horn salt
Icing sugar, a few drops of water and a few drops of lemon juice for icing.
-First, whip the egg and sugar together until light and airy.
- Then add the remaining ingredients, and stir well to combine. Use a wooden spoon and combine it so you get a sticky, but nice golden dough. Place in the fridge for at least half an hour. I let it sit overnight.
- Preheat the oven to about 200°C
- Roll out half of the dough at a time, until it's about 2-3 mm flat. Use a medium sized glass and cut out circles. Place on a tray with baking paper. These only rise and don't spread out, so you only need a bit of space between them.
- Place them in the middle of the oven for 5-10 minutes. The biscuits should still be pale, but have a slight golden colour around the edges. Leave on a rack to cool.
- Once they're cool, mix icing sugar, and a few drops each of water and lemon juice. The icing should be a lttle thick, as that helps it dry quicker and prevents it from going all runny.
Enjoy!
Original source:
My dear Grandmother Evelyn, whose birthday would have been today. The bestest mormor there was and will ever be!
- Jules
Secondly -
My fifth out of seven kinds of christmas biscuits! These go by different names, but I will use the one that I found in my grandmother's recipe book. Now, I don't know the story behind them, I just remember them from my childhood. Easy to make, really quick as soon as the dough has been left to cool for a little while, and sweet on the tongue. These are crumblicious!
PS. Icing is essential!
Jødekaker
(Makes about 46, 55 calories each without icing)
1 egg medium
125 g sugar
175 g butter (I used Flora), melted and slightly cooled
300 g plain flour
1 lemon, zest
1 tsp horn salt
Icing sugar, a few drops of water and a few drops of lemon juice for icing.
-First, whip the egg and sugar together until light and airy.
- Then add the remaining ingredients, and stir well to combine. Use a wooden spoon and combine it so you get a sticky, but nice golden dough. Place in the fridge for at least half an hour. I let it sit overnight.
- Preheat the oven to about 200°C
- Roll out half of the dough at a time, until it's about 2-3 mm flat. Use a medium sized glass and cut out circles. Place on a tray with baking paper. These only rise and don't spread out, so you only need a bit of space between them.
- Place them in the middle of the oven for 5-10 minutes. The biscuits should still be pale, but have a slight golden colour around the edges. Leave on a rack to cool.
- Once they're cool, mix icing sugar, and a few drops each of water and lemon juice. The icing should be a lttle thick, as that helps it dry quicker and prevents it from going all runny.
Enjoy!
Original source:
My dear Grandmother Evelyn, whose birthday would have been today. The bestest mormor there was and will ever be!
- Jules
Subscribe to:
Posts (Atom)