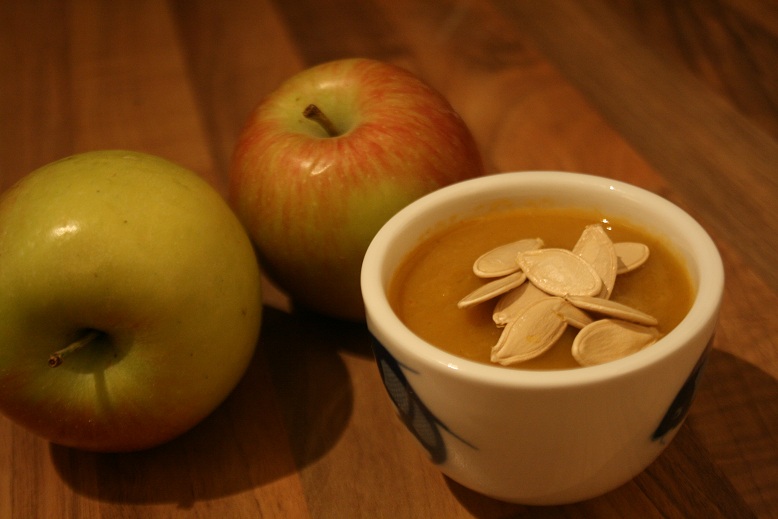
I few weeks ago, I tried to make spiced jelly jam for toasts and other such things, but I failed... And ended up with some Wintery syrup and so I couldn't really post it up, now could I? Naaaaah
On Saturday though, close to payday and lacking things to do, I decided to try and make some chutney! I have only ever had chutney once before, at a tearoom in Glasgow called the Butterfly and Pig, and I remembered it to have quite...an interesting flavour. Oatcakes with sweet chutney and tangy cheese was a mix of flavours I wasn't used to. I liked it though, and so I decided that I would make some that I could give away as sort of small tokens of appreciation now when we're getting closer to christmas.
It turned out quite nicely actually, if not even remotely close to the photo on the website I found the recipe on. But hey! Give it a go, and see what you think! I've already had a friend telling me that it's good - surely a step in the right direction?
Apple & Cranberry Chutney
(Makes approximately 5 small jars a 230 g/6 oz, I halved the original recipe)
750 g apples, peeled and diced
220 g onions, chopped
25 g root ginger, finely chopped
1 tsp black peppercorns
250 g sugar
125 ml cider vinegar
250 g dried cranberries (I didn't have enough, but will make sure I do next time for some extra cranberry-ness!)
- Have all the ingredients except from the cranberries, in a large pan. Gently heat it up and stir until the sugar has dissolved. Simmer uncovered for about 50 minutes, stirring occasionally.
- By now, the onion and apple will be tender and fall apart, and the mixture should have thickened and none of the watery juice remains.
- Then, add the cranberries and cook for a further 10 minutes, keep stirring gently.
- Spoon chutney over in jars and seal. In order to do this, pre-heat the oven to about 100-150°C. Quickly rinse the jars with soapy water, and place them without the lids into the oven to dry. Don't worry, you will still have time to do this before the chutney cools down.
Whilst the jars are just about dry, transfer the chutney onto the jars and tighten the lid firmly. When it cools, the heat on the inside will create a vacuum as it's cooling, and the jar will seal itself!
Store the jars in a cool dark place. The chutney can keep for up to 6 months. Once it's opened though, make sure to put it in the fridge and eat within a couple of weeks-a month.
If you're giving them away, why not tie a ribbon around it, with a little card?
Serve with oatcakes and cheese, or on toast. This chutney is even so sweet you can probably serve it on pancakes as well - mmmm!
Original source:
http://www.bbcgoodfood.com/recipes/8028/apple-and-cranberry-chutney
- Jules
Monday, 26 November 2012
Apple & Cranberry Chutney
Labels:
Asian,
Preservatives,
Recipe,
Side,
Snack,
Spreads,
Vegan,
Vegetarian
Sunday, 25 November 2012
Instant Coffee Cupcakes
....are simple yet O so delicious!
Because what is one to do if you have eggs that need used, and dinner has already been had? Make these of course! I didn't know this until last night though, when I visited my good friend Lucy who had made a batch of these, and I got my teeth in one.
Instant Coffee Cupcakes
(Makes 12, about 160 calories each, icing included)
170 g butter
100 g sugar
170 g flour (I used 50 g plain and 120 g wholemeal)
3 eggs
Instant coffee, I think I mixed about 1 tbsp of Nescafe Gold, with a little bit of boiling water. I poured almost all of the mix in. Fingers crossed I'll sleep tonight!
I also used 1 tsp each of bicarbonate of soda and baking powder.
Icing:
Approximately 40-50 g icing sugar
Half a tsp of vanilla extract
A few tbsp of water
- Pre heat the oven, 150°C.
- Cream the butter and sugar in a baking bowl. Then add flour and egg, one third of each at a time and stirring well before adding more.
- As soon as this is done, pour in the instant coffee, and mix until the batter has gotten a nice dark, even colour.
- Bake in the oven until risen and "golden", or a darker shade of brown if you will! I like for them to have a definite coffee taste to it.
- Leave to cool for 10-15 minutes, before making the icing. Make sure it is quite thick, so it doesn't run all over the place! Spoon over a teaspoon worth of icing, and decorate with a sweet if you like! I wanted to add nuts on top, but didn't incase anyone who wants one is allergic - maybe next time!
Ta dah!
Original source:
Lucy
*respectful bow*
- Jules
Because what is one to do if you have eggs that need used, and dinner has already been had? Make these of course! I didn't know this until last night though, when I visited my good friend Lucy who had made a batch of these, and I got my teeth in one.
Instant Coffee Cupcakes
(Makes 12, about 160 calories each, icing included)
170 g butter
100 g sugar
170 g flour (I used 50 g plain and 120 g wholemeal)
3 eggs
Instant coffee, I think I mixed about 1 tbsp of Nescafe Gold, with a little bit of boiling water. I poured almost all of the mix in. Fingers crossed I'll sleep tonight!
I also used 1 tsp each of bicarbonate of soda and baking powder.
Icing:
Approximately 40-50 g icing sugar
Half a tsp of vanilla extract
A few tbsp of water
- Pre heat the oven, 150°C.
- Cream the butter and sugar in a baking bowl. Then add flour and egg, one third of each at a time and stirring well before adding more.
- As soon as this is done, pour in the instant coffee, and mix until the batter has gotten a nice dark, even colour.
- Bake in the oven until risen and "golden", or a darker shade of brown if you will! I like for them to have a definite coffee taste to it.
- Leave to cool for 10-15 minutes, before making the icing. Make sure it is quite thick, so it doesn't run all over the place! Spoon over a teaspoon worth of icing, and decorate with a sweet if you like! I wanted to add nuts on top, but didn't incase anyone who wants one is allergic - maybe next time!
Ta dah!
Original source:
Lucy
*respectful bow*
- Jules
Friday, 23 November 2012
A Big Decision
...Depending on how you look at it of course.
As you might have noticed, the name of the blog has changed. Now, you might ask yourself - What's that all about?! Or perhaps you didn't even notice, but I decided to do it, and I'll explain why.
Whenever I first started blogging, I had no intention of it mainly being a recipe blog. I called it "A Howl in the Night" because it was in the evening I would spend most of my time online, like the lost little teenager I was, and jot down a few thoughts here and there.
Mikki, or St. Mikki
But the times have been a-changing, and I decided that the title should at least reflect the blog a little bit. I still want to keep the same image that the previous Blog-name had to it though, and thus I've decided to call it Wolf it Down, or WiD if you like (Not as in "when you're drunk", that would be ridiculous...) This way, not only is the title more fitting, but it also includes one of my favourite animals, the majestic wolf. When I was little, from the age of 4 up until I was 17, I had a brother - in the shape of a Belgian Shepherd - whom I called "My brother Wolf", so if anything that is even more of a reason for the change.
OK, so I didn't settle for Confused Cucumber, Hungry Hyena, The Delirious Dumpling Diary (I have never actually cooked or made dumpling before come to think of it...), but at least it
holds the promise that there might be food nearby - or at least a recipe to get your claws on!
Let me know what you think, or maybe even tell me how you decided to name your blog - I would really like to hear about it!
Have a merry post-Thanksgiving & pre-Yuletimes!
- Jules
As you might have noticed, the name of the blog has changed. Now, you might ask yourself - What's that all about?! Or perhaps you didn't even notice, but I decided to do it, and I'll explain why.
Whenever I first started blogging, I had no intention of it mainly being a recipe blog. I called it "A Howl in the Night" because it was in the evening I would spend most of my time online, like the lost little teenager I was, and jot down a few thoughts here and there.
Mikki, or St. Mikki
But the times have been a-changing, and I decided that the title should at least reflect the blog a little bit. I still want to keep the same image that the previous Blog-name had to it though, and thus I've decided to call it Wolf it Down, or WiD if you like (Not as in "when you're drunk", that would be ridiculous...) This way, not only is the title more fitting, but it also includes one of my favourite animals, the majestic wolf. When I was little, from the age of 4 up until I was 17, I had a brother - in the shape of a Belgian Shepherd - whom I called "My brother Wolf", so if anything that is even more of a reason for the change.
OK, so I didn't settle for Confused Cucumber, Hungry Hyena, The Delirious Dumpling Diary (I have never actually cooked or made dumpling before come to think of it...), but at least it
holds the promise that there might be food nearby - or at least a recipe to get your claws on!
Let me know what you think, or maybe even tell me how you decided to name your blog - I would really like to hear about it!
Have a merry post-Thanksgiving & pre-Yuletimes!
- Jules
Monday, 29 October 2012
Millie's Style Cookies with Kinder Chocolate
Greetings!
Here's another sweet treat for you! Ever had a Millie's cookie? Well, in the UK, or Glasgow at least, they're quite famous, and you can get them up to the size of a small pizza *jawdrop*.
Anywho! I decided to try out a recipe for them (which by the way was fairly easy to find on the internet, should you use the magic tool that is Google and type in "Millie's Cookies Recipe"). I will have a go at making my mother's chocolate chip cookies in the future, but I sort of associate them with christmas, so I will wait at least a few weeks before I make them. Oh! I even added 100 g Norwegian milk chocolate instead of the Kinder chocolate - this is entirely up to you though, and since Freia Melkesjokolade is a little tricky to obtain should you not happen to live in/visit Norway a few times a year, theeeeen why just not use all Kinder Chocolate?
Personally, I prefer oaty cookies with nuts and fruit, but I must admit, these are quite nice!
Millie's Style Cookies with Kinder Chocolate
(Makes 30 small ones, around 100 calories each)
125 g butter (I used Flora Light)
100 g light brown sugar
125 g caster sugar
1 egg, lightly beaten
1 tsp vanilla extract
225 g flour (or self-raising flour, drop the next ingredient in that case...)
A pinch of salt
1 tsp baking powder/bicarbonate of soda
200 g Kinder chocolate = 1 x 16 pack of mini Kinder chocolates
- Pre-heat the oven to 180°C
- In a baking bowl, cream the butter and sugars, until it goes all lovely and creamy, then stir in the vanilla extract and egg.
- Sift flour, rising agent and salt into the mix, combine, and then stir in the chopped chocolate.
- Use a tablespoon, or two teaspoons, to dollop a walnut sized ball of the batter onto a tray clad with baking paper. They don't spread out so much in the oven, but they do a little bit, so keep about 2 centimetres between them so they don't stick to each other.
- Then pop in the oven for 8-10 minutes. It said that if you wanted them doughy, you should take them out after 7 minutes, but I found them just to come out a mess then, and took them all out after 10 minutes just to be sure.
- Leave for a minute to cool, before transferring onto a cooling rack - if you can keep your paws away from them for that long that is!
Now, where's that glass of milk?!
Original source (one of many):
http://laureneasmith.blogspot.co.uk/2008/05/millies-cookie-recipe.html
- Jules
Here's another sweet treat for you! Ever had a Millie's cookie? Well, in the UK, or Glasgow at least, they're quite famous, and you can get them up to the size of a small pizza *jawdrop*.
Anywho! I decided to try out a recipe for them (which by the way was fairly easy to find on the internet, should you use the magic tool that is Google and type in "Millie's Cookies Recipe"). I will have a go at making my mother's chocolate chip cookies in the future, but I sort of associate them with christmas, so I will wait at least a few weeks before I make them. Oh! I even added 100 g Norwegian milk chocolate instead of the Kinder chocolate - this is entirely up to you though, and since Freia Melkesjokolade is a little tricky to obtain should you not happen to live in/visit Norway a few times a year, theeeeen why just not use all Kinder Chocolate?
Personally, I prefer oaty cookies with nuts and fruit, but I must admit, these are quite nice!
Millie's Style Cookies with Kinder Chocolate
(Makes 30 small ones, around 100 calories each)
125 g butter (I used Flora Light)
100 g light brown sugar
125 g caster sugar
1 egg, lightly beaten
1 tsp vanilla extract
225 g flour (or self-raising flour, drop the next ingredient in that case...)
A pinch of salt
1 tsp baking powder/bicarbonate of soda
200 g Kinder chocolate = 1 x 16 pack of mini Kinder chocolates
- Pre-heat the oven to 180°C
- In a baking bowl, cream the butter and sugars, until it goes all lovely and creamy, then stir in the vanilla extract and egg.
- Sift flour, rising agent and salt into the mix, combine, and then stir in the chopped chocolate.
- Use a tablespoon, or two teaspoons, to dollop a walnut sized ball of the batter onto a tray clad with baking paper. They don't spread out so much in the oven, but they do a little bit, so keep about 2 centimetres between them so they don't stick to each other.
- Then pop in the oven for 8-10 minutes. It said that if you wanted them doughy, you should take them out after 7 minutes, but I found them just to come out a mess then, and took them all out after 10 minutes just to be sure.
- Leave for a minute to cool, before transferring onto a cooling rack - if you can keep your paws away from them for that long that is!
Now, where's that glass of milk?!
Original source (one of many):
http://laureneasmith.blogspot.co.uk/2008/05/millies-cookie-recipe.html
- Jules
Saturday, 27 October 2012
Sir Lancelot's Pumpkin Soup
Why hello! Nice of you to peek in - do I have news for you! Yesterday, I went into the shop to buy some milk, I saw the pile of pumpkin's in the shop, and had one of those Lightbulb! moments, and yes....I came back out with a pumpkin in hand. Orange is my favourite colour, and pumpkins look amazing!
Not long after, I found myself carving away, putting the seeds away for drying them in the oven, I ended up with a small jarful, probably worth £3 in the shop itself.
Then, when Sir Lancelot was complete, I tried to search for recipes that I could use his flesh for. That might sound a little grotesque, but it is Halloween after all!
I decided to make two things, for surely one of them would end up tasting nice at the very least? I settled for a pumpkin and ginger tea bread recipe that I ended up tweaking a little too much, and it sort of fell apart. It tastes nice, don't get me wrong, but it's just a "tasty failure" projects. Life experience points to me anyway!
Then, I decided to try and make my own soup. I had so many bits and pieces of leftover vegetables, that I decided what the hey! And here it is, Sir Lancelot's Pumpkin Soup. I was going to call it Guinevere after his lover, but that would be cheesy! I don't know why I settled for Sir Lancelot, I've just always liked the name Lancelot...a lot! My puns are horrible...apologies!
Sir. Lancelot's Pumpkin Soup
(Serves 3-4, 213-160 calories each)
1 tbsp sunflower oil
1 leek, chopped
1 red chilli, deseeded and finely chopped
1/3 bulb garlic, or 2-3 cloves
1 yellow bell pepper, chopped
250-300 g pumpkin
A squeeze of lemon
Enough vegetable stock to almost cover the vegetables
1 tbsp smoked paprika
1 tbsp salt
1 tbsp dried chives
1 tsp pepper
1 tsp celery salt
1/2 tsp thyme
Pumpkin seeds to top with
Bread to serve
- Heat oil in a large saucepan, soften the leeks and garlic before adding the rest of the chopped vegetables as you chop them, adding the pumpkin last. Stir well and make sure everything is coated.
- Now, pour over the stock and mix in the spices. Cover the saucepan with a lid and leave it to simmer for about half an hour until the pumpkin is tender.
- With a stick blender, whizz the soup until it's got a smooth texture, season to taste should there be anything missing.
- Serve topped with toasted pumpkin seeds and a side of warm crusty bread on a cold evening, look at your newly carved pumpkin - Cool, isn't it? *smiles* Made me forget how cold it was outside, at least for a little while!
Original source:
Me!
Not long after, I found myself carving away, putting the seeds away for drying them in the oven, I ended up with a small jarful, probably worth £3 in the shop itself.
Then, when Sir Lancelot was complete, I tried to search for recipes that I could use his flesh for. That might sound a little grotesque, but it is Halloween after all!
I decided to make two things, for surely one of them would end up tasting nice at the very least? I settled for a pumpkin and ginger tea bread recipe that I ended up tweaking a little too much, and it sort of fell apart. It tastes nice, don't get me wrong, but it's just a "tasty failure" projects. Life experience points to me anyway!
Then, I decided to try and make my own soup. I had so many bits and pieces of leftover vegetables, that I decided what the hey! And here it is, Sir Lancelot's Pumpkin Soup. I was going to call it Guinevere after his lover, but that would be cheesy! I don't know why I settled for Sir Lancelot, I've just always liked the name Lancelot...a lot! My puns are horrible...apologies!
Sir. Lancelot's Pumpkin Soup
(Serves 3-4, 213-160 calories each)
1 tbsp sunflower oil
1 leek, chopped
1 red chilli, deseeded and finely chopped
1/3 bulb garlic, or 2-3 cloves
1 yellow bell pepper, chopped
250-300 g pumpkin
A squeeze of lemon
Enough vegetable stock to almost cover the vegetables
1 tbsp smoked paprika
1 tbsp salt
1 tbsp dried chives
1 tsp pepper
1 tsp celery salt
1/2 tsp thyme
Pumpkin seeds to top with
Bread to serve
- Heat oil in a large saucepan, soften the leeks and garlic before adding the rest of the chopped vegetables as you chop them, adding the pumpkin last. Stir well and make sure everything is coated.
- Now, pour over the stock and mix in the spices. Cover the saucepan with a lid and leave it to simmer for about half an hour until the pumpkin is tender.
- With a stick blender, whizz the soup until it's got a smooth texture, season to taste should there be anything missing.
- Serve topped with toasted pumpkin seeds and a side of warm crusty bread on a cold evening, look at your newly carved pumpkin - Cool, isn't it? *smiles* Made me forget how cold it was outside, at least for a little while!
Original source:
Me!
Thursday, 18 October 2012
Spicy Carrot & Cumin Soup
Wherever I turn, there are people sniffling here and coughing there, and I thought I'd post up a really simple and very tasty soup recipe! Thought carrots were boring? Think again! Especially if you have extra spicy chilli flakes, like the ones I used - hawt!
Spicy Carrot & Cumin Soup
(Serves 2, 180 calories each - it can serve four as a starter in small bowls)
5 large carrots, peeled and sliced
1 medium onion, chopped
1 tbsp olive oil
1 tsp ground cumin
A small pinch of chilli flakes or chilli powder
2 tsp soft brown sugar
500 ml - 1 litre of chicken or vegetable stock (depending on how thick you like the soup, start off with 500 ml)
1 bunch coriander chopped (optional)
(Low fat crème fraîche to serve)
- Heat a medium sized saucepan, and chuck in the cumin, sizzle for a couple of minutes so it releases some extra flavour.
- Pour in the oil along with the chopped onion, and soften for a few minutes before adding chilli.
- Now, add the sugar, carrots and stock and let it boil until the carrots are tender, 10-15 minutes.
- Take the pan off the hob and whizz it smooth with a stick blender, add more water for a thinner soup, I think I almost ended up using a full litre of stock.
- Return pan to the hob, and season with salt and pepper to taste. add a dollop of crème fraîche if you want, and serve with some lovely crusty bread.
Let the Winter commence!
Original source:
http://www.bbcgoodfood.com/recipes/3882/carrot-and-cumin-soup-with-fresh-coriander
- Jules
Spicy Carrot & Cumin Soup
(Serves 2, 180 calories each - it can serve four as a starter in small bowls)
5 large carrots, peeled and sliced
1 medium onion, chopped
1 tbsp olive oil
1 tsp ground cumin
A small pinch of chilli flakes or chilli powder
2 tsp soft brown sugar
500 ml - 1 litre of chicken or vegetable stock (depending on how thick you like the soup, start off with 500 ml)
1 bunch coriander chopped (optional)
(Low fat crème fraîche to serve)
- Heat a medium sized saucepan, and chuck in the cumin, sizzle for a couple of minutes so it releases some extra flavour.
- Pour in the oil along with the chopped onion, and soften for a few minutes before adding chilli.
- Now, add the sugar, carrots and stock and let it boil until the carrots are tender, 10-15 minutes.
- Take the pan off the hob and whizz it smooth with a stick blender, add more water for a thinner soup, I think I almost ended up using a full litre of stock.
- Return pan to the hob, and season with salt and pepper to taste. add a dollop of crème fraîche if you want, and serve with some lovely crusty bread.
Let the Winter commence!
Original source:
http://www.bbcgoodfood.com/recipes/3882/carrot-and-cumin-soup-with-fresh-coriander
- Jules
Tuesday, 16 October 2012
Mocha Milkshake
Mocha Milkshake
(Serves 4 - about 210 calories each)
I didn't have any fancy glasses, so I settled for a wine glass instead, it tastes way better than it looks by the way! The little photography skills I have failed me...
85 g dark chocolate (70- or 80%)
1 tbsp coffee granules
700 ml milk
4 scoops of vanilla icecream (+ extra 4 scoops to serve optional)
- Roughly chop 75 g of the chocolate and tip into a large bowl along with the coffee.
- Bring 300 ml of the milk juuuust to the boil, and pour it over the chocolate-coffee mixture. Stir until the chocolate is all melted, and then leave it to cool.
- Tip the cooled mocha milk into a blender with the remining milk and four scooped of icecream. Once it's all nice and smooth, divide the milkshake between four tall glasses, add an extra scoop of icecream if you wish
- Finally, grate the last piece of chocolate on top!
Original source:
http://www.bbcgoodfood.com/recipes/408616/mocha-milkshake
- Jules
(Serves 4 - about 210 calories each)
I didn't have any fancy glasses, so I settled for a wine glass instead, it tastes way better than it looks by the way! The little photography skills I have failed me...
85 g dark chocolate (70- or 80%)
1 tbsp coffee granules
700 ml milk
4 scoops of vanilla icecream (+ extra 4 scoops to serve optional)
- Roughly chop 75 g of the chocolate and tip into a large bowl along with the coffee.
- Bring 300 ml of the milk juuuust to the boil, and pour it over the chocolate-coffee mixture. Stir until the chocolate is all melted, and then leave it to cool.
- Tip the cooled mocha milk into a blender with the remining milk and four scooped of icecream. Once it's all nice and smooth, divide the milkshake between four tall glasses, add an extra scoop of icecream if you wish
- Finally, grate the last piece of chocolate on top!
Original source:
http://www.bbcgoodfood.com/recipes/408616/mocha-milkshake
- Jules
Subscribe to:
Posts (Atom)