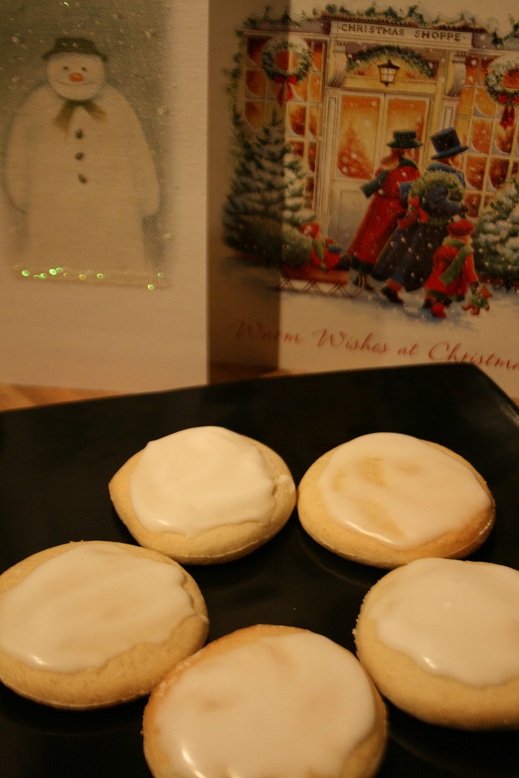
A.... sweet treat? R-r-r-eally? Yup folks! You better believe it! I know it has been a while, but here it is!
When I was little, I often stayed over at my mormor in the weekends - and it was magical every time. My granny was so creative and it was impossible to ever be bored. I would bring a teddy, a different one each time, and make them necklaces with all of my granny's yarn. I would let them sleep in the boxes you can buy fancy tangerines in, and the food was always delicious.
Before bed, she would hang a blanket up in front of the fireplace on a chair, so that when she tucked me in, it wuld be blanket first, then the duvet. It was the bomb!
She also sometimes made "mazariner" which is almond and vanilla based cupcakes, they were SO good, despite only needing a few pantry ingredients.
Today, I finally got around to making them (I don't know what on earth took me to long!) and they turned out really well! Despite maybe not being AS good as mormor's, cause that'd take a bit of effort, and a little piece of extra love which she always seemed to stuff them with!
Mazarin Cupcakes
(Makes about 12-14)
100g unsalted butter, room temperature
1/2 cup sugar
1/2 cup plain flour
50g ground almonds
1/2 tsp baking powder
1 tsp vanilla extract
1 egg
1/4 cup milk
Icing made up of icing sugar and a little bit of milk or water, I used milk.
- Start by pre-heating the oven to 200C.
- Have the sugar and butter in a bowl and cream until it goes almost white in colour. Add the egg, milk and vanilla extract and stir well to combine.
- Mix all the dry ingredients in one bowl, and then add it bit by bit into the wet mixture.
- Fill cupcake cases 2/3 up and bake for about 15 minutes until risen and golden and fluffy! Leave to cool and then drizzle with icing, wait until it sets before serving.
Deeeeliciously fluffy straight from the oven!
This was one of my favourites as a child, and still is! And it made the flat smell awesome!
Original source:
Mormor <3
- Jules
Showing posts with label Scandinavian. Show all posts
Monday, 15 February 2016
Monday, 6 April 2015
Vegan Chickpea Waffles with Antipasti
My friend sent me the recipe for buckwheat waffles with a lovely salsa, but... being impatient as I am, and intrigued by adding antipasti to waffle batter - I decided to experiment with the new gram flour I bought not long ago. Gram means chickpea!
And you know what? These are the best vegan waffles I have ever attempted thus far! They held together really well, and because of the oil in the batter, they wont stick to the iron - score!
Vegan Chickpea Waffles with Antipasti
(Makes about 1 and a half big waffle, probably about 4 small American ones)
3 topped tbsp gram/chickpea flour
1/2 cup soy milk
2 tsp neutral oil
1/2 tsp baking powder
Salt and pepper
3 sundried tomatoes (I used the oily ones), finely chopped
2 artichokes in oil, finely chopped (can also use 4-6 pitted olives)
To serve: Sundried tomatoes, cheese, pesto, aivar, hummous etc.
- Heat up the waffle iron.
- Let's get down to business! In a bowl, mix the flour, baking powder, a bit of salt and pepper and stir to combine. Fold in the soy milk, oil plus the sundried tomatoes and artichokes/olives.
- Once the iron is hot, pour a ladleful of the batter on and close, cook for about 3 minutes or so, until golden and cooked through, and repeat with remaining batter.
You can easily double this recipe to make sure you have enough for two or three people, you're going to want to! I immediately regretted not having made a bigger batch of these as soon as I'd had one. I simply served it with some more sundried tomatoes, but the waffles are suitable for any antipasti topping or spread!
Recipe by yours truly,
- Jules
And you know what? These are the best vegan waffles I have ever attempted thus far! They held together really well, and because of the oil in the batter, they wont stick to the iron - score!
Vegan Chickpea Waffles with Antipasti
(Makes about 1 and a half big waffle, probably about 4 small American ones)
3 topped tbsp gram/chickpea flour
1/2 cup soy milk
2 tsp neutral oil
1/2 tsp baking powder
Salt and pepper
3 sundried tomatoes (I used the oily ones), finely chopped
2 artichokes in oil, finely chopped (can also use 4-6 pitted olives)
To serve: Sundried tomatoes, cheese, pesto, aivar, hummous etc.
- Heat up the waffle iron.
- Let's get down to business! In a bowl, mix the flour, baking powder, a bit of salt and pepper and stir to combine. Fold in the soy milk, oil plus the sundried tomatoes and artichokes/olives.
- Once the iron is hot, pour a ladleful of the batter on and close, cook for about 3 minutes or so, until golden and cooked through, and repeat with remaining batter.
You can easily double this recipe to make sure you have enough for two or three people, you're going to want to! I immediately regretted not having made a bigger batch of these as soon as I'd had one. I simply served it with some more sundried tomatoes, but the waffles are suitable for any antipasti topping or spread!
Recipe by yours truly,
- Jules
Labels:
Baking,
Lunch,
Recipe,
Scandinavian,
Snack,
Vegan,
Vegetarian
Friday, 3 April 2015
Marzipan Kolibriegg or Humming Bird Easter Eggs
One of my favourite Norwegian Easter treats... are these marzipan eggs coated in chocolate and topped with sprinkles. We call them "kolibriegg" or humming bird eggs, which is weird because I am pretty sure the average adult humming bird is smaller than one of these sweets, wingspan included!
Either which way - they don't sell them in Glasgow, so I had to take it in my own hands and make sure I got my annual fix, as I missed out last year.
Instead of sprinkles though, I dyed some dessicated coconut yellow instead of multi-colour cake sprinkles, and it worked a treat!
NB! I used about 80g ground almonds because I used a large egg white. For vegan, you can replace with vegan egg substitute or syrup or choice, such as agave or maple.
Marzipan Kolibriegg or Humming Bird Easter Eggs
(Makes 5)
For the marzipan:
50-80g ground almonds (start with 50)
30g xylitol, brown sugar or Sukrin Gold (I used Sukrin Gold)
4 drops stevia vanilla or vanilla creme (optional)
1 egg white, or egg replacer, or syrup
Coating:
25-30 g dark chocolate
1 tbsp syrup of choice
(I also used a little bit of cocoa butter to make the mixture more liquid)
Cake sprinkles OR dessicated coconut for rolling in
I used 1/3 cup dessicated coconut that I added a tiny splash of yellow food colouring to, a pinch of turmeric, and a little bit of vanilla extract - worked a treat!
- First, mix together the ground almonds and sweetener, then stir in the egg or egg replacer/syrup. You can use a spoon for stirring.
- You should end up with a slightly sticky dough, make sure to wet your hands with water when dividing them into 5 pieces and shaping into eggs. Once the eggs are done, you can make the dyed coconut if you are using that, if using sprinkles - move onto choooocolate!
PS. place the coconut/sprinkles on a plate so it is easy to roll the marzipan in it.
- Now, melt the chocolate over a "water-bath", but make sure to switch off the heat once melted so the mixture doesn't go dry.
- Coat the marzipan with chocolate - I did this by placing them one by one on a spoon and rolling them gently into the mixture.
- Now this is where it gets messy: Roll the chocolate covered marzipan in the coconut or sprinkles until lightly coated! Place either on non/stick paper or a serving plate. Repeat until all the eggs are done, and cool for a while until serving.
You can keep these in the fridge for a couple of days, and they'll get a little more solid then.
I wish you a happy Easter! And if you don't celebrate this holiday - you can always make these in different shapes if you want. Mmmmmmmarzipan!
Original source:
http://www.kriweb.no/tag/marsipan/
- Jules
Either which way - they don't sell them in Glasgow, so I had to take it in my own hands and make sure I got my annual fix, as I missed out last year.
Instead of sprinkles though, I dyed some dessicated coconut yellow instead of multi-colour cake sprinkles, and it worked a treat!
NB! I used about 80g ground almonds because I used a large egg white. For vegan, you can replace with vegan egg substitute or syrup or choice, such as agave or maple.
Marzipan Kolibriegg or Humming Bird Easter Eggs
(Makes 5)
For the marzipan:
50-80g ground almonds (start with 50)
30g xylitol, brown sugar or Sukrin Gold (I used Sukrin Gold)
4 drops stevia vanilla or vanilla creme (optional)
1 egg white, or egg replacer, or syrup
Coating:
25-30 g dark chocolate
1 tbsp syrup of choice
(I also used a little bit of cocoa butter to make the mixture more liquid)
Cake sprinkles OR dessicated coconut for rolling in
I used 1/3 cup dessicated coconut that I added a tiny splash of yellow food colouring to, a pinch of turmeric, and a little bit of vanilla extract - worked a treat!
- First, mix together the ground almonds and sweetener, then stir in the egg or egg replacer/syrup. You can use a spoon for stirring.
- You should end up with a slightly sticky dough, make sure to wet your hands with water when dividing them into 5 pieces and shaping into eggs. Once the eggs are done, you can make the dyed coconut if you are using that, if using sprinkles - move onto choooocolate!
PS. place the coconut/sprinkles on a plate so it is easy to roll the marzipan in it.
- Now, melt the chocolate over a "water-bath", but make sure to switch off the heat once melted so the mixture doesn't go dry.
- Coat the marzipan with chocolate - I did this by placing them one by one on a spoon and rolling them gently into the mixture.
- Now this is where it gets messy: Roll the chocolate covered marzipan in the coconut or sprinkles until lightly coated! Place either on non/stick paper or a serving plate. Repeat until all the eggs are done, and cool for a while until serving.
You can keep these in the fridge for a couple of days, and they'll get a little more solid then.
I wish you a happy Easter! And if you don't celebrate this holiday - you can always make these in different shapes if you want. Mmmmmmmarzipan!
Original source:
http://www.kriweb.no/tag/marsipan/
- Jules
Tuesday, 16 December 2014
Christmas Chess Biscuits a.k.a Sunnere Silkekaker
December is flying by, so I thought I'd do a second Yule-inspired post to make sure we all have enough time to make them!
I had never had "silkekaker", nor had I ever made them until the other day, but I have seen them about - it just wasn't one of the biscuits that were a tradition to make in our family. Then, then I thought "Hey! I have to try and make seven kinds before christmas, I should have a go at some I haven't tried before". Now, OK...so I might have devoured them, and a couple of my friends have already pre-approved of them, so I must have done something right! Personally, I love how they have that lovely old fashioned texture, despite swapping some of the ingredients for healthier alternatives. Means I can have a few extra and claim that they are good for me! Right? Yes!
Christmas Chess Biscuits a.k.a Sunnere Silkekaker
(Makes one small batch - so you might want to double the recipe!)
100g coconut oil (about 4tbsp)
40g xylitol or brown sugar
100g plain flour
50g potato flour or cornflour
1/2 tsp baking powder
1/2 tsp vanilla extract
Additional:
1 heaped tsp cocoa powder
- Pre-heat the oven to 180°C.
- Simply mix the xylitol or sugar with the coconut oil before adding everything but the cocoa.
- Then, divide the dough in half, and add the cocoa powder to one of the halves, making sure it is mixed in well and keeping the two doughs separate.
- Now, roll two sausages out of each of the doughs, giving you a total of four. Place one brown next to a white and then the last two on top so that you have your "chess" log. Place in the freezer for a couple of minutes or in the fridge for 10-30 minutes.
- Slice the log into biscuits and place on a baking paper clad tray. bake in the ovem for 8-10 minutes until golden.
- Leave to cool slightly before serving. Perfect with a cuppa or as something sweet and light after dinner.
.... try and not wolf them all in one go, sharing is caring *winks*
This week has been good so far, I have enjoyed some time off and had the wonderful pleasure of making new friends, went to the christmas party at Nice'n'Sleazy's open mic night, and managed to keep my nerves somewhat in check and had a little debut singing a song accompanied by my friend on guitar that we finished writing last year. Today, I bumped into a musician that has been one of my muses for years now (and still is!), and he wished me a merry christmas - surreal but nice, to quote Notting Hill.
Tomorrow, it's back to work for a final four-day intervall before I'm off to Norway for a few days over the holidays, it'll be so nice!
Have you gotten around to doing much holiday baking, or just baking in general? I'd love to hear what your favourite biscuits and cookies are! I hope you have a lovely evening ^ ^
Recipe inspired from my granny's cookbook
- Jules
I had never had "silkekaker", nor had I ever made them until the other day, but I have seen them about - it just wasn't one of the biscuits that were a tradition to make in our family. Then, then I thought "Hey! I have to try and make seven kinds before christmas, I should have a go at some I haven't tried before". Now, OK...so I might have devoured them, and a couple of my friends have already pre-approved of them, so I must have done something right! Personally, I love how they have that lovely old fashioned texture, despite swapping some of the ingredients for healthier alternatives. Means I can have a few extra and claim that they are good for me! Right? Yes!
Christmas Chess Biscuits a.k.a Sunnere Silkekaker
(Makes one small batch - so you might want to double the recipe!)
100g coconut oil (about 4tbsp)
40g xylitol or brown sugar
100g plain flour
50g potato flour or cornflour
1/2 tsp baking powder
1/2 tsp vanilla extract
Additional:
1 heaped tsp cocoa powder
- Pre-heat the oven to 180°C.
- Simply mix the xylitol or sugar with the coconut oil before adding everything but the cocoa.
- Then, divide the dough in half, and add the cocoa powder to one of the halves, making sure it is mixed in well and keeping the two doughs separate.
- Now, roll two sausages out of each of the doughs, giving you a total of four. Place one brown next to a white and then the last two on top so that you have your "chess" log. Place in the freezer for a couple of minutes or in the fridge for 10-30 minutes.
- Slice the log into biscuits and place on a baking paper clad tray. bake in the ovem for 8-10 minutes until golden.
- Leave to cool slightly before serving. Perfect with a cuppa or as something sweet and light after dinner.
.... try and not wolf them all in one go, sharing is caring *winks*
This week has been good so far, I have enjoyed some time off and had the wonderful pleasure of making new friends, went to the christmas party at Nice'n'Sleazy's open mic night, and managed to keep my nerves somewhat in check and had a little debut singing a song accompanied by my friend on guitar that we finished writing last year. Today, I bumped into a musician that has been one of my muses for years now (and still is!), and he wished me a merry christmas - surreal but nice, to quote Notting Hill.
Tomorrow, it's back to work for a final four-day intervall before I'm off to Norway for a few days over the holidays, it'll be so nice!
Have you gotten around to doing much holiday baking, or just baking in general? I'd love to hear what your favourite biscuits and cookies are! I hope you have a lovely evening ^ ^
Recipe inspired from my granny's cookbook
- Jules
Labels:
Cookies,
Recipe,
Scandinavian,
Snack,
Vegan,
Vegetarian
Tuesday, 30 September 2014
Gul Kake
..or Yellow Cake, as it were should you translate it to English.
In Norway, this cake is also called "Suksessterte" which basically means success tart. It's wonderfull, almost macarroon-like base is the beginning of something good...always.
My mum bakes this to perfection, but since she's back in Bergen and I am here in Glasgow, I gotta make sure I'll keep the tradition alive, eh? And I don't mind that at all!
The first time I tried to make this, I undercooked the egg-custard frosting, and this time? I cooked it for a minute too much and it curdled slightly, I have pinky promised myself that next time it will be perfect. I know what to look for now! Overnight though, thankfully the custard frosting set, and come the following day - it was pretty much spot on!
With only a few ingredients, and a little patience, you'll have an amazing cake in no time! The base also cools down fairly quickly, so you don't have to wait for long until frosting it.
Gul Kake
(Makes 1 cake)
I crushed some "Smash" chocolate from Norway to top it with!
For the base:
4 egg whites (save the egg yolks in a bowl covered with water and a little sugar, ready to use for the frosting later, keep refrigerated until then)
200g ground almonds
200g icing sugar
1/2 tsp baking powder
For the frosting:
4 egg yolks (the ones you set aside)
100ml milk
100g sugar (I used light brown)
100g light butter for stirring in
- First, pre-heat the oven to 175-180ºC.
- Now, in a bowl, whisk your egg whites stiff, and then add the icing sugar, before folding in the ground almonds along with the baking powder. Pour it into a cake tin (about 18-22cm diameter) and bake for 45 minutes until a toothpick comes out clean and the surface is nice and crisp. Set aside to cool.
- Once the cake has cooled (about 20 minutes or so later) you can get cracking with the delicious egg custard frosting! Melt the butter and set aside.
- Heat the milk, egg yolks and sugar in a small saucepan over a medium low heat and whisk almost constantly for 5-10 minutes. Once it thickens, take it off the heat to prevent it from curdling - and stir in the butter, wait until it cools a little before frosting the base.
- Serve as it is, or with melted dark chocolate drizzled sparingly over it, or scatter some chopped nuts or crunchy sweets on top (I used the infamous Norwegian Smash! chocolate, yum!) For ideas, you can optionally google "suksessterte" soooo many beautiful examples there! I just prefer them a little plain, s'all ^ ^
I hope you like this as much as I do!
Oh, and today, I had the pleasure of having a little bottle of blackberry sparkling wine delivered to my door, now how about that? Remember the blackberry trip I went on with some friends? Well, turns out the most enthusiastic blackberry picker of the lot had a hard time finishing all the blackberry wine he made and needed a little help from his friends. And holy smokes - it was delicious! I used a little bit for braising some venison I got at a bargain, and the sweetness really shone through in the gravy I made for it. The wine itself though - so good on its own! Come to think of it - it would even have been really nice on the evening cake was had, mmmm ^ ^
I hope you have a great week so far! I myself had a trial shift yesterday which went well, but sadly not well enough, so now I'm a-looking for a job still, and making the most of my spare time. Also, I have become addicted to the Great British Bake-Off and over the course of a few evenings I have caught up on the most recent episode, like I said - making the most of it. I have done a lot of cooking and seen friends too, it's been good! Now I gotta turn on the "job search mode" button though, wish me luck!
Original source:
Iris (Grandmother's sister <3 )
- Jules aka Yellow Cake Addict
In Norway, this cake is also called "Suksessterte" which basically means success tart. It's wonderfull, almost macarroon-like base is the beginning of something good...always.
My mum bakes this to perfection, but since she's back in Bergen and I am here in Glasgow, I gotta make sure I'll keep the tradition alive, eh? And I don't mind that at all!
The first time I tried to make this, I undercooked the egg-custard frosting, and this time? I cooked it for a minute too much and it curdled slightly, I have pinky promised myself that next time it will be perfect. I know what to look for now! Overnight though, thankfully the custard frosting set, and come the following day - it was pretty much spot on!
With only a few ingredients, and a little patience, you'll have an amazing cake in no time! The base also cools down fairly quickly, so you don't have to wait for long until frosting it.
Gul Kake
(Makes 1 cake)
I crushed some "Smash" chocolate from Norway to top it with!
For the base:
4 egg whites (save the egg yolks in a bowl covered with water and a little sugar, ready to use for the frosting later, keep refrigerated until then)
200g ground almonds
200g icing sugar
1/2 tsp baking powder
For the frosting:
4 egg yolks (the ones you set aside)
100ml milk
100g sugar (I used light brown)
100g light butter for stirring in
- First, pre-heat the oven to 175-180ºC.
- Now, in a bowl, whisk your egg whites stiff, and then add the icing sugar, before folding in the ground almonds along with the baking powder. Pour it into a cake tin (about 18-22cm diameter) and bake for 45 minutes until a toothpick comes out clean and the surface is nice and crisp. Set aside to cool.
- Once the cake has cooled (about 20 minutes or so later) you can get cracking with the delicious egg custard frosting! Melt the butter and set aside.
- Heat the milk, egg yolks and sugar in a small saucepan over a medium low heat and whisk almost constantly for 5-10 minutes. Once it thickens, take it off the heat to prevent it from curdling - and stir in the butter, wait until it cools a little before frosting the base.
- Serve as it is, or with melted dark chocolate drizzled sparingly over it, or scatter some chopped nuts or crunchy sweets on top (I used the infamous Norwegian Smash! chocolate, yum!) For ideas, you can optionally google "suksessterte" soooo many beautiful examples there! I just prefer them a little plain, s'all ^ ^
I hope you like this as much as I do!
Oh, and today, I had the pleasure of having a little bottle of blackberry sparkling wine delivered to my door, now how about that? Remember the blackberry trip I went on with some friends? Well, turns out the most enthusiastic blackberry picker of the lot had a hard time finishing all the blackberry wine he made and needed a little help from his friends. And holy smokes - it was delicious! I used a little bit for braising some venison I got at a bargain, and the sweetness really shone through in the gravy I made for it. The wine itself though - so good on its own! Come to think of it - it would even have been really nice on the evening cake was had, mmmm ^ ^
I hope you have a great week so far! I myself had a trial shift yesterday which went well, but sadly not well enough, so now I'm a-looking for a job still, and making the most of my spare time. Also, I have become addicted to the Great British Bake-Off and over the course of a few evenings I have caught up on the most recent episode, like I said - making the most of it. I have done a lot of cooking and seen friends too, it's been good! Now I gotta turn on the "job search mode" button though, wish me luck!
Original source:
Iris (Grandmother's sister <3 )
- Jules aka Yellow Cake Addict
Labels:
Baking,
Cake,
Dessert,
Scandinavian,
Vegetarian
Thursday, 25 September 2014
Skoleboller
Here's another one of those pesky Norwegian recipes. I made these for my birthday yesterday, and they actually turned out really well for a first attempt!
These lovely sweet buns with a hint of warming cardamom, with a custard cream center, finished off with icing and dessicated coconut - surely that is a lot of good things in one go?
"Skoleboller" means school buns, and if you skip the dessicated coconut, they'll be "Sommer boller" - Summer buns, because of the little sun in the middle.
I had to use two recipe references here, as the recipe for the dough used a store-bought custard filling, whereas it is SO easy to whip up that you might as well make it yourself!
PS. If you live in the UK, you can usually get fresh yeast in the Polish shops (I always go there for either that or kefir, or both!), lovely people *smiles*
Skoleboller
(Makes 10-12)
For the dough:
600g plain flour
1/2 tsp salt
1/2 tsp cardamom
1/2 tsp baking powder
325ml milk
100g butter, melted
50g fresh yeast
For the custard filling:
1 egg
100ml milk
1 tbsp sugar
1 tsp vanilla sugar
1 tbsp cornflour
Extra:
One egg
Icing made of icing sugar and a bit of water
Dessicated coconut
- Start by making the dough: Mix all the dry ingredients in a big baking bowl, and make a well in the middle.
- In a small pot, melt the butter on low heat and add the milk, once it reaches 37ºC (you can dip your finger into it and almost not feel the liquid because it is body temperature). Take the casserole off the heat and crumble the yeast into it, stir until it is aaaaall dissolved. Pour into the well and make a dough. Kneading it until well combined. Place in the baking bowl covered in the warmest spot in the house/flat/whereveryouare (my spot was in the cubboard with the boiler - why have I not thought of that before?!).
- Leave it for about hald an hour until it has doubled in size.
- Now, pre-heat the oven to 225ºC.
- On a floured surface roll out the dough in 10-12 pieces and roll them into little buns. Place them on a baking paper clad baking tray and repeat with the remaining buns. Make a little well in the middle (like with thumb-print cookies only a little bigger).
- On to the eggy custard! Have all the ingredients for the custard in a little casserole, and whisk it free from lumps, nice and smooth. After about 3-5 minutes it will thicken. Don't worry if it curdles, that's OK. Just take the pot off the heat and whisk in another splash of milk. The custard can be a little lumpy anyway, cause it's going into the well! Take one teaspoon's worth of the custard and place it in the well. Let it rise for a second time for another 10-15 minutes.
- Brush the buns with the egg, and place in the middle of the oven and bake the buns for about 12-15 minutes until nice and golden. Cool for a little bit.
Work station!
- Now comes the fun part! Make icing by using a cup or two with icing sugar and a little bit of water. Have a bowl of dessicated coconut next to it. First dip the top of the bun in icing (unless you wanna use a frosting bag and do it a little bit tidier - that's totally cool!) and then in the coconut - simples! Set them aside and let the icing dry a little, before serving.
Ta-Dah! (This was after I had quality checked, and thus there might be one missing...) Sweet, sticky fingers and happy faces is what you get if you prescribe them a skolebolle ^ ^
I cannot think of much that beats a nice, warm, sweet pastry on an early Autumns eve! What is your favourite bake, and have you tried these before?
I am so happy and humbled by how many people turned up to celebrate with me last night, and I couldn't have asked for a better present! I hope you have a great day *smiles*
Original source:
http://www.tine.no/oppskrifter/bakst/sot-gjarbakst/skolebr%C3%B8d
And
Haugesund Husmorsskoles Kokebok, p. 96
- Jules
These lovely sweet buns with a hint of warming cardamom, with a custard cream center, finished off with icing and dessicated coconut - surely that is a lot of good things in one go?
"Skoleboller" means school buns, and if you skip the dessicated coconut, they'll be "Sommer boller" - Summer buns, because of the little sun in the middle.
I had to use two recipe references here, as the recipe for the dough used a store-bought custard filling, whereas it is SO easy to whip up that you might as well make it yourself!
PS. If you live in the UK, you can usually get fresh yeast in the Polish shops (I always go there for either that or kefir, or both!), lovely people *smiles*
Skoleboller
(Makes 10-12)
For the dough:
600g plain flour
1/2 tsp salt
1/2 tsp cardamom
1/2 tsp baking powder
325ml milk
100g butter, melted
50g fresh yeast
For the custard filling:
1 egg
100ml milk
1 tbsp sugar
1 tsp vanilla sugar
1 tbsp cornflour
Extra:
One egg
Icing made of icing sugar and a bit of water
Dessicated coconut
- Start by making the dough: Mix all the dry ingredients in a big baking bowl, and make a well in the middle.
- In a small pot, melt the butter on low heat and add the milk, once it reaches 37ºC (you can dip your finger into it and almost not feel the liquid because it is body temperature). Take the casserole off the heat and crumble the yeast into it, stir until it is aaaaall dissolved. Pour into the well and make a dough. Kneading it until well combined. Place in the baking bowl covered in the warmest spot in the house/flat/whereveryouare (my spot was in the cubboard with the boiler - why have I not thought of that before?!).
- Leave it for about hald an hour until it has doubled in size.
- Now, pre-heat the oven to 225ºC.
- On a floured surface roll out the dough in 10-12 pieces and roll them into little buns. Place them on a baking paper clad baking tray and repeat with the remaining buns. Make a little well in the middle (like with thumb-print cookies only a little bigger).
- On to the eggy custard! Have all the ingredients for the custard in a little casserole, and whisk it free from lumps, nice and smooth. After about 3-5 minutes it will thicken. Don't worry if it curdles, that's OK. Just take the pot off the heat and whisk in another splash of milk. The custard can be a little lumpy anyway, cause it's going into the well! Take one teaspoon's worth of the custard and place it in the well. Let it rise for a second time for another 10-15 minutes.
- Brush the buns with the egg, and place in the middle of the oven and bake the buns for about 12-15 minutes until nice and golden. Cool for a little bit.
Work station!
- Now comes the fun part! Make icing by using a cup or two with icing sugar and a little bit of water. Have a bowl of dessicated coconut next to it. First dip the top of the bun in icing (unless you wanna use a frosting bag and do it a little bit tidier - that's totally cool!) and then in the coconut - simples! Set them aside and let the icing dry a little, before serving.
Ta-Dah! (This was after I had quality checked, and thus there might be one missing...) Sweet, sticky fingers and happy faces is what you get if you prescribe them a skolebolle ^ ^
I cannot think of much that beats a nice, warm, sweet pastry on an early Autumns eve! What is your favourite bake, and have you tried these before?
I am so happy and humbled by how many people turned up to celebrate with me last night, and I couldn't have asked for a better present! I hope you have a great day *smiles*
Original source:
http://www.tine.no/oppskrifter/bakst/sot-gjarbakst/skolebr%C3%B8d
And
Haugesund Husmorsskoles Kokebok, p. 96
- Jules
Sunday, 1 June 2014
Krydderkake (Spice Cake)
For the flatwarming that we had here after the move, I wanted to make a lot of things - and I got a little overwhelmed. But then...then I had an epiphany, and remembered the cake that I first tried after my sister brought some home from kindergarden years and years and years ago!
She got the recipe for it, and whenever my mum made it, it would sit in the kitchen, and for some straaaaange reason, we would always come up with excuses to go to the kitchen, so we could sneak a piece of this with us...or two!
I halved the original recipe, so that it fit into an approximately 15x25cm povenproof dish, but I had to cook it for 15 minutes longer than the recipe stated.
Krydderkake (Spice Cake)
(Serves 12-15)
*Edited, as original recipe doesn't have eggs as previously stated*
2 cups sugar (I used medium brown sugar)
3 cups flour
2 cups kefir or light soured cream
4 tsp cinnamon
1/2 tsp cardamom
1 tsp bicarbonate of soda
100g melted butter
For the icing:
2 cups icing sugar
1 tsp cinnamon
1 tbsp cocoa powder
Water to right consistency (careful!)
- Start by pre-heating the oven to 175-180C.
- In a large bowl, whisk the eggs and sugar light and airy. Then add the spices, melted butter, kefir/soured cream, bicarbonate of soda and flour. Mix well until you have a smooth batter. Pour this into your oven proof dish (I used a 15x25ish centimetre one), and place in the middle in the oven to bake for 45-60 minutes, until a knife comes out clean.
- Once done, take out and let it cool for a couple of hours. Then, make the icing sugar, by mixing all the dry ingredients first, and then carefully adding a little water at a time. I think I altogether used around 1/2 cup, but start out with just a little as it liquifies quite easily!
- Pour the icing sugar over the cake and let it sit, covered, until the icing has dried slightly, before serving.
- I know it is tempting to wanting to decorate this bad boy, but you know what? This cake speaks for itself, so it isn't necessary for any other reasons than to make it more fun, hehe.
Pre-party! Spice cake and cocoa Nutty Date Marbles rolled in dessicated coconut, mmmm!
And I thought I'd throw in a picture of a colourful little breakfast I had last week, after having finally bought a milk frother so I could make cappuccinos at home
Crackerbread with soft cheese, ham and basil, accompanied by a home made cappuccino and apricots, yum!
What are your favourite cakes and breakfasts?
Original source:
Camilla's kindergarden (thank you!)
- Jules
She got the recipe for it, and whenever my mum made it, it would sit in the kitchen, and for some straaaaange reason, we would always come up with excuses to go to the kitchen, so we could sneak a piece of this with us...or two!
I halved the original recipe, so that it fit into an approximately 15x25cm povenproof dish, but I had to cook it for 15 minutes longer than the recipe stated.
Krydderkake (Spice Cake)
(Serves 12-15)
*Edited, as original recipe doesn't have eggs as previously stated*
2 cups sugar (I used medium brown sugar)
3 cups flour
2 cups kefir or light soured cream
4 tsp cinnamon
1/2 tsp cardamom
1 tsp bicarbonate of soda
100g melted butter
For the icing:
2 cups icing sugar
1 tsp cinnamon
1 tbsp cocoa powder
Water to right consistency (careful!)
- Start by pre-heating the oven to 175-180C.
- In a large bowl, whisk the eggs and sugar light and airy. Then add the spices, melted butter, kefir/soured cream, bicarbonate of soda and flour. Mix well until you have a smooth batter. Pour this into your oven proof dish (I used a 15x25ish centimetre one), and place in the middle in the oven to bake for 45-60 minutes, until a knife comes out clean.
- Once done, take out and let it cool for a couple of hours. Then, make the icing sugar, by mixing all the dry ingredients first, and then carefully adding a little water at a time. I think I altogether used around 1/2 cup, but start out with just a little as it liquifies quite easily!
- Pour the icing sugar over the cake and let it sit, covered, until the icing has dried slightly, before serving.
- I know it is tempting to wanting to decorate this bad boy, but you know what? This cake speaks for itself, so it isn't necessary for any other reasons than to make it more fun, hehe.
Pre-party! Spice cake and cocoa Nutty Date Marbles rolled in dessicated coconut, mmmm!
And I thought I'd throw in a picture of a colourful little breakfast I had last week, after having finally bought a milk frother so I could make cappuccinos at home
Crackerbread with soft cheese, ham and basil, accompanied by a home made cappuccino and apricots, yum!
What are your favourite cakes and breakfasts?
Original source:
Camilla's kindergarden (thank you!)
- Jules
Labels:
Cake,
Dessert,
Recipe,
Scandinavian,
Vegetarian
Thursday, 13 February 2014
Semolina Porridge (Semiliegrynsgrøt)
This is a recipe that takes me back years and years to when I was a toddler, up until the late years in primary school.
Sometimes instead of having a sandwich or snack in the evening, my mum would boil up some macaroni that she and I would share smothered with ketchup, or she would make velvet porridge or semolina porridge! I decided to recreate this long lost favourite (thankfully not lost anymore!) that is the semolina porridge, "semulegrøt" in Norwegian, but for some reason I remember I used to call it "semiliegrynsgrøt", for breakfast. This was a treat, and topped with some sugar or sukrin gold and some cinnamon, it is sure to hit the spot!
On it's own, this porridge might seem a little dull, but trust me, it isn't! I had to try my way with the amount of semolina, if it gets a little too thick when stirring, add a good bit of water or more milk!
Semolina Porridge (Semiliegrynsgrøt)
(Serves 1)
250ml whole or semi-skimmed milk
30g semolina flour
A good knob of butter
Brown sugar/sukrin gold and cinnamon for topping
- Heat up the milk in a small pan on medium heat, make sure it doesn't start boiling.
- Once it's gotten quite warm, add the semolina flour and stir almost continously with a whisk for a few minutes. Make sure the porridge is smooth and free of any lumps. Once it's getting quite a thick consistency, either add a little more milk or water and stir for a bit longer, or simply skip that bit and add the butter. I think I boiled mine for ten minutes, which was way longer than it needed, I had to add more water to the mixture twice!
- When you have melted the butter and stirred it through, it's ready to serve! Top with brown sugar or sukrin gold along with a little bit of cinnamon and enjoy!
You can also serve this with rasberry or strawberry sauce, chopped nuts and raisins along with cinnamon, or honey, syrup basically anything you'd top porridge with that's on the crunchy, fruity, sweet and fresh side!
Also, yesterday I came across these crisps in a health shop, and they were on sale!
They are delicious! Made with quinoa flour amongst other things. I had the Chilli & Lime flavoured one yesterday with a little tortilla-yogurt mix I made up, and they were delicious! They actually had a bit of a bite to them too, which I didn't mind at all! Might have to go back and buy some more! What are your favourite crisps?
It's almost the weekend!
Original source:
http://www.tine.no/oppskrifter/lunsj-og-smaretter/grot-og-kornblandinger/mormors-semulegr%C3%B8t
Sometimes instead of having a sandwich or snack in the evening, my mum would boil up some macaroni that she and I would share smothered with ketchup, or she would make velvet porridge or semolina porridge! I decided to recreate this long lost favourite (thankfully not lost anymore!) that is the semolina porridge, "semulegrøt" in Norwegian, but for some reason I remember I used to call it "semiliegrynsgrøt", for breakfast. This was a treat, and topped with some sugar or sukrin gold and some cinnamon, it is sure to hit the spot!
On it's own, this porridge might seem a little dull, but trust me, it isn't! I had to try my way with the amount of semolina, if it gets a little too thick when stirring, add a good bit of water or more milk!
Semolina Porridge (Semiliegrynsgrøt)
(Serves 1)
250ml whole or semi-skimmed milk
30g semolina flour
A good knob of butter
Brown sugar/sukrin gold and cinnamon for topping
- Heat up the milk in a small pan on medium heat, make sure it doesn't start boiling.
- Once it's gotten quite warm, add the semolina flour and stir almost continously with a whisk for a few minutes. Make sure the porridge is smooth and free of any lumps. Once it's getting quite a thick consistency, either add a little more milk or water and stir for a bit longer, or simply skip that bit and add the butter. I think I boiled mine for ten minutes, which was way longer than it needed, I had to add more water to the mixture twice!
- When you have melted the butter and stirred it through, it's ready to serve! Top with brown sugar or sukrin gold along with a little bit of cinnamon and enjoy!
You can also serve this with rasberry or strawberry sauce, chopped nuts and raisins along with cinnamon, or honey, syrup basically anything you'd top porridge with that's on the crunchy, fruity, sweet and fresh side!
Also, yesterday I came across these crisps in a health shop, and they were on sale!
They are delicious! Made with quinoa flour amongst other things. I had the Chilli & Lime flavoured one yesterday with a little tortilla-yogurt mix I made up, and they were delicious! They actually had a bit of a bite to them too, which I didn't mind at all! Might have to go back and buy some more! What are your favourite crisps?
It's almost the weekend!
Original source:
http://www.tine.no/oppskrifter/lunsj-og-smaretter/grot-og-kornblandinger/mormors-semulegr%C3%B8t
Labels:
Breakfast,
Lunch,
Recipe,
Scandinavian,
Snack,
Vegetarian
Sunday, 5 January 2014
Pleskner
Or maybe the medieval poor man's biscuit?
I felt it was about time to take out my granny's old cookbook again, it feels like forever and a day since I last used it, which really isn't good enough...
When flicking through the pages, I noticed a recipe that seemed to simple not to try out, even just for the sake of testing what they tasted like. Three ingredients, and I came to the conclusion that these must be the poor-man's version of "cookies". After I had made them, I had a small epiphany - what about using two of these as a sandwich with something nice like chocolate spread of peanut butter inside?
Either which way you choose to eat them, they would go with a cup of tea regardless! They remind me a little bit of crispy waffles in flavour.
The batter will be only slightly thicker than pancake batter, so make sure to not make them too big and keep a good bit of space between them, a couple of mine melted together, but then you could always decorate them to make like a pair of eyes, or something else!
Pleskner
(Makes 16, about 30 calories each)
1 egg
50g sugar
50g plain flour
- Pre-heat your oven to 225°C.
- In a bowl, whish together the egg and sugar. Then simply sieve the flour over and combine well.
- Use a teaspoon to dollop on the batter on a baking tray with non-stick parchment, or a greased tray. Bake in the oven until golden, about 10 minutes or so. Take them out and leave them on a rack to cool before carefully removing them from the tray or baking paper.
This batch was only one third of what the recipe said, but I am only little! Sometimes all the baking can seem a bit overwhelming when reading recipes using big quantities, but I believe than everything can be had in moderation. That's why I thought that making enough batter to use with one egg would be good - and I was right! Enough if you're having a few guests, and some leftovers for yourself! I will be trying these with a little peanut butter sandwiched inbetween two tomorrow I think, I don't see how that could be anything short of amazing!
With the filling, it madea big difference, but I have yet to try and donk them into a cuppa!
Original source:
Mormor
- Jules
I felt it was about time to take out my granny's old cookbook again, it feels like forever and a day since I last used it, which really isn't good enough...
When flicking through the pages, I noticed a recipe that seemed to simple not to try out, even just for the sake of testing what they tasted like. Three ingredients, and I came to the conclusion that these must be the poor-man's version of "cookies". After I had made them, I had a small epiphany - what about using two of these as a sandwich with something nice like chocolate spread of peanut butter inside?
Either which way you choose to eat them, they would go with a cup of tea regardless! They remind me a little bit of crispy waffles in flavour.
The batter will be only slightly thicker than pancake batter, so make sure to not make them too big and keep a good bit of space between them, a couple of mine melted together, but then you could always decorate them to make like a pair of eyes, or something else!
Pleskner
(Makes 16, about 30 calories each)
1 egg
50g sugar
50g plain flour
- Pre-heat your oven to 225°C.
- In a bowl, whish together the egg and sugar. Then simply sieve the flour over and combine well.
- Use a teaspoon to dollop on the batter on a baking tray with non-stick parchment, or a greased tray. Bake in the oven until golden, about 10 minutes or so. Take them out and leave them on a rack to cool before carefully removing them from the tray or baking paper.
This batch was only one third of what the recipe said, but I am only little! Sometimes all the baking can seem a bit overwhelming when reading recipes using big quantities, but I believe than everything can be had in moderation. That's why I thought that making enough batter to use with one egg would be good - and I was right! Enough if you're having a few guests, and some leftovers for yourself! I will be trying these with a little peanut butter sandwiched inbetween two tomorrow I think, I don't see how that could be anything short of amazing!
With the filling, it madea big difference, but I have yet to try and donk them into a cuppa!
Original source:
Mormor
- Jules
Labels:
Baking,
Cookies,
Recipe,
Scandinavian,
Vegetarian
Monday, 16 December 2013
Sandnøtter
These translates simply as sand-nuts! Like ginger nuts, except these are made with mainly potato flour for a sandy texture. I would perhaps advice you to use normal butter that is a little harder than flora, as the batter I made turned out a liiiittle melty.
Also, I was surprised at how big they turned out when shaping them with two teaspoons. You could make twice as many by using a small teaspoon's worth of batter, just note that they will bake in a few minutes less. The sand nut biscuits are not supposed to turn golden, so don't go by the colour when checking if they're done.
For many people in Norway, these are considered one of the seven kinds, but you also get some similar biscuits called sandkaker or sand-cakes! Plenty of christmas recipes out there.
Sandnøtter
(Makes 28, about 52 calories each)
125g butter (I used flora light...as always)
145g sugar
1 egg
1-2 tbsp milk of choice
210g potato flour (I bought mine in a health shop, organic shops will probably also have it)
60g plain flour
1 tsp baking powder
- Start by pre-heating your oven to 200°C.
- Now, whisk together the egg and sugar until it's light and airy, then mix in the egg and stir well.
- Sift in the flours and baking powder into the butter mixture and stir well. If using regular butter, you might get more of a dough consistency, in which case you can roll little balls, place them on a baking tray on baking parchment, and press down lightly with a fork. If the mixture is a little to wet to handle with your hands, then use two teaspoons and work it between them before placing on the baking paper.
- Place them in the middle of the oven and bake for approximately 10 minutes, tap gently with your fingers to check if they're done. Because I made mine slightly bigger, they needed about five minutes extra.
- Take out and leave on a rack to cool completely before peeling of the paper. Store in an airtight container or biscuit tin, or eat straight away with your tea of coffee!
I also noticed some other recipes for these used 1 tsp of vanilla sugar and a bit of spice like cardamom or nutmeg, so that's something to keep in mind should you feel a little experimental, you can't go wrong with vanilla sugar, mmm!
Original source:
Mormor, once again - thanks!
- Jules
Also, I was surprised at how big they turned out when shaping them with two teaspoons. You could make twice as many by using a small teaspoon's worth of batter, just note that they will bake in a few minutes less. The sand nut biscuits are not supposed to turn golden, so don't go by the colour when checking if they're done.
For many people in Norway, these are considered one of the seven kinds, but you also get some similar biscuits called sandkaker or sand-cakes! Plenty of christmas recipes out there.
Sandnøtter
(Makes 28, about 52 calories each)
125g butter (I used flora light...as always)
145g sugar
1 egg
1-2 tbsp milk of choice
210g potato flour (I bought mine in a health shop, organic shops will probably also have it)
60g plain flour
1 tsp baking powder
- Start by pre-heating your oven to 200°C.
- Now, whisk together the egg and sugar until it's light and airy, then mix in the egg and stir well.
- Sift in the flours and baking powder into the butter mixture and stir well. If using regular butter, you might get more of a dough consistency, in which case you can roll little balls, place them on a baking tray on baking parchment, and press down lightly with a fork. If the mixture is a little to wet to handle with your hands, then use two teaspoons and work it between them before placing on the baking paper.
- Place them in the middle of the oven and bake for approximately 10 minutes, tap gently with your fingers to check if they're done. Because I made mine slightly bigger, they needed about five minutes extra.
- Take out and leave on a rack to cool completely before peeling of the paper. Store in an airtight container or biscuit tin, or eat straight away with your tea of coffee!
I also noticed some other recipes for these used 1 tsp of vanilla sugar and a bit of spice like cardamom or nutmeg, so that's something to keep in mind should you feel a little experimental, you can't go wrong with vanilla sugar, mmm!
Original source:
Mormor, once again - thanks!
- Jules
Labels:
Baking,
Cookies,
Recipe,
Scandinavian,
Vegetarian
Thursday, 12 December 2013
Lussekatter
In primary schools all over Scandinavia, the 13th of December is known as Santa Lucia-day. Most pupils wouldn't know the whole back story to it, and to be honest I had to look it up myself whenever I decided I was going to make Lussekatter. There are so many stories and they all sound different from one another, and so I'll just tell you what exactly I remember.
Every 13th of December, a group from one of the younger classes would dress up as little angels, or saints, and one would get to be Santa Lucia. The other children would wear lovely white little robes, and usually paperhaps they had made themselves, and hold a candle, whilst Santa Lucia would be at the very front, wearing almost like a halo-like crown, and holding a big basket full of these lovely little baked goods! They would go from classroom to classroom and make sure that everyone at the school, teachers included, would get one.
Out in the halls, the lights would be switched off, and down the hall, you could see candles, and little feet shuffling excitedly along, looking around, singing:
Svart senker natten seg
I stall og stue
Solen har gått sin vei,
Skyggene truer
Inn i vårt mørke hus
Stiger med tente lys,
Santa Lucia, Santa Lucia
Natten er mørk og stum
Med ett det suser
I alle tyste rom
Som vinger bruser
Se, på vår terskel står
Hvitkledd med lys i hår
Santa Lucia, Santa Lucia
Mørke skal flykte snart
Fra jordens daler
Slik hun et underfullt
Ord til oss taler
Dagen skal atter ny
Stige av røde sky
Santa Lucia, Santa Lucia
Lussekatter
(10 lussekatter, about 140 calories each)
50g Flora light (or light butter)
150ml semi-skimmed milk
20g fresh yeast
1g saffron (of 1/2 tsp tumeric)
50g sugar
1/2 tsp salt
2/3 tsp ground cardamom
4 dl flour, preferably all-plain (I mixed half and half wholemeal and plain, about 240g)
1 whisked egg for brushing
Raisins for decorating
- In a small pot, heat up the butter and milk until it is 37°C (body temperature, if you stick your finger into it, it should almost feel as if it isn't there). Turn off the heat and crumble in the yeast. Stir until it is all dissolved and back to liquid consistency.
- Mix all your dry ingredients in a bowl and make a well in the middle. Pour in your yeast mixture and stir well. Now knead the dough, add a little more flour or milk (1 tsp at a time, as a tiny bit makes a big difference!) should it be necessary. Place it back in the bowl and leave in a fairly warm place to rise to double its size (about 1-2 hours).
- On a floured surface, tip your dough out, and knead well. Divide the dough into about 20 bits and roll into sausages before shaping them.
- Place them on a baking clad baking tray and cover with plastic, and leave them to rise for at least a further 15 minutes, up to 45 minutes if you have the patience!
- Now, pre-heat your oven at 250°C, and brush each lussekatt with some egg, and decorate with a few raisins on each. Place the tray in the middle of the oven and bake them for about 7-10 minutes (Keep a close eye on them!) until they are nice and golden. Leave on a rack to cool, and enjoy!
Lussekatter can come in many shapes and twirls, here, you have "lussekatt" at the top left, "lily" on the top right, "christmas pig" on the bottom left, and lastly the "lily".
I know they are supposed to be more yellow in appearance, but because I used about half and half with wholemeal flour, the saffron didn't shine through as well - still as tasty though!
Original source:
http://www.tine.no/oppskrifter/sesong-og-tema/jul/julekaker/lussekatter
- Jules
Every 13th of December, a group from one of the younger classes would dress up as little angels, or saints, and one would get to be Santa Lucia. The other children would wear lovely white little robes, and usually paperhaps they had made themselves, and hold a candle, whilst Santa Lucia would be at the very front, wearing almost like a halo-like crown, and holding a big basket full of these lovely little baked goods! They would go from classroom to classroom and make sure that everyone at the school, teachers included, would get one.
Out in the halls, the lights would be switched off, and down the hall, you could see candles, and little feet shuffling excitedly along, looking around, singing:
Svart senker natten seg
I stall og stue
Solen har gått sin vei,
Skyggene truer
Inn i vårt mørke hus
Stiger med tente lys,
Santa Lucia, Santa Lucia
Natten er mørk og stum
Med ett det suser
I alle tyste rom
Som vinger bruser
Se, på vår terskel står
Hvitkledd med lys i hår
Santa Lucia, Santa Lucia
Mørke skal flykte snart
Fra jordens daler
Slik hun et underfullt
Ord til oss taler
Dagen skal atter ny
Stige av røde sky
Santa Lucia, Santa Lucia
Lussekatter
(10 lussekatter, about 140 calories each)
50g Flora light (or light butter)
150ml semi-skimmed milk
20g fresh yeast
1g saffron (of 1/2 tsp tumeric)
50g sugar
1/2 tsp salt
2/3 tsp ground cardamom
4 dl flour, preferably all-plain (I mixed half and half wholemeal and plain, about 240g)
1 whisked egg for brushing
Raisins for decorating
- In a small pot, heat up the butter and milk until it is 37°C (body temperature, if you stick your finger into it, it should almost feel as if it isn't there). Turn off the heat and crumble in the yeast. Stir until it is all dissolved and back to liquid consistency.
- Mix all your dry ingredients in a bowl and make a well in the middle. Pour in your yeast mixture and stir well. Now knead the dough, add a little more flour or milk (1 tsp at a time, as a tiny bit makes a big difference!) should it be necessary. Place it back in the bowl and leave in a fairly warm place to rise to double its size (about 1-2 hours).
- On a floured surface, tip your dough out, and knead well. Divide the dough into about 20 bits and roll into sausages before shaping them.
- Place them on a baking clad baking tray and cover with plastic, and leave them to rise for at least a further 15 minutes, up to 45 minutes if you have the patience!
- Now, pre-heat your oven at 250°C, and brush each lussekatt with some egg, and decorate with a few raisins on each. Place the tray in the middle of the oven and bake them for about 7-10 minutes (Keep a close eye on them!) until they are nice and golden. Leave on a rack to cool, and enjoy!
Lussekatter can come in many shapes and twirls, here, you have "lussekatt" at the top left, "lily" on the top right, "christmas pig" on the bottom left, and lastly the "lily".
I know they are supposed to be more yellow in appearance, but because I used about half and half with wholemeal flour, the saffron didn't shine through as well - still as tasty though!
Original source:
http://www.tine.no/oppskrifter/sesong-og-tema/jul/julekaker/lussekatter
- Jules
Labels:
Baking,
Bread,
Recipe,
Scandinavian,
Vegetarian
Saturday, 25 May 2013
Lapper
...which is basically really thick pancakes made with kefir - soured cream.
This was one of my favourite breakfasts when I was little and stayed over at my grandmother's, the best mormor there could ever be! You can also use yogurt in the recipe if you can't find kefir (in the UK, they usually sell it in big supermarkets in the Polish section, I got mine from Tesco)
Serve lapper with butter and syrup, peanutbutter, honey, or jam of any kind! I always had them with strawberry jam, and so that is my favourite. Today I had to "settle" for apricot jam, and I tried one with butter and agave syrup too, mmmm :D
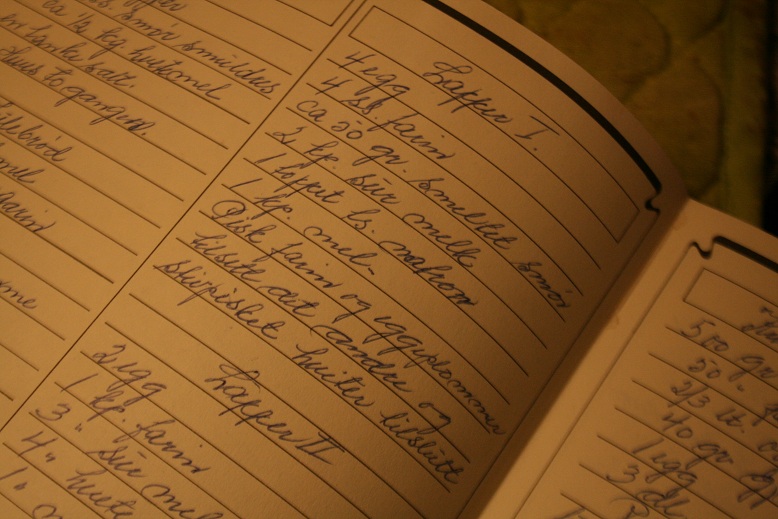
I halved the original recipe which you can see in my grandmother's beautiful handwriting, and I got eight lapper pluss a small "skrapekake" or "scrap cake" as we call it in Norwegian.

Six ingredients, anyone can do it, challenge accepted?
Lapper
(Makes 8, about 100 calories each with all sugar and not sweetners)

2 eggs, separated
2 tbsp sugar
25g butter (I used Flora light as always!), melted
1 small cup/200ml kefir (soured milk, or yogurt)
1/2 small cup/100g flour
1 small tsp with bicarbonate of soda
- Whisk egg yolks and sugar together. Then add the butter, kefir and flour together. Lastly, whisk the egg whites until they're starting to form peaks.
- Heat a small non-stick frying pan and fry lapper out of almost a ladleful of the batter. Cook for a few minutes on each side. Once the top side has gone all bubbly, flip!
- Keep warm by placing half a kitchen towel on a plate, place lapper on the plate and fold over the rest of the towel. They can keep out of the fridge if you intend to eat them over the course of a day (which you probably will! I only have a couple left and it's not even noon!), if you want to save some for the next day though, place them in the fridge. You can keep them there for about two days. They taste way better when they're fresh from the pan though!
- If you're feeling rebellious, fry them in a little bit of extra butter, mmmmm! It wont add a lot of badness, just a bit of extra goodness!

I hope you are having a wonderful start to your weekend!
Original source:
Mormor Evelyn <3
- Jules
This was one of my favourite breakfasts when I was little and stayed over at my grandmother's, the best mormor there could ever be! You can also use yogurt in the recipe if you can't find kefir (in the UK, they usually sell it in big supermarkets in the Polish section, I got mine from Tesco)
Serve lapper with butter and syrup, peanutbutter, honey, or jam of any kind! I always had them with strawberry jam, and so that is my favourite. Today I had to "settle" for apricot jam, and I tried one with butter and agave syrup too, mmmm :D
I halved the original recipe which you can see in my grandmother's beautiful handwriting, and I got eight lapper pluss a small "skrapekake" or "scrap cake" as we call it in Norwegian.
Six ingredients, anyone can do it, challenge accepted?
Lapper
(Makes 8, about 100 calories each with all sugar and not sweetners)
2 eggs, separated
2 tbsp sugar
25g butter (I used Flora light as always!), melted
1 small cup/200ml kefir (soured milk, or yogurt)
1/2 small cup/100g flour
1 small tsp with bicarbonate of soda
- Whisk egg yolks and sugar together. Then add the butter, kefir and flour together. Lastly, whisk the egg whites until they're starting to form peaks.
- Heat a small non-stick frying pan and fry lapper out of almost a ladleful of the batter. Cook for a few minutes on each side. Once the top side has gone all bubbly, flip!
- Keep warm by placing half a kitchen towel on a plate, place lapper on the plate and fold over the rest of the towel. They can keep out of the fridge if you intend to eat them over the course of a day (which you probably will! I only have a couple left and it's not even noon!), if you want to save some for the next day though, place them in the fridge. You can keep them there for about two days. They taste way better when they're fresh from the pan though!
- If you're feeling rebellious, fry them in a little bit of extra butter, mmmmm! It wont add a lot of badness, just a bit of extra goodness!
I hope you are having a wonderful start to your weekend!
Original source:
Mormor Evelyn <3
- Jules
Labels:
Baking,
Breakfast,
Dessert,
Lunch,
Pancakes,
Recipe,
Scandinavian,
Vegetarian
Wednesday, 8 May 2013
Veiled Fitness Girl
Hi!
Apologies for my absence, but something came up on the other side of the ocean (aka Norway, in my case) and so I had to go on my merry way and try and help out as best I could!
It was really nice to see my family, and I had felt like seeing them, and the trip I've booked for July seemed so far away! Overall it was a really nice visit, and I got to fit way more events into my five-nights stay than I had intended to, or even imagined! I visited granny, went for walks with and without my dad, went out for a few drinks with my cousins, cooked for both my parents, got to catch up with my sister, see my uncle and auntie, and visit my friend and her partner. Despite not being a fan of shopping, I actually had a few hours, buying some exercise gear, things for the kitchen, and slightly healthier cooking ingredients that I'd otherwise would have had to buy online. Now though, I'm back in business, back to work, and I've also taken a few photos along the way, that'll help me catch up!
This recipe is recreated by Kriweb, and when I saw it, I couldn't help myself and had to try it out! Originally it's called "Veiled Farmer Girl" but here we have a Veiled Fitness girl, probably a few times healthier than the original, but O so delicious! With only three ingredients and a dash of water, who can refuse a work-night treat like this after dinner? ...Didn't think so! That girl sure knows what she's talking about *grins*
Veiled Fitness Girl
(Serves 1, about 220 calories, depending on the yogurt)

1 tub of fat free yogurt, I used vanilla with muesli
1 apple, diced
1 tbsp cinnamon + extra sprinkle
A dash of water
- Start with softening the bits of apple in a small pot with a dash of water and about a tablespoon of cinnamon (...because I can't enough of that stuff!)
- Stir occasionally until you end up with a lovely, fragrant apple purée. Once done, get a medium sized glass. Start by scooping half of the apple mixture in, top with half the yogurt and repeat. If you're using muesli as your topping of choice (you can use chopped or grated chocolate, ground nuts or other goodies if you prefer), use a little bit of cinnamon so as to follow through the whole sweetly spiced goodness, and sprinkle on top!
Grab a spoon and tuck in!
Here is the yogurt I used when I made mine:

It was only until after I'd had five of these, with different flavours (red currant being my favourite!) that I noticed there are e-numbers in these little goodies, dang! Might have to stay clear of these next time I go back to visit!
Also I thought I should add a picture of the different baking products, all natural I might add!

Psyllium husk for baking, Sukrin icing sugar, surkin gold (with a caramel like flavour almost that melt if it's served on top of something warm), stevia sweet drops with Vanilla Crême and chocolate flavours. I have yet to decide if I like the chocolate one, but the Vanilla Crême is delicious!
Last but not least, my first pair of running tights! I found these on sale, pretty puddytat! There was also an Asics tights that I really wanted as well, but decided against it as I reckon I should at least see if I like running in tights. Usually I just run in some normal shorts.

I'm glad to be back and blogging again, and I hope you all are having a wonderful weekend so far!
Original source:
http://www.kriweb.no/2013/05/03/tilslorte-treningspiker/
- Jules
Apologies for my absence, but something came up on the other side of the ocean (aka Norway, in my case) and so I had to go on my merry way and try and help out as best I could!
It was really nice to see my family, and I had felt like seeing them, and the trip I've booked for July seemed so far away! Overall it was a really nice visit, and I got to fit way more events into my five-nights stay than I had intended to, or even imagined! I visited granny, went for walks with and without my dad, went out for a few drinks with my cousins, cooked for both my parents, got to catch up with my sister, see my uncle and auntie, and visit my friend and her partner. Despite not being a fan of shopping, I actually had a few hours, buying some exercise gear, things for the kitchen, and slightly healthier cooking ingredients that I'd otherwise would have had to buy online. Now though, I'm back in business, back to work, and I've also taken a few photos along the way, that'll help me catch up!
This recipe is recreated by Kriweb, and when I saw it, I couldn't help myself and had to try it out! Originally it's called "Veiled Farmer Girl" but here we have a Veiled Fitness girl, probably a few times healthier than the original, but O so delicious! With only three ingredients and a dash of water, who can refuse a work-night treat like this after dinner? ...Didn't think so! That girl sure knows what she's talking about *grins*
Veiled Fitness Girl
(Serves 1, about 220 calories, depending on the yogurt)
1 tub of fat free yogurt, I used vanilla with muesli
1 apple, diced
1 tbsp cinnamon + extra sprinkle
A dash of water
- Start with softening the bits of apple in a small pot with a dash of water and about a tablespoon of cinnamon (...because I can't enough of that stuff!)
- Stir occasionally until you end up with a lovely, fragrant apple purée. Once done, get a medium sized glass. Start by scooping half of the apple mixture in, top with half the yogurt and repeat. If you're using muesli as your topping of choice (you can use chopped or grated chocolate, ground nuts or other goodies if you prefer), use a little bit of cinnamon so as to follow through the whole sweetly spiced goodness, and sprinkle on top!
Grab a spoon and tuck in!
Here is the yogurt I used when I made mine:
It was only until after I'd had five of these, with different flavours (red currant being my favourite!) that I noticed there are e-numbers in these little goodies, dang! Might have to stay clear of these next time I go back to visit!
Also I thought I should add a picture of the different baking products, all natural I might add!
Psyllium husk for baking, Sukrin icing sugar, surkin gold (with a caramel like flavour almost that melt if it's served on top of something warm), stevia sweet drops with Vanilla Crême and chocolate flavours. I have yet to decide if I like the chocolate one, but the Vanilla Crême is delicious!
Last but not least, my first pair of running tights! I found these on sale, pretty puddytat! There was also an Asics tights that I really wanted as well, but decided against it as I reckon I should at least see if I like running in tights. Usually I just run in some normal shorts.
I'm glad to be back and blogging again, and I hope you all are having a wonderful weekend so far!
Original source:
http://www.kriweb.no/2013/05/03/tilslorte-treningspiker/
- Jules
Labels:
Dessert,
Recipe,
Scandinavian,
Sweets,
Vegetarian
Sunday, 10 February 2013
Fastelavnsboller
It is that day of the year again where Scandinavians makes buns and have them with jam, whipped cream and a sprinkle of icing sugar! Why? I am not entirely sure, but I think it has to do with an old tradition - one of the best traditions I know! It was a day where you would eat a little extra before the fast, sort of like Shrove Tuesday (Which is on this coming Tuesday, also know as Pancake Tuesday!).
Usually the children in Primary School also make "fastelavnsris" which are the twigs with little fluffy bulbs on them, decorated with colourful feathers and other little pretty things. You can also read about it on Wikipedia. There, it says that is a sort of carnival, which I wouldn't agree with as such, it's more just a sort of holiday where you do these little things that are o so nice!
Originally, this recipe was twice as big, but considering it was only my boyfriend and I who were going to have them, I decided to half it. I made six large ones, but I would recommend making 8 smaller ones, as they are quite filling!
Fastelavnsboller
(Makes about 6-8, 290-220 calories each without the filling and topping)
250-300 g plain flour (start with 250, then add more if the dough is too sticky)
50 g sugar
75 g flora light
150 ml milk (I used semi-skimmed)
25 g fresh yeast (or a sachet of dry yeast, not many shops in the UK sell it dry, I found some in a Polish shop!)
1/4 tsp hornsalt or heartshorn/ammonion bicarbonate (optional)
1 tsp ground cardamom
1 egg for brushing
Filling:
Strawberry jam
Whipped cream
Topping:
Sift a little bit of icing sugar on top
- Mix all the dry ingredients in a bowl.
- Melt the butter in a pan and add the milk. It should be body temperature 37°C. Mix the yeast in with about half of the egg mixture.
- Make a well in the dry flour mix, and pour the liquid into the centre. Use a wooden spoon to blend it all together and then knead well, adding more flour if necessary. Leave the dough to rise somewhere warm for about 1 hour (I set the bowl in another bowl of hot water and covered it with a kitchen towel.
- An hour later and you can roll out the buns. Place them on a baking paper clad baking tray and leave for at least another half hour to rise some more. Make sure you have enough space between them as they will rise quite a bit!
- Preheat the oven to 180-200°C. In the meantime, crach an egg into a bowl and top each bun with some of the egg.
- Once the oven is hot, pop in the tray (or trays) of buns in the oven and leave to bake for about 12-14 minutes. I left mine in for a few minutes too much, they should have a nice golden colour. Take them out and leave them to cool down for 5-10 minutes.
- Cut each bun in half, spread over some jam, top with cream, place the lid over and sprinkle over some icing sugar using a sieve.
Original source:
http://forum.snartmamma.com/archive/index.php/t-113182.html and my mother to confirm that this was a proper recipe.
- Jules
Usually the children in Primary School also make "fastelavnsris" which are the twigs with little fluffy bulbs on them, decorated with colourful feathers and other little pretty things. You can also read about it on Wikipedia. There, it says that is a sort of carnival, which I wouldn't agree with as such, it's more just a sort of holiday where you do these little things that are o so nice!
Originally, this recipe was twice as big, but considering it was only my boyfriend and I who were going to have them, I decided to half it. I made six large ones, but I would recommend making 8 smaller ones, as they are quite filling!
Fastelavnsboller
(Makes about 6-8, 290-220 calories each without the filling and topping)
250-300 g plain flour (start with 250, then add more if the dough is too sticky)
50 g sugar
75 g flora light
150 ml milk (I used semi-skimmed)
25 g fresh yeast (or a sachet of dry yeast, not many shops in the UK sell it dry, I found some in a Polish shop!)
1/4 tsp hornsalt or heartshorn/ammonion bicarbonate (optional)
1 tsp ground cardamom
1 egg for brushing
Filling:
Strawberry jam
Whipped cream
Topping:
Sift a little bit of icing sugar on top
- Mix all the dry ingredients in a bowl.
- Melt the butter in a pan and add the milk. It should be body temperature 37°C. Mix the yeast in with about half of the egg mixture.
- Make a well in the dry flour mix, and pour the liquid into the centre. Use a wooden spoon to blend it all together and then knead well, adding more flour if necessary. Leave the dough to rise somewhere warm for about 1 hour (I set the bowl in another bowl of hot water and covered it with a kitchen towel.
- An hour later and you can roll out the buns. Place them on a baking paper clad baking tray and leave for at least another half hour to rise some more. Make sure you have enough space between them as they will rise quite a bit!
- Preheat the oven to 180-200°C. In the meantime, crach an egg into a bowl and top each bun with some of the egg.
- Once the oven is hot, pop in the tray (or trays) of buns in the oven and leave to bake for about 12-14 minutes. I left mine in for a few minutes too much, they should have a nice golden colour. Take them out and leave them to cool down for 5-10 minutes.
- Cut each bun in half, spread over some jam, top with cream, place the lid over and sprinkle over some icing sugar using a sieve.
Original source:
http://forum.snartmamma.com/archive/index.php/t-113182.html and my mother to confirm that this was a proper recipe.
- Jules
Labels:
Baking,
Dessert,
Recipe,
Scandinavian,
Vegetarian
Sunday, 23 December 2012
Sandkaker - Sand Biscuits
I am proud to present to you - the Seventh Kind!
I only just got there in time, but the point is that I made the finish line, phew! I even brought some biscuits across the road to my Aunt and Uncle.
Usually, these are made in a special biscuit tin, but neither my mum nor me have any, and so I had to make them the way my grandmother made them, which is a little easier! I also added an almond on top for good measure - they're healthy after all! And ooooh so tasty!
Sandkaker - Sand Biscuits
(Makes about 34, 110 calories each)
Ho-ho-holey moley!
200 g butter
250 g plain flour
100 g ground almonds
1 egg
100 g sugar
- Crumble the butter in with the flour, and then add the rest of the ingredients. Work with it until you have a nice dough, shape it into a ball and leave it in the fridge to cool for at least an hour.
- Pre-heat the oven to 175°C.
- IF you have the biscuit tins required, use them to put the dough in and press it around so that you end up with a 3-5 mm thick biscuit "bowl", if you don't have them - worry not! Just roll them into balls the size of a walnut, and optionally press and almond on top. Bake the biscuit tins for 10-15 minutes, and the biscuit balls for 15-20 minutes. The latter are thicker and therefore need a few more minutes in the oven to cook through.
Enjoy - and I hope you have a wonderful holiday! And if you don't celebrate christmas and like almonds, why not give these a shot anyway?
Oh, oh! And it turns out I have a least been a wee bit of a good girl this year, as my stocking that has been with me since I was three months old has been filled by "santa" - win! *grins*
Original source:
http://oppskrift.klikk.no/sandkaker/1723/
- Jules
I only just got there in time, but the point is that I made the finish line, phew! I even brought some biscuits across the road to my Aunt and Uncle.
Usually, these are made in a special biscuit tin, but neither my mum nor me have any, and so I had to make them the way my grandmother made them, which is a little easier! I also added an almond on top for good measure - they're healthy after all! And ooooh so tasty!
Sandkaker - Sand Biscuits
(Makes about 34, 110 calories each)
Ho-ho-holey moley!
200 g butter
250 g plain flour
100 g ground almonds
1 egg
100 g sugar
- Crumble the butter in with the flour, and then add the rest of the ingredients. Work with it until you have a nice dough, shape it into a ball and leave it in the fridge to cool for at least an hour.
- Pre-heat the oven to 175°C.
- IF you have the biscuit tins required, use them to put the dough in and press it around so that you end up with a 3-5 mm thick biscuit "bowl", if you don't have them - worry not! Just roll them into balls the size of a walnut, and optionally press and almond on top. Bake the biscuit tins for 10-15 minutes, and the biscuit balls for 15-20 minutes. The latter are thicker and therefore need a few more minutes in the oven to cook through.
Enjoy - and I hope you have a wonderful holiday! And if you don't celebrate christmas and like almonds, why not give these a shot anyway?
Oh, oh! And it turns out I have a least been a wee bit of a good girl this year, as my stocking that has been with me since I was three months old has been filled by "santa" - win! *grins*
Original source:
http://oppskrift.klikk.no/sandkaker/1723/
- Jules
Labels:
Baking,
Cookies,
Recipe,
Scandinavian,
Vegetarian
Peppernøtter - Pepper Nuts
First of all - Happy little christmas!
I would like to apologise for my absence, but I am currently on Christmas holiday in Norway with my family. I was panicking a bit as I hadn't finished my "Seven Kinds" biscuit project, but today I had some time to spare tonight and finished off the project.
Before that, we had "Santa Porridge", which is a tradition for my family to have on the 23rd. It's rice porridge that we serve hot sprinkled with sugar, cinnamon and a little knob of butter in the centre. It is a little different from family to family, but I think the point of it is to have a cheap nice meal before celebrating with a huge dinner on the 24th.
To make a little bit more out of it than just, well...rice porridge - we add an almond in the casserole, and whoever gets it wins a prize, which is usually a marzipan pig! This year, my mother got it! We always save a little of the leftover porridge and sets it out in a bowl for Santa - the man needs a little porridge to keep him going!
I would have tried to make it from scratch if it was up to me, it only takes pudding rice, a tiny bit of salt, a little more sugar, and a few drops of vanilla extract, and then you boil it like a risotto, only with milk. Cook it for about an hour until the rice is nice and soft. ANYWHOOOO, mum suggested we did as we usually do and cheated with a little hand from Toro, and to be honest, it is a pretty good substitute
I'm rambling, anyway, now for the sixth type of christmas biscuits - peppernøtter, which means peppernuts, but are basically gingernuts, and these came out better than the ones I made last year, result!
Peppernøtter - Pepper Nuts
(Makes about 60, 80 calories each)
250 g butter
200 g sugar
1 tbsp dark or light syrup
1 egg
2 ts ground ginger
2 ts ground cinnamon
2 ts ground cloves
1 ts cardamom (optional)
2 ts bicarbonate of soda
650 ml flour
- Mix sugar, butter and syrup. Then add the egg and stir well to combine.
- Now, add the spices, followed by bicarbonate of soda and the most of the flour. Combine this to a nice dough, add more of the flour until it is easy to handle without it sticking to your hands too much.
- Pre-heat the oven to 150°C. And on a baking paper clad tray roll the dough into balls the size of large hazelnuts. These will spread out a little, so keep some distance between them.
- Place in the middle of the oven and bake for about 15 minutes until nice and golden.
Original source:
http://www.dansukker.no/no/oppskrifter/fine-peppernotter.aspx
- Jules
I would like to apologise for my absence, but I am currently on Christmas holiday in Norway with my family. I was panicking a bit as I hadn't finished my "Seven Kinds" biscuit project, but today I had some time to spare tonight and finished off the project.
Before that, we had "Santa Porridge", which is a tradition for my family to have on the 23rd. It's rice porridge that we serve hot sprinkled with sugar, cinnamon and a little knob of butter in the centre. It is a little different from family to family, but I think the point of it is to have a cheap nice meal before celebrating with a huge dinner on the 24th.
To make a little bit more out of it than just, well...rice porridge - we add an almond in the casserole, and whoever gets it wins a prize, which is usually a marzipan pig! This year, my mother got it! We always save a little of the leftover porridge and sets it out in a bowl for Santa - the man needs a little porridge to keep him going!
I would have tried to make it from scratch if it was up to me, it only takes pudding rice, a tiny bit of salt, a little more sugar, and a few drops of vanilla extract, and then you boil it like a risotto, only with milk. Cook it for about an hour until the rice is nice and soft. ANYWHOOOO, mum suggested we did as we usually do and cheated with a little hand from Toro, and to be honest, it is a pretty good substitute
I'm rambling, anyway, now for the sixth type of christmas biscuits - peppernøtter, which means peppernuts, but are basically gingernuts, and these came out better than the ones I made last year, result!
Peppernøtter - Pepper Nuts
(Makes about 60, 80 calories each)
250 g butter
200 g sugar
1 tbsp dark or light syrup
1 egg
2 ts ground ginger
2 ts ground cinnamon
2 ts ground cloves
1 ts cardamom (optional)
2 ts bicarbonate of soda
650 ml flour
- Mix sugar, butter and syrup. Then add the egg and stir well to combine.
- Now, add the spices, followed by bicarbonate of soda and the most of the flour. Combine this to a nice dough, add more of the flour until it is easy to handle without it sticking to your hands too much.
- Pre-heat the oven to 150°C. And on a baking paper clad tray roll the dough into balls the size of large hazelnuts. These will spread out a little, so keep some distance between them.
- Place in the middle of the oven and bake for about 15 minutes until nice and golden.
Original source:
http://www.dansukker.no/no/oppskrifter/fine-peppernotter.aspx
- Jules
Labels:
Baking,
Cookies,
Recipe,
Scandinavian,
Vegetarian
Tuesday, 18 December 2012
Jødekaker - Jew's Biscuits
First of all, I found some of the biggest red apples I have ever seen in our local fruit and vegetable shop! Take a look at this....
Secondly -
My fifth out of seven kinds of christmas biscuits! These go by different names, but I will use the one that I found in my grandmother's recipe book. Now, I don't know the story behind them, I just remember them from my childhood. Easy to make, really quick as soon as the dough has been left to cool for a little while, and sweet on the tongue. These are crumblicious!
PS. Icing is essential!
Jødekaker
(Makes about 46, 55 calories each without icing)
1 egg medium
125 g sugar
175 g butter (I used Flora), melted and slightly cooled
300 g plain flour
1 lemon, zest
1 tsp horn salt
Icing sugar, a few drops of water and a few drops of lemon juice for icing.
-First, whip the egg and sugar together until light and airy.
- Then add the remaining ingredients, and stir well to combine. Use a wooden spoon and combine it so you get a sticky, but nice golden dough. Place in the fridge for at least half an hour. I let it sit overnight.
- Preheat the oven to about 200°C
- Roll out half of the dough at a time, until it's about 2-3 mm flat. Use a medium sized glass and cut out circles. Place on a tray with baking paper. These only rise and don't spread out, so you only need a bit of space between them.
- Place them in the middle of the oven for 5-10 minutes. The biscuits should still be pale, but have a slight golden colour around the edges. Leave on a rack to cool.
- Once they're cool, mix icing sugar, and a few drops each of water and lemon juice. The icing should be a lttle thick, as that helps it dry quicker and prevents it from going all runny.
Enjoy!
Original source:
My dear Grandmother Evelyn, whose birthday would have been today. The bestest mormor there was and will ever be!
- Jules
Secondly -
My fifth out of seven kinds of christmas biscuits! These go by different names, but I will use the one that I found in my grandmother's recipe book. Now, I don't know the story behind them, I just remember them from my childhood. Easy to make, really quick as soon as the dough has been left to cool for a little while, and sweet on the tongue. These are crumblicious!
PS. Icing is essential!
Jødekaker
(Makes about 46, 55 calories each without icing)
1 egg medium
125 g sugar
175 g butter (I used Flora), melted and slightly cooled
300 g plain flour
1 lemon, zest
1 tsp horn salt
Icing sugar, a few drops of water and a few drops of lemon juice for icing.
-First, whip the egg and sugar together until light and airy.
- Then add the remaining ingredients, and stir well to combine. Use a wooden spoon and combine it so you get a sticky, but nice golden dough. Place in the fridge for at least half an hour. I let it sit overnight.
- Preheat the oven to about 200°C
- Roll out half of the dough at a time, until it's about 2-3 mm flat. Use a medium sized glass and cut out circles. Place on a tray with baking paper. These only rise and don't spread out, so you only need a bit of space between them.
- Place them in the middle of the oven for 5-10 minutes. The biscuits should still be pale, but have a slight golden colour around the edges. Leave on a rack to cool.
- Once they're cool, mix icing sugar, and a few drops each of water and lemon juice. The icing should be a lttle thick, as that helps it dry quicker and prevents it from going all runny.
Enjoy!
Original source:
My dear Grandmother Evelyn, whose birthday would have been today. The bestest mormor there was and will ever be!
- Jules
Wednesday, 12 December 2012
Konfektkaker - Confectionary Cookies
...or dark chocolate chip cookies if you like!
I found this as one of the recipes I already had written down in my recipe journal even before I got properly into cooking. My grandmother always used to make these whenever we were getting close to christmas, and my mum still makes them every year! And so I have decided that this will be my #4 out of the seven kinds I will be making for christmas this year. They might be very similar to the ones I have already posted, BUT I prefer these ones because of the bittersweet dark chocolate, mmmm!
Six ingredients = epic cookies!
Konfektkaker - Confectionary Cookies
(Makes 25 large cookies, 160 calories each)
200 g butter (I used flora light)
250 g sugar
275 g plain flour
2 eggs
1 tsp baking powder
200 g dark chocolate, chopped
- Cream the sugar and butter until it's nice and smooth.
- Preheat the oven to 200°C, before mixing in flour, baking powder and eggs with the butter and sugar. Make sure it is combined well, and then stir in the chopped chocolate.
- Use to teaspoons and set little mounts of batter onto a baking paper clad tray. These cookies will spread out quite a bit, so make sure there's plenty of room between them!
- Place in the middle of the oven and bake for 10-12 minutes until golden, leave on a cooling rack for 5-10 minutes.
Original source:
Mum! And possibly also granny...I think we might have gotten the recipe from her in the first place
- Jules
I found this as one of the recipes I already had written down in my recipe journal even before I got properly into cooking. My grandmother always used to make these whenever we were getting close to christmas, and my mum still makes them every year! And so I have decided that this will be my #4 out of the seven kinds I will be making for christmas this year. They might be very similar to the ones I have already posted, BUT I prefer these ones because of the bittersweet dark chocolate, mmmm!
Six ingredients = epic cookies!
Konfektkaker - Confectionary Cookies
(Makes 25 large cookies, 160 calories each)
200 g butter (I used flora light)
250 g sugar
275 g plain flour
2 eggs
1 tsp baking powder
200 g dark chocolate, chopped
- Cream the sugar and butter until it's nice and smooth.
- Preheat the oven to 200°C, before mixing in flour, baking powder and eggs with the butter and sugar. Make sure it is combined well, and then stir in the chopped chocolate.
- Use to teaspoons and set little mounts of batter onto a baking paper clad tray. These cookies will spread out quite a bit, so make sure there's plenty of room between them!
- Place in the middle of the oven and bake for 10-12 minutes until golden, leave on a cooling rack for 5-10 minutes.
Original source:
Mum! And possibly also granny...I think we might have gotten the recipe from her in the first place
- Jules
Labels:
Baking,
Cookies,
Recipe,
Scandinavian,
Vegetarian
Sunday, 2 December 2012
Havremakroner med Rosiner - Oat Macaroons
...with raisins! Although, I would describe them more as flapjack bites. They are delicious, and usually made without raisins (only heaven knows why!).
Havremakroner med Rosiner - Oat Macaroons
(Makes about 24 small ones - about 70-75 calories each)
90 g/3 dl oats
125 g butter (I use Flora light)
125 g sugar
3 tbsp water
1 1/2 dl raisins (about 50 g)
100 g/3 dl plain flour
1 tsp baking powder
- Melt the butter and pour over the oats into a baking bowl, then stir in the other ingredients. You should end up with a sticky mixture that you can shape balls with.
- Pre-heat the oven to about 175°C. On a baking paper clad tray, use two teaspoons to shape little balls out of the batter, OR use your hands. My mixture was not that wet, so I just used my hands, worked just fine!
- Place in the middle of the oven and bake until golden, 15-20 minutes. These need a little longer than the coconut macaroons because they are quite solid with all the oats. They come out lovely and chewy though!
I hope you enjoy!
Original source:
As previous recipe, my dearest mormor, of granny if you like! I'm trying to take most of the recipes I use for the christmas biscuits from an old recipe books of hers. How beautiful is the handwriting?!
- Jules
Havremakroner med Rosiner - Oat Macaroons
(Makes about 24 small ones - about 70-75 calories each)
90 g/3 dl oats
125 g butter (I use Flora light)
125 g sugar
3 tbsp water
1 1/2 dl raisins (about 50 g)
100 g/3 dl plain flour
1 tsp baking powder
- Melt the butter and pour over the oats into a baking bowl, then stir in the other ingredients. You should end up with a sticky mixture that you can shape balls with.
- Pre-heat the oven to about 175°C. On a baking paper clad tray, use two teaspoons to shape little balls out of the batter, OR use your hands. My mixture was not that wet, so I just used my hands, worked just fine!
- Place in the middle of the oven and bake until golden, 15-20 minutes. These need a little longer than the coconut macaroons because they are quite solid with all the oats. They come out lovely and chewy though!
I hope you enjoy!
Original source:
As previous recipe, my dearest mormor, of granny if you like! I'm trying to take most of the recipes I use for the christmas biscuits from an old recipe books of hers. How beautiful is the handwriting?!
- Jules
Labels:
Baking,
Cookies,
Recipe,
Scandinavian,
Vegetarian
Saturday, 1 December 2012
Kokosmakroner - Coconut Macaroons
So the flat has had its Winter clean, and I have just finished making the first two out of my "seven kinds" of christmas biscuits. I will post the first one up here now, I hope you enjoy!
Kokosmakroner - Coconut Macaroons
(Makes 40, about 65 calories each)
4 egg whites
200 g sugar
1/2 tsp vanilla sugar OR 1/2 tsp vanilla extract
280 g dessicated coconut
- Whisk the egg whites along with the sugar and vanilla until it's nice and airy, then fold in the dessicated coconut.
- Pre-heat oven to 175°C. On a baking paper clad tray, use two teaspoons and shape little balls out of the coconut mixture. Place about 2 cm apart from each other as they do get a bit bigger in the oven as they bake.
- Sit them in the middle of the oven, and bake for about 10-12 minutes until golden. Leave to cool for a little while before transferring to a cooling rack.
Original source:
Mormor
- Jules
Kokosmakroner - Coconut Macaroons
(Makes 40, about 65 calories each)
4 egg whites
200 g sugar
1/2 tsp vanilla sugar OR 1/2 tsp vanilla extract
280 g dessicated coconut
- Whisk the egg whites along with the sugar and vanilla until it's nice and airy, then fold in the dessicated coconut.
- Pre-heat oven to 175°C. On a baking paper clad tray, use two teaspoons and shape little balls out of the coconut mixture. Place about 2 cm apart from each other as they do get a bit bigger in the oven as they bake.
- Sit them in the middle of the oven, and bake for about 10-12 minutes until golden. Leave to cool for a little while before transferring to a cooling rack.
Original source:
Mormor
- Jules
Labels:
Baking,
Cookies,
Recipe,
Scandinavian,
Vegetarian
Subscribe to:
Posts (Atom)